
| Quick Summary |
|---|
A shifted embroidery border happens when the border and fill shift apart during stitching, even when they look correct in the software.
|
A design can look perfectly aligned in an embroidery digitizing software, yet the sew-out tells a different story. The outline may sit outside the fill on one side and cut into it on another. This problem is called embroidery registration or outline misalignment.
However, there is no single cause. The file, fabric, stabilizer, hooping, stitch order, density, and normal push-pull movement can affect the final result. A software preview shows planned needle positions, but real fabric moves as thread tension builds.
This guide explains how to find the real cause before changing random settings. Cleaner borders start with precision embroidery digitizing.

- Understanding Outline Registration Problems
- Main Causes of Embroidery Outline Shift
- Separating File Problems from Setup Problems
- Step-by-Step Fix for Misaligned Embroidery Outlines
- Preventing Outline Registration Problems
- When the Design File Needs Redigitizing
- Professional Digitizing for Better Registration
- Final Thoughts
- Frequently Asked Questions
Understanding Outline Registration Problems
The fill and border can lose alignment during stitching, even when they match perfectly in the design file. You may see the border pull away from the fill in some areas or stitch too far inside it in others.
Registration vs Placement
These two problems look similar, but they are not the same.
Registration means:
- Parts inside the design do not line up
- A border shifts away from the fill
- Details move from their intended position
Placement means:
- The full design sits too high, low, left, or right
- The logo is misplaced on the garment
- The design itself may still stitch correctly
For example, if the fill looks fine but the border moves away from its edge, that is an internal registration problem.
Because of this, it is important not to blame hooping and stabilizing or machine alignment too quickly. The real cause may come from the file, fabric movement, or stitch setup.
Main Causes of Embroidery Outline Shift
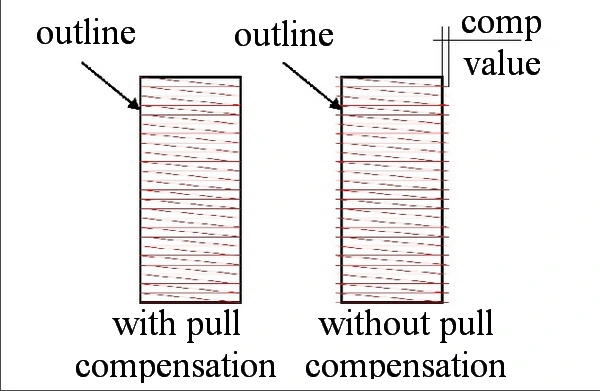
Embroidery outlines can shift for several reasons. In most cases, the problem comes from fabric movement, the way the file is built, or how the garment is supported.
Push and Pull Distortion
Stitches do not stay completely still after the needle places them. Thread tension pulls fabric inward across the stitch direction. Meanwhile, stitch buildup can push the fabric and make parts of the shape spread outward.
Because of this movement, a fill may finish narrower, longer, or uneven compared with the digital preview. The outline still follows its programmed path. As a result, it may land outside the fill on one side and cut into it on another.
This effect often becomes stronger on soft, stretchy, or loosely woven fabrics.
Insufficient Pull Compensation and Overlap
A fill and its border should not always meet at one exact edge. Real fabric moves, so the digitized shapes often need a small planned overlap.
Pull compensation extends the fill slightly beyond its original edge. This helps cover the area that may pull inward during stitching.
However, more compensation is not always better. Too much can create:
- Bulging edges
- Heavy stitch buildup
- Uneven borders
- Distorted shapes
The right amount depends on the fabric, stitch type, design size, and shape.
Weak Underlay and Excess Stitch Density
Underlay gives top stitches a stable base. A planned edge run or other support can help control the fabric and keep fill edges stable.
However, adding extra stitch density is not a reliable fix. Too many stitches add thread, pressure, and movement. This can make registration worse.
Therefore, the goal is balanced support, not simply more stitches.
Poor Stitch Sequencing
Stitch order can also affect registration. A fill may sew early, while its outline does not stitch until much later. During that time, other areas can pull or shift the fabric.
For example, a risky sequence may be:
- Sew the main fill
- Sew several distant color areas
- Return later for the border
A more controlled file may complete related areas closer together. However, no single order works for every design. Large logos, layered artwork, and overlapping objects may need different sequencing.
Hooping and Stabilizer Problems
Even a strong embroidery file can shift when the garment moves inside the hoop.
Common setup problems include:
- Loose hooping
- Stretching fabric while hooping
- Backing that is too light
- Using a hoop much larger than the design
- Weak support under stretchy fabric
Cut-away backing is often a better choice for unstable fabrics because it stays with the garment and supports the stitches after sewing.
Tension and Mechanical Movement
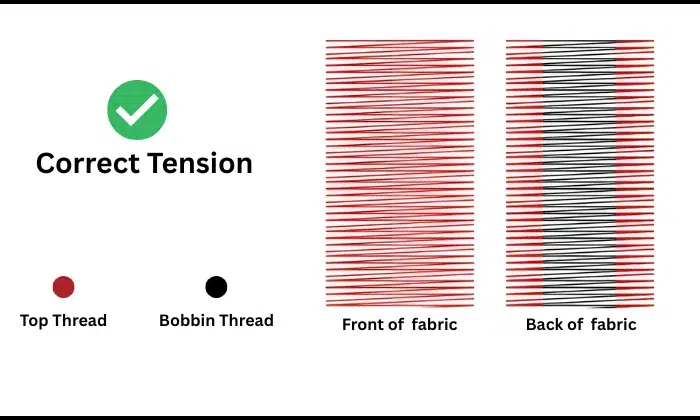
Finally, check the machine setup when the shift looks sudden or inconsistent. Excessive thread tension can increase fabric pull. The hoop can also move if the garment catches on the machine or another object.
Frame movement, loose hoop parts, or an obstruction can create similar symptoms.
Because of this, do not blame the digitizing file or the machine too quickly. Compare the file, sew-out, fabric, and setup before making changes.
Separating File Problems from Setup Problems
A shifted outline does not always mean the embroidery file is wrong. Sometimes the same symptom comes from hooping, backing, fabric stretch, or machine movement. The best clue is whether the error repeats in the same way.
Quick Diagnosis Guide
| What You See | More Likely Cause | First Check |
|---|---|---|
| Gap repeats in the same area | Digitizing file | Compensation, overlap, sequence |
| Outline gets worse during sewing | Sequence or fabric movement | Stitch order and stabilization |
| Result changes every sew-out | Setup | Hooping, backing, frame |
| Problem appears mostly on knits | Fabric support | Cut-away backing and compensation |
| Fill shrinks but outline stays wide | Push and pull | Fill compensation |
| Whole color area shifts suddenly | Hoop or machine movement | Frame and obstructions |
| Problem starts after resizing | File modification | Recalculate or redigitize |
Because of this, compare two or three test sew-outs before editing the design. Repeated errors usually point to the file, while changing errors often point to the setup.
Outline shifts can come from more than one source. This quick and helpful video shows common registration problems and practical ways to correct borders and edges that do not line up during stitching.
Step-by-Step Fix for Misaligned Embroidery Outlines
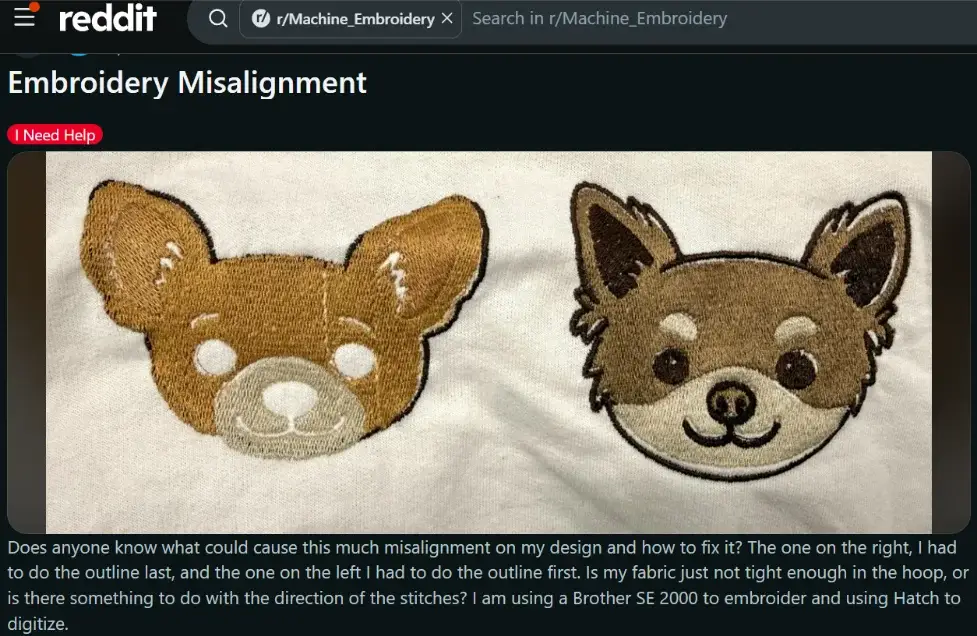
A shifted outline is easier to fix when you troubleshoot carefully. Avoid changing several settings at once, because that can hide the real cause.
Step 1: Inspect the Stitch Simulation
Start by checking the file before touching the machine. Run the design through stitch simulation and watch how the fill and border sew.
Check these points:
- Start and stop points
- Object sequence
- Outline position
- Unexpected resizing
- Long delays between fill and border
If the border already looks wrong in the simulation, correct the file before another test sew.
Step 2: Check the Fill Before Moving the Outline
However, do not drag the outline toward the bad sew-out right away. First check whether the fill became narrower, longer, or uneven during stitching.
If the fill changed shape, moving the border only hides the cause. The problem may return on another fabric or after a size change.
Step 3: Adjust Pull Compensation and Overlap
Next, add enough pull compensation so the fill stays covered under the outline after the fabric moves. A small planned overlap is often safer than making both objects meet at one exact edge.
For some designs, a thin outline may work better when it sits slightly inside the visible fill edge. This gives fabric movement some room without exposing a gap.
Avoid too much compensation. Excess overlap can make the edge heavy or uneven.
Step 4: Review Underlay and Density
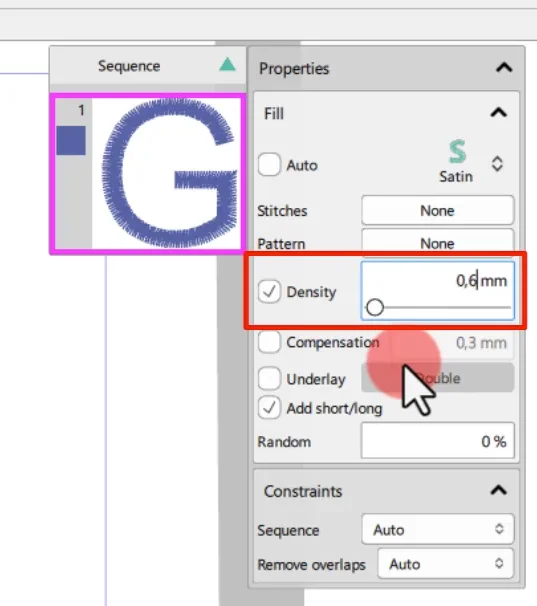
Then, check the structure under the fill. Underlay should support the fabric and help hold the shape before the top stitches sew.
At the same time, watch the density. Extra stitches add thread and stress. A denser fill does not always improve registration.
Step 5: Improve the Stitch Sequence
Meanwhile, check how far the machine travels before it returns to the matching outline. Long delays can give the fabric more time to shift.
On larger designs, it often helps to finish related areas before moving across the design. Still, the best sequence depends on the artwork and object overlap.
Step 6: Test the Production Setup
Finally, test the design under the same conditions you will use in production.
Check:
- Correct stabilizer
- Proper hooping
- Same fabric as the final job
- Balanced thread tension
- Free hoop movement
Sew another sample and change only one variable at a time. This makes it easier to identify the real fix.
Preventing Outline Registration Problems
Accurate registration starts before the machine begins stitching. Build the file for the actual fabric, then match the setup to that material.
Production Checklist
- Digitize for the final fabric type
- Use controlled overlap between fill and border
- Choose underlay that supports the shape
- Avoid unnecessary stitch density
- Plan the stitch sequence before exporting
- Hoop and stabilize the garment correctly
- Avoid heavy resizing of finished machine files
- Test-sew before full production
However, one setting will not work for every design. Pull compensation can change with fabric stretch, hooping, object size, stitch direction, and stitch type.
Because of this, use the test sew as your final check. Small changes based on the actual fabric usually give better results than using the same values for every job.
When the Design File Needs Redigitizing
If the same gap or shifted border appears in the same place on every test sew, the problem may be built into the file. Small machine adjustments will not fix a weak stitch structure.
Signs the File Needs More Than a Quick Edit
Common file problems include:
- Poor pull compensation
- No planned overlap
- Weak or incorrect underlay
- Bad stitch sequence
- Too much or too little density
- Artwork that was poorly converted
- Heavy resizing of a finished machine file
When several of these issues are present, rebuilding the embroidery design is often safer than patching each problem.
Stop repeating the same failed sew-out. Start with production-ready embroidery digitizing built around the fabric, size, and final use.
Professional Digitizing for Better Registration
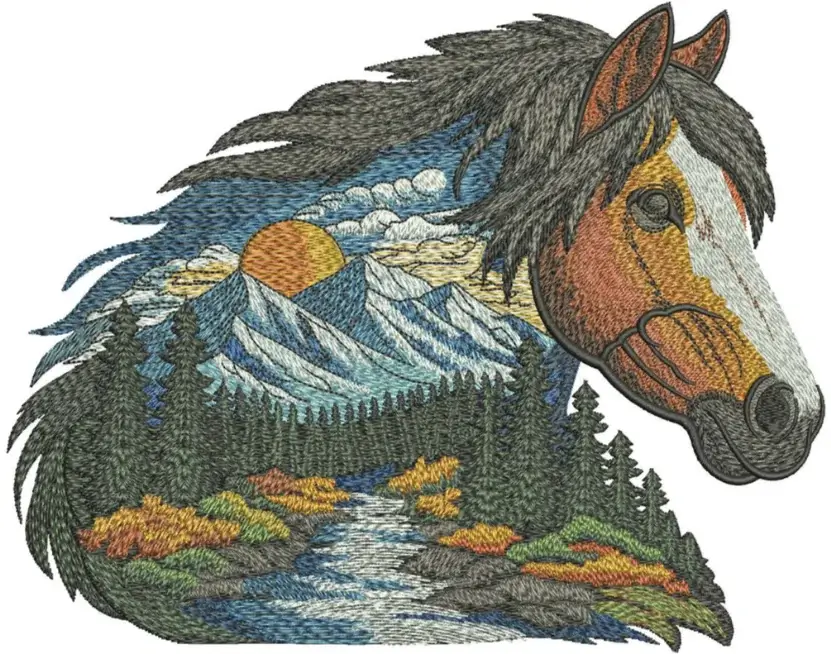
Some registration problems need more than a small file edit. A skilled embroidery digitizer looks at the full stitch structure and how the design will behave on the actual garment. The goal is to correct the stitch structure so the design performs more consistently during real production.
Benefits of Expert Digitizing
Expert digitizing can:
- Find the real cause of repeated border gaps
- Rebuild problem areas instead of hiding them
- Improve registration between fills and outlines
- Reduce repeated test sew-outs and wasted garments
- Create smoother stitch paths with fewer problem areas
- Prepare cleaner files for repeat production
- Adjust difficult details without making the design too heavy
When Is Professional Digitizing More Reliable?
Professional digitizing becomes more valuable when the same defect keeps returning after proper hooping and machine checks. It is also a better choice for customer orders, repeat runs, detailed logos, small elements, or designs that have already been resized or converted several times.
In these cases, fixing the stitch structure is usually more dependable than making another quick border adjustment.
For a file that keeps missing the mark, choose production-tested embroidery digitizing from Absolute Digitizing and start the next run with a cleaner setup.
Final Thoughts
Embroidery Outline Misalignment is a sign that something in the stitching process needs attention. The real cause may come from the file, fabric, stabilizer, hooping, stitch order, density, or machine setup.
Start with the sew-out and look closely at what moved. Did the fill shrink, did the border shift, or did the whole design move? Then fix that cause instead of simply dragging the outline into place.
Small changes in compensation, support, and sequence can make a big difference. However, repeated defects often point to a file that needs stronger stitch planning.
For a cleaner, production-ready result, send your design to Absolute Digitizing and get a free quote.
Frequently Asked Questions
The software shows programmed stitch positions, but fabric moves during sewing. Fill stitches can pull the material inward, so the border may no longer meet the stitched edge correctly.
It can be either. A defect that repeats in the same spot often points to the file or compensation. A shift that changes between sew-outs may come from hooping, stabilizer, or fabric movement.
Not automatically. A small increase in compensation or overlap may help, but too much can push the fill beyond the border. Check stabilization, stitch direction, and the fill structure as well.
Knits can move and stretch while dense areas stitch. Proper stabilization becomes more important on these fabrics, and cut-away backing often gives better long-term support than light tear-away backing.
Yes. Large size changes can affect density, compensation, stitch spacing, and other stitch settings. When a resized file starts sewing poorly, adjusting the original editable design or redigitizing it may give a cleaner result.