When it comes to embroidery, having a great logo isn’t enough, you need it in the right format to stitch it perfectly on fabric. That’s where embroidery file conversion comes in. Each embroidery machine uses specific file types, and if your logo isn’t properly converted, it won’t stitch out correctly—or at all. One of the most common formats used in Brother and Bernina home embroidery machines is the PEC file format, known for carrying both stitch and color information.

In this blog, we’ll walk you through everything you need to know about PEC files—what they are, why they matter, and how to convert your logo into a PEC embroidery file that your machine can read without errors. Whether you’re trying to do it yourself or looking for professional help, we’ll cover the tools, the steps, and common mistakes to avoid. We’ll also explain how Absolute Digitizing can save you time and frustration by delivering high-quality PEC embroidery files starting at just $10 with fast turnaround and free edits.
Let’s dive in and make sure your logo is ready to stitch flawlessly.
- What is a PEC File?
- Which Machines Use PEC Format?
- PEC vs PES, DST, and JEF Formats
- Why PEC is Great for Home Embroidery
- Why Converting a Logo into PEC Format Isn’t Straightforward
- Step-by-Step Overview of the Conversion Process
- Tools and Software Used for PEC Conversion
- Common Mistakes to Avoid in PEC Logo Conversion
- Conclusion: Let the Experts Handle It
What is a PEC File?
A PEC file is a type of embroidery design file used by specific home embroidery machines. It contains all the instructions your machine needs to stitch a design, including stitch placement, type, and even thread color information. This makes it ideal for users who rely on their machine’s screen to preview and guide embroidery projects.
Which Machines Use PEC Format?
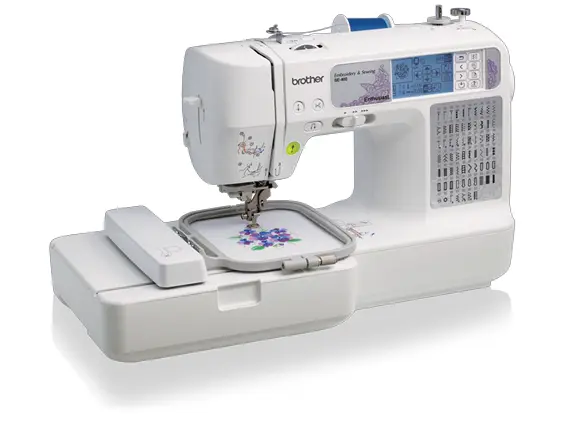
PEC files are commonly used by Brother and some Bernina home embroidery machines. These machines are popular among hobbyists and small business owners because of their user-friendly features and reliable stitching quality. PEC files allow these machines to display design previews, showing how the final embroidery will look along with the color sequence.
PEC vs PES, DST, and JEF Formats
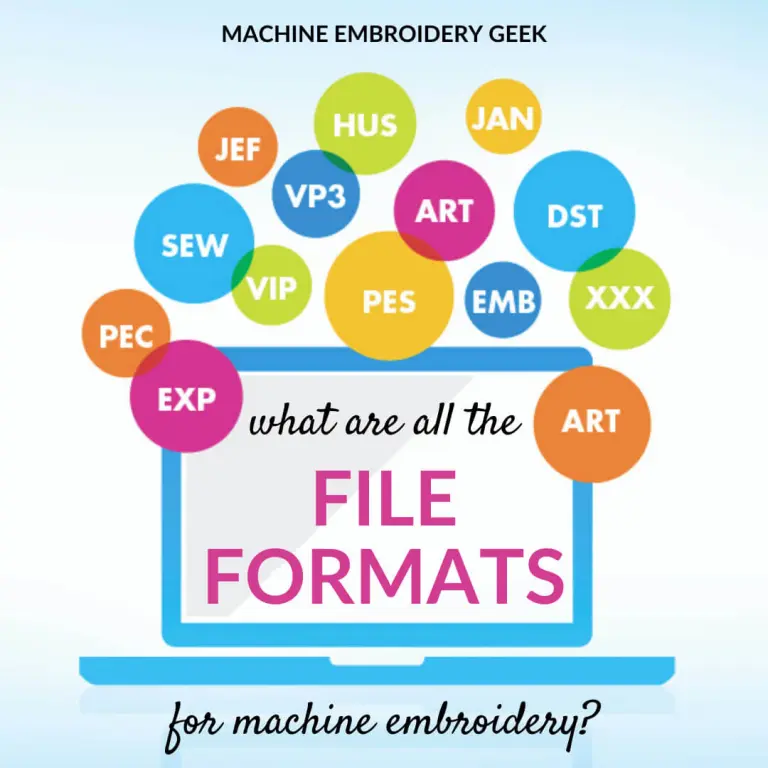
While PEC is often grouped with PES files (another format used by Brother), it serves a slightly different function. A PES file may contain an embedded PEC file that the machine uses for display and stitching simulation.
Here’s how PEC compares to other embroidery formats:
-
DST (used in industrial machines): Stitch-only, no color data.
-
JEF (used in Janome machines): Includes color but not compatible with Brother.
-
PEC: Contains both stitch data and color previews, ideal for home use.
Why PEC is Great for Home Embroidery

Unlike commercial formats, PEC files are designed with simplicity and clarity in mind. They allow users to:
-
View the design on-screen before stitching.
-
Follow thread color changes easily.
-
Achieve professional-looking results at home.
In short, PEC makes embroidery more accessible and accurate for home users. That’s why getting your logo digitized into PEC format is a smart move if you own a Brother or Bernina machine.
Why Converting a Logo into PEC Format Isn’t Straightforward
![]()
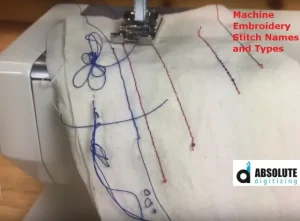
Converting a logo into a PEC embroidery file involves much more than just uploading an image and clicking “save.” It’s a technical and creative process that requires expertise, precision, and the right tools.
Logos Are Not Ready-to-Stitch
Most logos are made for screens and print—not for embroidery. To be stitched properly, they must be digitized, meaning they are manually converted into machine-readable stitch instructions. Without this step, embroidery machines cannot process or stitch the logo accurately.
Vector Art vs Raster Images
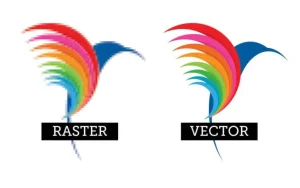
Not all images are created equal. Vector files (like SVG, AI, or EPS) are best because they use smooth lines and clean shapes, making them easier to digitize. Raster files (like JPG or PNG), especially if blurry or low-quality, require more work to clean up before they’re usable for embroidery.
Manual Stitch Type Selection
Embroidery isn’t one-size-fits-all. You have to manually assign stitch types:
-
Satin stitch for clean edges and lettering
-
Fill stitch for larger areas
-
Running stitch for outlines or fine detail
Color Mapping for Machine Display
PEC files are designed to include color data, so it’s important to assign the correct thread colors during digitizing. This ensures your Brother or Bernina machine displays the design preview correctly and guides you through accurate thread changes during stitching.
Step-by-Step Overview of the Conversion Process
Converting a logo into a PEC embroidery file is a multi-step process that blends technical skill with artistic judgment. Here’s a simple breakdown of how professionals turn a regular image into a PEC file your machine can read and stitch flawlessly.
Step 1: Collecting a High-Quality Logo
![]()
The first step is to obtain a high-resolution logo, preferably in vector format (like AI, SVG, or EPS). Vector images are scalable without losing quality and provide clean edges, making them much easier to digitize. If only a raster image (like PNG or JPG) is available, it must be clear, sharp, and ideally at 300 DPI or higher.
Step 2: Importing into Digitizing Software
Next, the logo is imported into professional digitizing software such as Wilcom, Chroma, or Hatch. These tools allow the digitizer to trace, interpret, and plan the embroidery layout stitch by stitch.
Step 3: Manual Digitizing
This is the most crucial part. The digitizer manually chooses the right stitch types (satin, fill, running), sets the stitch direction, controls entry and exit points, and manages pathing to reduce unnecessary jumps and thread trims. It’s a creative step that ensures both aesthetic appeal and functional stitching.
Step 4: Assigning Thread Colors
In PEC files, color mapping is essential for accurate machine previews. Thread colors are selected from standardized libraries, so Brother or Bernina machines can guide the user through correct color changes during embroidery.
Step 5: Exporting to PEC Format
Once everything is ready, the design is exported as a PEC file using the compatible options within the digitizing software.
Optional Step: Test Stitch-Out
Before final delivery, a sample stitch-out on similar fabric is often done to check for flaws, alignment issues, or unexpected stitch behavior—ensuring top-quality results.
Tools and Software Used for PEC Conversion

Creating a PEC embroidery file requires the right tools—not all software can handle this format properly, especially if you want clean, accurate stitch results.
Professional Digitizing Software
The most reliable tools for PEC conversion are Wilcom Embroidery Studio, Hatch Embroidery, and Chroma Inspire. These programs allow for precise control over stitch types, sequencing, color mapping, and export settings. They are designed specifically for creating embroidery files that work smoothly on machines like Brother and Bernina.
File Converters (with Limitations)
Some users try using Embird, Ink/Stitch, or online converters to generate PEC files. While these can work for simple designs, they often lack advanced features, and the output may not stitch properly. They’re not ideal for detailed logos or complex layouts.
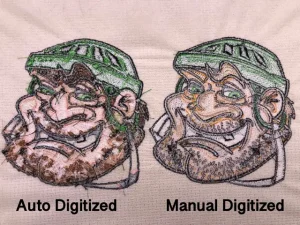
Manual Digitizing vs Auto-Digitizing
Auto-digitizing tools can speed up the process, but they often produce unreliable results—especially with fine details, small text, or complex shapes. Manual digitizing, done by a skilled professional, ensures that each stitch is placed for maximum quality, durability, and visual appeal.
Common Mistakes to Avoid in PEC Logo Conversion
Converting a logo to PEC format isn’t just about clicking “save as.” A few common mistakes can ruin the final stitch-out, especially on home machines like Brother or Bernina.
1. Using Low-Resolution Images
Starting with a blurry or pixelated logo makes digitizing harder and less accurate. Always use high-resolution or vector files to ensure clean edges and proper detailing.
2. Overloading with Small Details
Tiny text, fine lines, and complex shading might look great on screen—but don’t translate well to thread. Simplify your design to suit embroidery limitations, especially for small-size logos.
3. Ignoring Machine Constraints
Each machine has hoop size limits and maximum stitch counts. If you don’t account for these, the design might not fit or may overload the machine, causing errors.
4. Color Mismatch
Using the wrong thread chart or skipping color mapping can confuse your machine and result in a design that looks totally different from what you expected.
5. Skipping the Test Stitch
Never skip a test run on similar fabric. It helps catch issues like puckering, density problems, or alignment errors before the final production.
Why Professionals Make a Difference

Professional embroidery digitizers know how to work with stitch dynamics, fabric behavior, thread tension, and machine constraints. They also understand how different embroidery formats, like PEC, interact with machines like Brother and Bernina. A well-digitized file doesn’t just look better—it also runs smoother and lasts longer.
Try Absolute Digitizing
At Absolute Digitizing, we create high-quality PEC files starting at just $10. Our team offers:
-
Free unlimited edits until you’re satisfied
-
Fast delivery within 2 to 12 hours
-
Rush service in as little as 2 hours for urgent jobs
We make it easy for you to get a clean, accurate, and ready-to-stitch PEC file—without the stress.
Conclusion: Let the Experts Handle It
Converting a logo into a PEC embroidery file isn’t a simple task, it requires a sharp design eye, the right digitizing software, and a deep understanding of how stitches work on fabric. From choosing stitch types to color mapping and file formatting, every step matters for a smooth machine run and a flawless final look.
If you want to save time, avoid costly mistakes, and ensure top-quality results, it’s best to leave the job to professionals who do this every day.