
Brother embroidery machines have earned a strong reputation among both hobbyists and small business owners for their ease of use, reliability, and excellent stitch quality. Whether you’re customizing gifts at home or running a small embroidery business, Brother machines offer the perfect blend of performance and user friendly features. But to unlock their full potential, you need more than just a great design—you need a properly digitized file. Digitizing is the process of converting artwork into a stitch file that your Brother machine can read, usually in the PES format. Without proper digitizing, even the best designs can end up looking messy or distorted. In this blog, we’ll walk you through everything you need to know about digitizing for Brother embroidery machines, from choosing the right software to avoiding common mistakes, so you can create flawless embroidery every time.
Understanding Brother Embroidery Machines
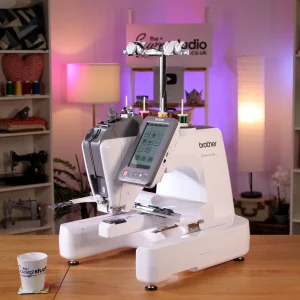
Brother embroidery machines are known for their innovation, ease of use, and high-quality stitching, making them a top choice for everyone from hobbyists to small business owners. Whether you’re customizing gifts at home or producing orders for customers, Brother offers a model to match your needs.
Popular models like the SE600, PE800, and the advanced Luminaire XP3 come equipped with features that simplify the embroidery process. These include full-color touchscreen displays, built-in embroidery designs, and options for wireless or USB design transfer, making it easy to get started without extra equipment.
Brother machines primarily use the PES file format, which supports color information and design layering. Some models also support DST and PHC files, allowing for flexibility when importing designs from different digitizing sources. Choosing the right file format and properly digitized designs ensures smooth stitching and professional results on any Brother embroidery machine.
File Formats Compatible with Brother Machines

When it comes to embroidery file formats, PES is the most commonly used format for Brother machines. A PES file holds all the instructions your machine needs, including stitch types, thread colors, and the stitching order. It’s the default format for most Brother models and offers the best compatibility and accuracy.
Other Supported Formats
Some newer Brother machines also support formats like DST, PHC, and PHX. While DST is widely used in commercial embroidery, it does not retain color information the way PES does. That’s why PES remains the go-to format for Brother users who care about full-color support, layering, and design precision.
Creating PES Files
To create a PES file, you’ll need embroidery digitizing software such as Wilcom, Hatch, Embrilliance, or PE-Design by Brother. These programs allow you to import your artwork, assign stitch types, adjust settings, and export the final design in PES format.
Avoid Free Converters
While free online converters might seem convenient, they can lower your design’s quality, skip important stitch data, or even introduce security risks. For best results, always use professional software or a trusted digitizing service to ensure your Brother embroidery machine performs at its best.
Step-by-Step: How to Digitize a Design for Brother Machines

Digitizing a design for your Brother embroidery machine might sound complicated, but by following a few structured steps, you can turn any artwork into a clean, machine-ready embroidery file. Here’s a simple guide to help you through the process:
Step 1: Choose High-Resolution Artwork

Start with a high-quality image—preferably a vector file (like AI, SVG, or EPS) or a clean high-resolution raster image (such as PNG or JPG). Clear lines and defined shapes are essential for accurate digitizing.
Step 2: Open the Artwork in Digitizing Software

Use professional software like Wilcom, Hatch, Chroma, or PE-Design. These tools let you import the artwork and start converting it into stitch data.
Step 3: Choose Appropriate Stitch Types
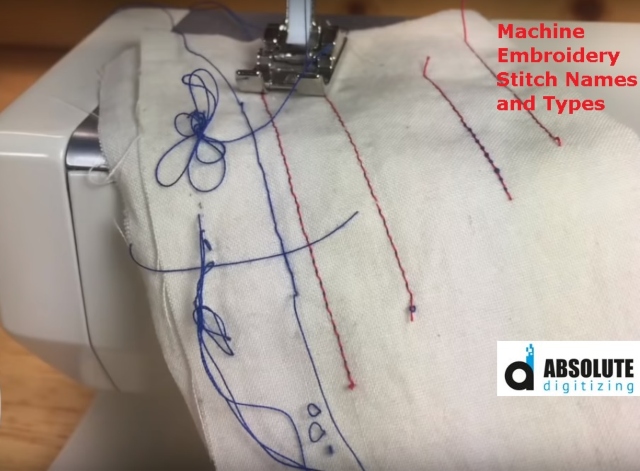
Decide which stitch type fits each part of your design. Use satin stitches for text and borders, fill stitches for large areas, and run stitches for fine outlines or details.
Step 4: Set Stitch Density and Underlay
Adjust stitch density based on fabric type and design size. Add underlay stitches to stabilize the fabric and improve stitch quality.
Step 5: Optimize Pathing
Plan the stitch sequence smartly to reduce jumps and trims. This keeps the design neat and prevents thread breaks.
Step 6: Assign Thread Colors
Choose thread colors that match your design. Many Brother machines display color previews from PES files.
Step 7: Save/Export as a PES File
Once finalized, export the design in PES format, which is compatible with all Brother machines.
Step 8: Transfer the File to Your Machine
Send the file via USB drive, memory card, or Wi-Fi, depending on your model.
Best Software for Digitizing Brother Designs
![]()
Choosing the right digitizing software is essential for creating clean, professional embroidery files that work perfectly with Brother machines. Whether you’re a beginner or an experienced digitizer, there’s a software option to fit your needs.
Paid Options
Wilcom Embroidery Studio

Wilcom is the gold standard in embroidery digitizing. It offers advanced tools like auto-digitizing, stitch-by-stitch editing, and realistic design previews. It’s best suited for professionals and businesses that need precision and efficiency.
Embird

Embird is a flexible and modular program that allows users to purchase only the features they need. It supports multiple file formats and offers strong editing capabilities, making it a cost-effective solution for growing businesses.
Hatch Embroidery

Developed by Wilcom, Hatch is ideal for beginners and intermediate users. It combines a user-friendly interface with powerful tools, including auto-digitizing, lettering, and layout options.
Free or Limited Options
Ink/Stitch

Ink/Stitch is a free, open-source extension for Inkscape. It’s a great starting point for hobbyists or students who want to learn the basics of digitizing without investing in premium software.
Brother PE-Design

This software is designed specifically for Brother machines. It includes basic editing, lettering, and design layout tools. It’s often bundled with higher-end Brother models or available for purchase separately.
Comparison Overview
If you’re looking for a beginner-friendly interface with strong features, Hatch is a top choice. Wilcom is best for advanced users and professionals, while Ink/Stitch and PE-Design are great entry points for those on a budget or just starting out.
Professional Help vs DIY Digitizing
If you’re just starting out or working on simple designs like names, monograms, or basic shapes, DIY digitizing can be a great way to learn the process and experiment with your Brother machine. Many beginners use this approach to build confidence and develop a deeper understanding of how stitch types and paths work.
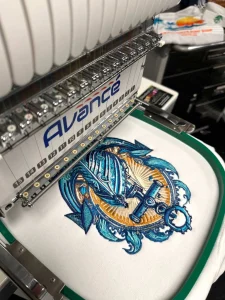
However, for complex logos, detailed artwork, or business orders, it’s best to leave digitizing to the professionals. A poorly digitized file can lead to thread breaks, misaligned stitching, and wasted materials. That’s where expert services like Absolute Digitizing come in.
With years of experience and advanced software, Absolute Digitizing ensures clean, high-quality stitch files that run smoothly on Brother embroidery machines. They offer affordable pricing—$10 to $25 for most left chest or cap designs, depending on complexity. Larger designs like jacket backs are also available at competitive rates.
Hiring professionals not only saves time but also guarantees precise stitch quality, free revisions until you’re satisfied, and a quick turnaround—often within 12 hours. Whether you’re a small business or a hobbyist on a deadline, professional digitizing can make all the difference in the final result.
Tips to Get the Best Results on Brother Machines
Getting clean, professional-quality embroidery from your Brother machine isn’t just about the design file—it’s also about how you set up your materials and machine. Here are key tips to ensure great results every time.
Use the Right Embroidery Needles
Select needles based on your fabric type. Use sharp-point needles for woven fabrics like canvas and denim. For knits and stretchable materials, ballpoint needles are best as they glide between threads without damaging the fabric.
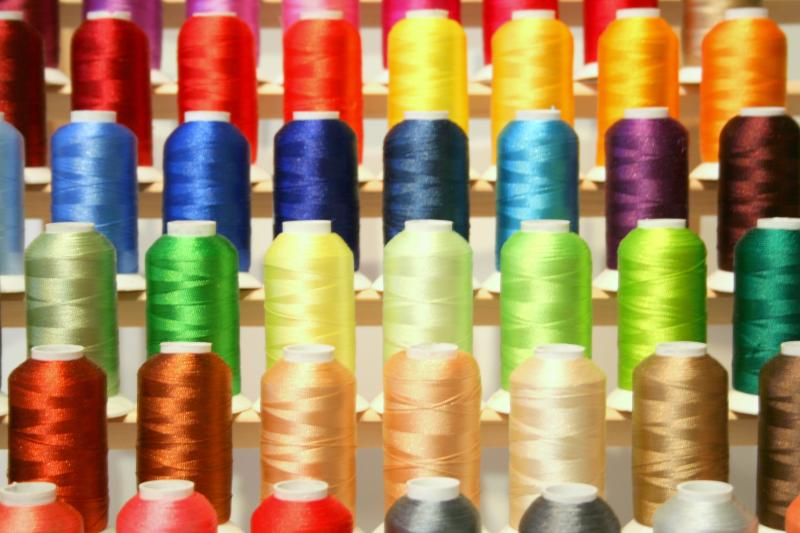
Choose High-Quality Thread Brands

Invest in top-quality threads such as Madeira, Isacord, or Brother-branded threads. These provide consistent tension, vibrant colors, and minimize thread breaks during stitching.
Match the Hoop Size to Your Design

Always use a hoop that’s close to your design’s size. A properly fitted hoop prevents the fabric from shifting, which helps avoid puckering and misalignment.
Stabilize Your Fabric Properly
Use the correct stabilizer based on the fabric. Tear-away stabilizers work well for firm fabrics, while cut-away stabilizers are better for stretchy or delicate materials. Stabilizers help keep the fabric from distorting during stitching.
Always Run a Test Sample
Before you stitch on the final garment or item, run a sample on similar fabric. This lets you check for issues with alignment, tension, or thread choice—saving time, thread, and material in the long run.
Conclusion

Quality digitizing is the key to getting clean, professional results from your Brother embroidery machine. Whether you’re working on a simple monogram or a detailed logo, using properly digitized PES files ensures your designs stitch out smoothly and look exactly as intended.
If you’re just starting out, don’t hesitate to experiment with DIY digitizing to learn the basics. But for complex artwork or business orders, working with a professional digitizing service can save time and deliver better results.
At Absolute Digitizing, we specialize in creating high-quality PES files that are optimized for Brother machines. Our experienced team offers fast turnaround, free edits, and prices starting at just $10.
Have questions or need a custom quote? Reach out through our 24/7 live chat or contact form—we’re always here to help. Get your design digitized today for as low as $10 and experience the difference professional quality makes.