| Quick Summary |
|---|
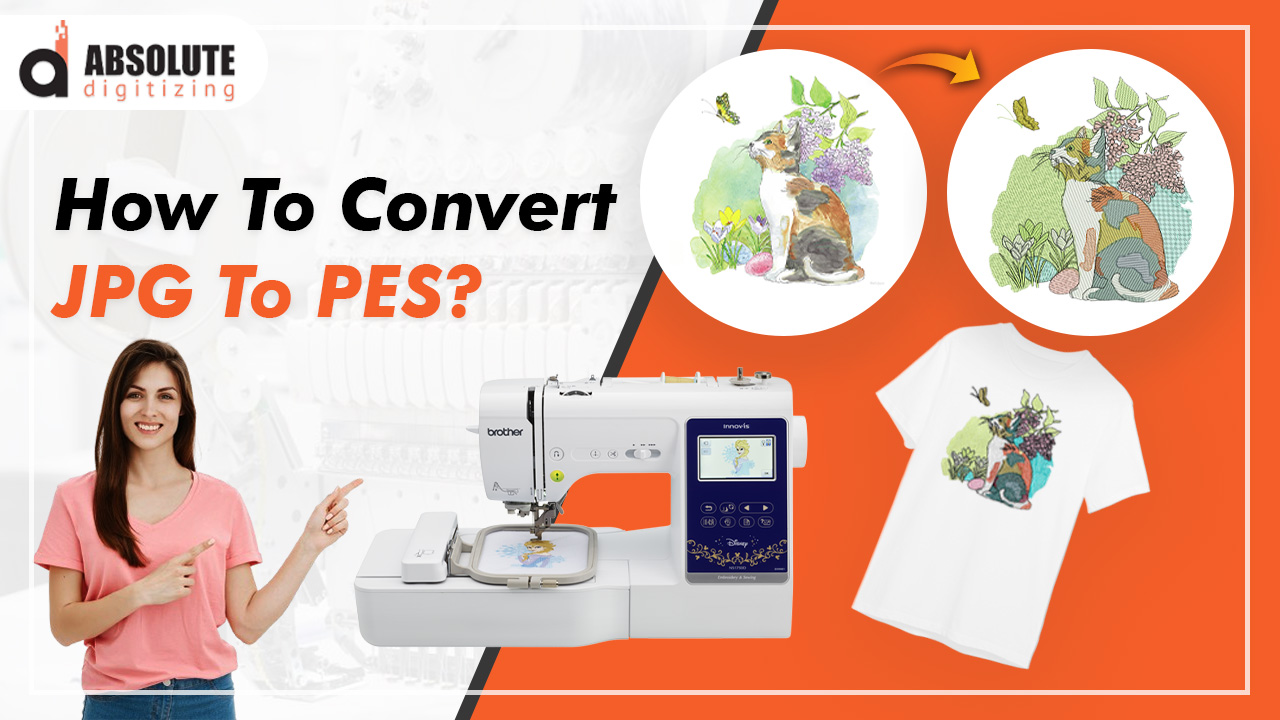
A JPG must be digitized before a Brother embroidery machine can read it as a PES file.
|
A JPG image may look ready on your screen, but your Brother embroidery machine cannot stitch pixels. It needs a PES file that carries stitch paths, colors, order, density, and other machine instructions.
In this guide, you will see how to prepare the artwork, compare manual and automatic software options, digitize the design, export the correct PES file, and check Brother machine compatibility. You will also understand why a test sew matters before final production.
However, complex artwork may need expert care. Absolute Digitizing provides reliable embroidery digitizing support for clean, machine ready files when you need professional help.

- Quick Answer: Can You Convert JPG to PES Directly?
- What Is the Difference Between JPG and PES?
- What Should You Prepare Before Creating the PES File?
- Which JPG-to-PES Method Should You Use?
- How to Convert a JPG to a PES Embroidery File: Step by Step
- Do Online JPG-to-PES Converters Really Work?
- How to Transfer a PES File to a Brother Machine
- Why Is the PES File Not Showing on the Brother Machine?
- When Should You Use a Professional Digitizing Service?
Quick Answer: Can You Convert JPG to PES Directly?
No. Renaming a JPG file or using a standard image converter will not create a dependable PES design. A JPG shows pixels, while a PES file needs stitch paths, colors, order, density, and machine commands. Therefore, you must digitize the artwork with embroidery software or use a professional digitizing service.
What Is the Difference Between JPG and PES?

What Information Does a JPG Contain?
A JPG is a pixel-based image that stores visual details, including shapes, colors, and shading. It can help a digitizer view the original artwork, but it does not contain stitches, thread changes, or sewing commands.
However, JPG compression may soften edges and create small visual marks. A low-resolution image can also become blocky when enlarged. For this reason, clean, high-resolution artwork gives the digitizer a clearer guide.
What Information Does a PES File Provide?
A PES file is a machine embroidery format commonly used with Brother embroidery machines and software. Unlike a JPG, it contains embroidery data that tells a compatible machine where and in what order to place stitches.
It can also carry design size, stitch positions, color sequence, and other production details. The machine follows these instructions to reproduce the design on fabric. Therefore, creating a PES file requires digitizing the artwork rather than simply changing its file extension.
What Should You Prepare Before Creating the PES File?
Good preparation helps the design stitch cleanly and prevents machine problems later. Before digitizing, collect the details that affect stitch structure, file setup, and final appearance.
Final Embroidery Size
Choose the exact width and height before building the stitches. Enlarging or shrinking a finished machine file can change stitch spacing, satin widths, outlines, and small lettering. Therefore, digitize the artwork at its intended size whenever possible.
Brother Machine Model and Hoop Area
Brother machines do not all share the same embroidery field or file limits. For example, the PE535 supports designs up to 4 by 4 inches, while other models offer different working areas.
Check these details:
- Exact machine model
- Accepted embroidery formats
- Maximum design field
- Available hoop sizes
- USB, cable, or wireless transfer method
- File, stitch, and color limits
- Supported PES version
Fabric and Placement
Also, identify the material and design location. A knit shirt, fleece jacket, denim panel, cap, and patch may need different underlay, density, and stabilizer choices.
State whether the design is for a left chest, sleeve, cap, jacket back, or another area. In addition, decide whether the embroidery should feel soft or handle frequent wear.
Thread Colors
Reduce screen colors to practical thread shades. Gradients and tiny color changes may need simplification because embroidery thread cannot copy every pixel or screen color exactly.
Clean Artwork
Provide clear, readable artwork with visible shapes, text, colors, and design details. JPG, PNG, PDF, scanned artwork, and other common files can all be digitized. However, cleaner artwork simply helps the digitizer interpret each element more accurately.
Which JPG-to-PES Method Should You Use?

The right method depends on your skill level, budget, design quality, and how often you need embroidery files. Some options give you full control, while others save time. However, every finished PES file should be reviewed and test sewn before production.
Compare Your Options
| Method | Best for | Advantages | Limitations |
|---|---|---|---|
| Manual digitizing software | Experienced digitizers and regular production | Gives full control over stitch types, density, underlay, and sequence | Requires paid software, training, and time |
| Automatic or AI tool | Simple, flat artwork and quick drafts | Creates a starting file quickly and is easy to access | May add poor paths, extra stitches, or weak settings that need manual correction |
| Ink/Stitch | People who need a free workflow | Free to use and can export PES files | Requires artwork preparation and time to learn the tools |
| Professional service | Businesses, detailed logos, and production files | Saves time and provides expert control for the final fabric and size | Finding the best service |
How Should You Decide?
Manual software works well when you create files often and want control over every stitch. Meanwhile, an automatic tool may help with a simple shape, but it cannot judge every fabric, detail, or production need.
Ink/Stitch removes the software cost. Still, you must prepare objects, assign stitch behavior, arrange the sequence, and test the result.
For complex logos, small lettering, caps, textured fabric, or customer orders, a professional digitizing service is often the safer choice. It reduces the learning burden and helps you receive a PES file prepared for actual embroidery.
How to Convert a JPG to a PES Embroidery File: Step by Step
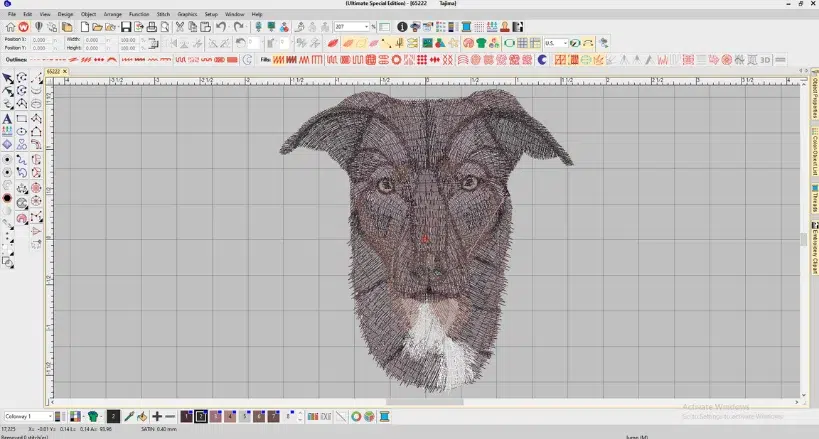
Converting a JPG into a dependable PES file takes more than changing the file extension. You must rebuild the image as stitches that match the final size, fabric, and Brother machine. The steps below use Wilcom, although the basic process applies to most digitizing software.
Step 1: Inspect and Simplify the JPG
Review the artwork before adding stitches. Remove an unwanted background, reduce extra colors, and correct rough or blurry edges when needed.
Also, identify tiny text, thin lines, gradients, and details that may not stitch clearly. Simplify only the weak areas while keeping the main logo features easy to recognize.
Step 2: Set the Final Embroidery Size
Enter the finished width and height before detailed digitizing. Also, choose the correct hoop or design area, intended placement, and fabric profile when available.
These choices affect stitch spacing, satin width, detail, and coverage. Therefore, avoid building the design at a random size and resizing it heavily later.
Step 3: Import the JPG as Artwork
Open Wilcom and use Import Graphic to bring the JPG into the workspace. Position it inside the hoop or design boundary, then confirm the final dimensions.
The JPG now acts as a visual backdrop. It does not become embroidery until you create stitch objects over it.
Step 4: Rebuild the Design as Embroidery Objects
Separate the artwork into logical sections, such as backgrounds, shapes, borders, lettering, and small details. Do not trace every pixel or compression mark.
Instead, smooth uneven curves, close gaps, remove objects that are too small, and create clean shapes. Preserve the features that make the logo recognizable while adapting weak details for thread.
Step 5: Choose Suitable Stitch Types
Match each area with a practical embroidery stitch type:
- Use running stitches for narrow lines and light details.
- Use satin stitches for suitable lettering, borders, and narrow columns.
- Use fill or tatami stitches for broader areas.
However, no stitch type works for every design. Base the choice on object width, scale, fabric, thread, and the desired appearance.
Step 6: Set Underlay, Density, and Pull Compensation
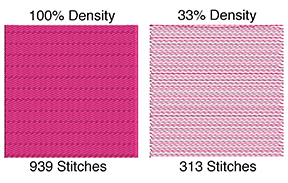
Underlay supports the top stitches and helps control the fabric. Density controls stitch spacing and coverage. Pull compensation adds width where thread and fabric movement may narrow an object.
Meanwhile, stitch angle changes the texture and helps separate nearby shapes. Adjust these settings for the actual material instead of applying one fixed value to every job.
Step 7: Plan the Stitching Sequence
Arrange objects in a stable order. Background areas usually sew before details placed over them. Stable elements may also support smaller or delicate parts.
In addition, choose logical start and end points, hide travel stitches, reduce unnecessary color changes, and limit long jumps and trims. Avoid heavy overlaps that can make the design stiff or cause thread breaks.
Step 8: Review the Stitch Simulation
Run the stitch player and inspect the full sewing path.
Check for:
- Missing or crowded areas
- Long unsupported stitches
- Poor outline registration
- Unwanted overlaps
- Excessive trims and jumps
- Weak small lettering
- Incorrect color order
- An unreasonable stitch count
A digital preview can reveal many errors. Still, it cannot show exactly how the fabric, stabilizer, needle, and thread will behave.
Step 9: Save the Master File and Export PES
Save the editable Wilcom design as an EMB file before creating the machine file. The master file keeps the object information needed for later changes.
Then export the production version as PES. Also, save a worksheet or thread list when useful. Confirm that the design size and PES output suit the intended Brother machine.
Step 10: Test Sew and Revise
Stitch a sample on similar fabric with the intended stabilizer, thread, needle, and approximate placement. Check for puckering, gaps, sinking stitches, broken thread, stiff areas, unreadable text, and misaligned outlines.
Afterward, return to the editable file and correct any problems before production. Absolute Digitizing can prepare a clean, machine-ready PES file when you need professional support for detailed artwork or customer orders.
Do Online JPG-to-PES Converters Really Work?
Online JPG-to-PES converters cannot create dependable embroidery files. A JPG is an image made of pixels. In contrast, a PES file contains stitch paths, sequences, colors, and machine instructions.
Because of this difference, file conversion cannot build a production-ready stitch map. The artwork must be digitized, with each shape assigned stitches, density, underlay stitches, stitch direction, and sewing order.
Why Do Automatic Results Need Correction?
Some tools can generate an automatic embroidery file from simple artwork. However, they rely on preset rules and may not understand the fabric, placement, final size, or purpose of the design.
Common problems include:
- Uneven or excessive density
- Missing or unsuitable underlay
- Poor stitch paths and extra jumps
- Weak lettering and small details
- Too many trims or color changes
- Gaps, puckering, and poor registration
How to Transfer a PES File to a Brother Machine
The transfer method depends on your Brother model. Some machines read designs from a USB flash drive, while others support a direct computer connection or wireless transfer through Brother software.
Prepare the File
Before moving the design, check these details:
- Extract the PES file if it is inside a ZIP folder.
- Confirm that your machine supports PES.
- Keep the design within its embroidery field and file limits.
- Use a simple name with letters, numbers, hyphens, or underscores.
- Select a PES version compatible with your machine.
- Place the file in the folder listed in the machine manual.
Transfer and Open the Design
Copy the file to a compatible USB drive or send it through the connection supported by your machine. Then insert the drive or open the transferred design from the machine screen.
However, wireless transfer works only with compatible models and software. Direct cable support also varies. Therefore, check the manual for your exact model instead of using one method for every Brother machine. After opening the design, confirm its size, orientation, color order, and hoop choice before stitching.
You can also watch this quick and helpful video to see how to transfer embroidery designs to a Brother embroidery machine using a USB stick.
Why Is the PES File Not Showing on the Brother Machine?
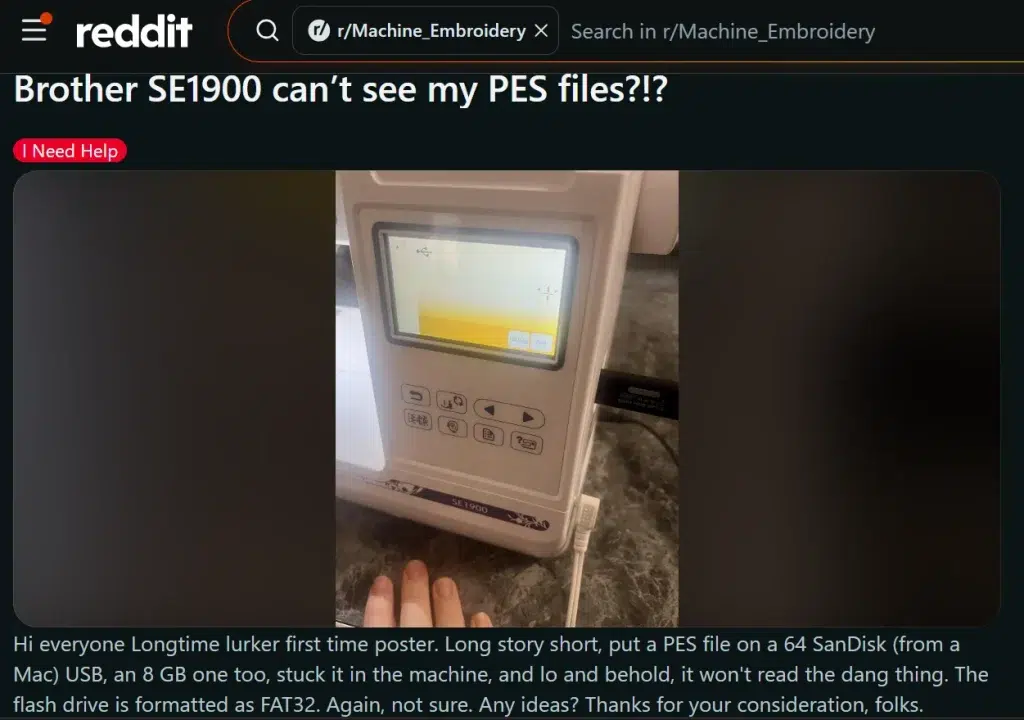
A Brother SE1900 user shared that the machine could not find a PES file stored on a FAT32 USB drive. The user tested more than one flash drive, but the design still did not appear. This example shows why file location, USB compatibility, design limits, file naming, and PES version should all be checked.
A PES file may not appear when its format, size, name, storage location, or design limits do not match the machine. Because Brother models have different requirements, check the manual for your exact machine before changing the file.
Common Problems and Fixes
| Problem | What to Check |
|---|---|
| File remains zipped | Extract the PES file before transferring it |
| Wrong file format | Confirm that your machine supports PES |
| Design is too large | Compare its size with the machine’s embroidery field |
| Unsupported hoop setting | Export the design for a hoop the machine recognizes |
| File name contains symbols | Use only letters, numbers, hyphens, or underscores |
| File is inside several folders | Move it to a location the machine can read |
| Stitch or color limits are exceeded | Reduce or edit the design |
| PES version is too new | Save it in an older version supported by the machine |
| USB drive is not recognized | Check the required drive type, format, and capacity |
| File is damaged | Export or download a fresh copy |
Also, keep the complete design inside the selected design page when exporting. Some Brother machines will hide files that exceed their stitch, color, size, or combined-pattern limits.
When Should You Use a Professional Digitizing Service?
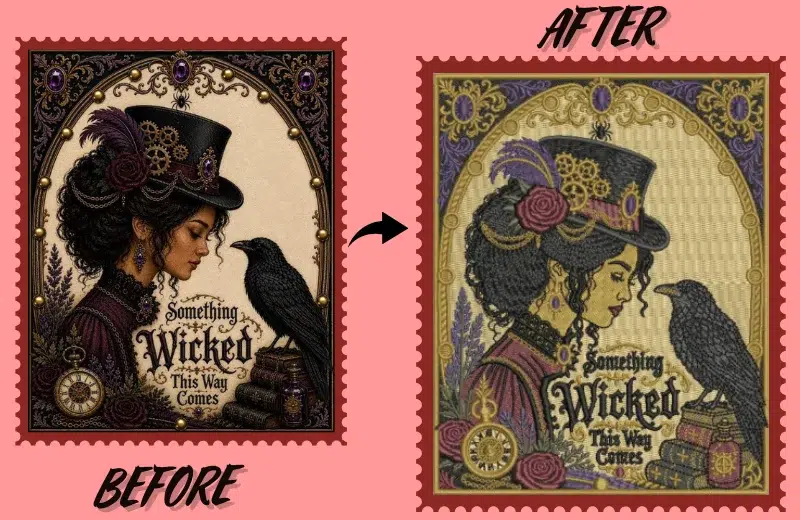
Embroidery digitizing software can be costly, and learning to use it takes time. You must understand stitch types, density, underlay, pull compensation, sequencing, and fabric behavior. Therefore, occasional users may spend more time fixing files than stitching them.
Professional Help May Suit These Designs
- Small or detailed lettering
- Fine outlines and complex layers
- Stretchy, thick, or textured fabrics
- Paid customer orders
- Designs used on several products
- Jobs where thread breaks and production delays matter
- Projects without suitable software or digitizing experience
A professional digitizer can prepare the file for the final size, fabric, placement, and machine. This can reduce testing time, unnecessary stitches, poor registration, and production problems.
However, simple personal designs may still be suitable for learning with digitizing software. The best choice depends on your budget, available time, skill level, and the quality required for the finished embroidery.
Final Thoughts
JPG and PES files serve very different purposes. A JPG shows the artwork, while a PES file gives an embroidery machine the stitch instructions it needs.
Therefore, creating a dependable PES file requires proper digitizing. The software matters, but correct stitch types, density, underlay, sequencing, and pull compensation matter even more. The design must also match the final size, fabric, hoop, and Brother machine limits.
A digital preview helps find problems, but only a test sew confirms the real result. For production work, Absolute Digitizing can save you time and prepare a clean, machine-ready PES file. Contact us today for a free quote.
Frequently Asked Questions
No. Changing the file name from JPG to PES does not create embroidery stitches. The image must be digitized with stitch types, density, underlay, direction, color order, and machine commands before a Brother machine can sew it.
Embroidery software such as Wilcom, Hatch, PE-DESIGN, and Ink/Stitch can help create PES files. However, the software does not replace digitizing skills. You must still build or adjust the stitch objects for the final size, fabric, and placement.
Yes. Ink/Stitch is a free embroidery extension for Inkscape that can export PES files. However, you must prepare the artwork, assign stitch settings, arrange the sewing sequence, preview the stitch plan, and test the finished design.
The file may be zipped, oversized, damaged, saved in an unsupported PES version, or placed in the wrong USB folder. The design may also exceed the machine’s hoop, stitch, or color limits. Check the manual for your exact model.
Usually not. Automatic tools may generate a basic stitch file, but they cannot always choose suitable underlay, density, sequencing, or fabric settings. Review and correct the file, then test sew it before using it for customer orders or full production.