Bird nesting occurs when thread tangles beneath the fabric, disrupting clean stitching. It often starts with loose tension, poor threading, bobbin issues, a weak stabilizer, or poor machine care.
|
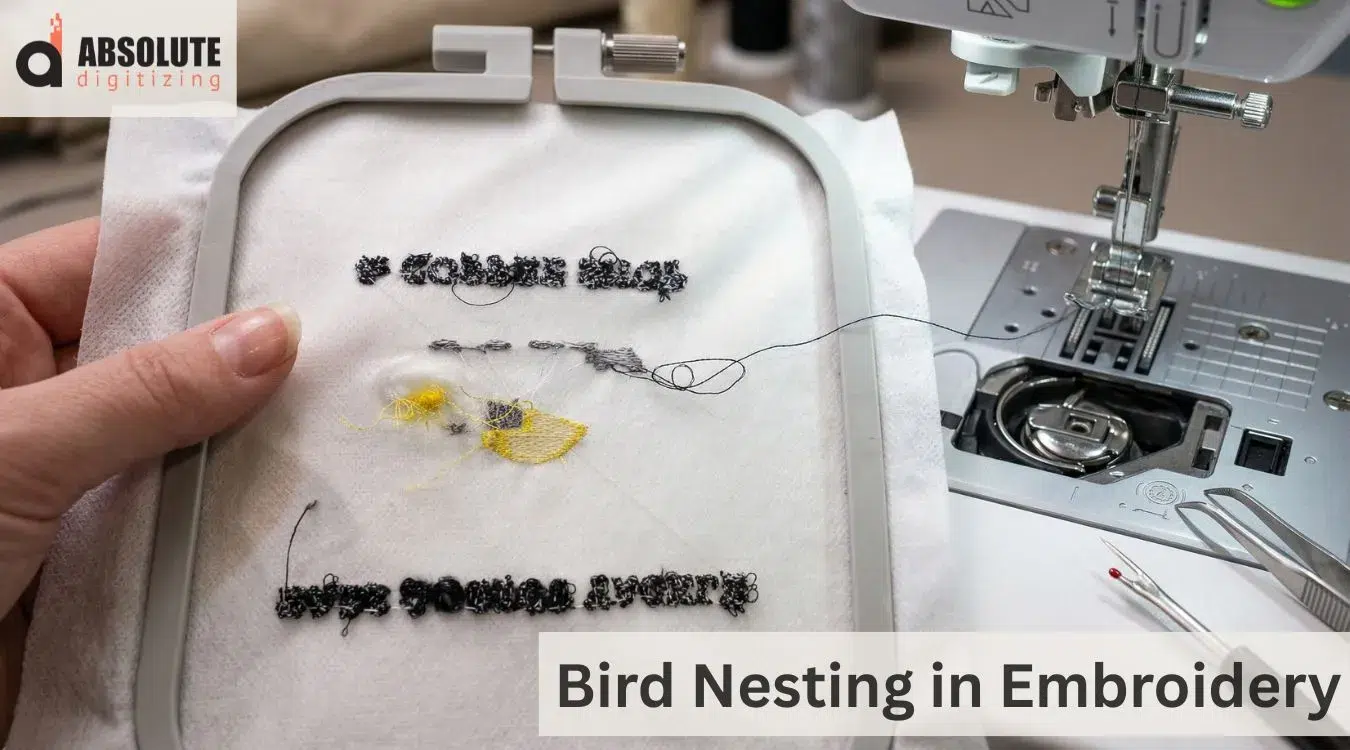
Bird nesting in embroidery can ruin a good design fast. It happens when the thread collects under the fabric and turns into a messy tangle. Such issues can stop your machine, waste thread, and damage the material.
This problem is very common, and it usually has a simple cause. The machine may not be threaded correctly. The bobbin may be loose or placed incorrectly. The needle may be dull or bent. In some cases, the fabric or stabilizer does not support the stitches well. For that reason, the thread starts to bunch up under the design.
So, the good news is that bird nesting can often be prevented. Once you know what to check, you can save time and get cleaner results.
In this blog, you will learn what bird nesting means, what causes it, and how to stop it step by step. For clean, machine-friendly embroidery files, Absolute Digitizing specializes in reliable embroidery digitizing services to support your work.

What Does “Bird Nesting” Mean in Embroidery?

Bird nesting in machine embroidery happens when thread builds up under the fabric in a messy knot. Instead of forming clean stitches, the thread gathers in one spot, creating a thick tangle.
As a result, the underside of the design starts to look like a small ball of thread. That is why people call it bird nesting. It often looks like a bird’s nest made of loose, twisted thread.
This problem usually starts while the machine is running. However, you may not notice it right away until the stitching looks wrong or the machine begins to struggle.
Where Does Bird Nesting Usually Happen?
Bird nesting does not happen in only one part of the machine. In most cases, it shows up in the areas where the thread moves and forms stitches.
Common places where bird nesting appears:
- Under the fabric
- Around the bobbin area
- Near the needle plate
Meanwhile, these areas work closely together during stitching. So, if one part has a problem, the thread can bunch up very fast.
Why Is Bird Nesting a Big Problem?
Bird nesting is more than a small mistake. It can slow down your work and damage your project.
For hobbyists, it can ruin a fun embroidery session. For small business owners, it can waste time during paid orders. If the issue continues, you may lose fabric, thread, and production time.
In some cases, bird nesting can even break needles. It may also damage delicate fabric or leave marks on finished pieces. Because of this, the design may not look clean enough to sell or gift.
So, it is important to fix bird nesting early. When you catch the signs fast, you protect your machine, your fabric, and the quality of your embroidery.
A Reddit embroiderer describes a frustrating bird nesting problem:
I have RARELY, gotten a decent embroidery piece out of this machine. I’m designing in Hatch, I think I’m using the right stabilizer (Cutaway mostly), and my machine CONSTANTLY bird nests and gets caught up in the machine. How do I stop this? Are my settings off? I don’t use auto digitize. I’ve ruined so many garments and I’m at a loss. I did have an issue with the uptake lever but got it fixed by a local repair shop. Worked great for them, with no issues after they fixed it, but maybe 1-2 pieces in, MORE BIRDNESTING. Help it really is killing me on the inside.
What Are the Main Causes of Bird Nesting?
Bird nesting in embroidery usually starts with a small setup problem. The machine may still run, but the thread does not move the right way. For that reason, the thread begins to collect under the fabric and forms a messy tangle.
So, it helps to know the most common causes. When you spot the real reason early, you can resolve the problem faster and protect your design.
Incorrect Threading
Incorrect threading is one of the biggest causes of bird nesting. If the top thread misses a guide or does not sit in the tension path, the machine cannot control the thread well.
For example, the thread may look fine at the top. Still, it can bunch up under the fabric within a few stitches. That is why rethreading the machine often solves the issue.
Improper Tension Settings
Tension controls how the top thread and bobbin thread work together. If the top tension is too loose, extra thread can gather underneath.
On the other hand, very tight tension can also create stitching problems. For example, the design may pull, the stitches may look off, and the thread may not feed smoothly.
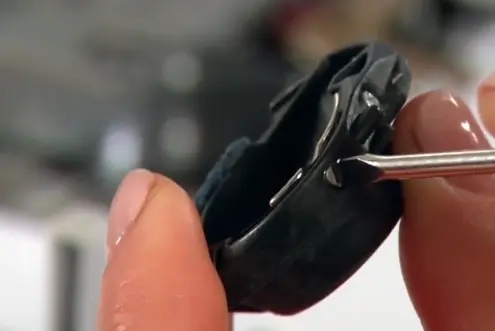
Bobbin Problems
Bobbin issues often lead to bird nesting. The bobbin may be inserted the wrong way, wound unevenly, or filled with poor-quality thread.
As a result, the lower thread cannot move smoothly. For example, a loose or badly wound bobbin can cause sudden tangles near the bobbin case.
Needle Problems
A damaged or wrong needle can create trouble fast. A bent, dull, or incorrect needle may not pass cleanly through the fabric.
For that reason, the thread can catch, loop, or break. For example, using a small needle with a thicker thread may cause the thread to drag and bunch underneath.
Poor Fabric Stabilization
The stabilizer supports the fabric during stitching. If the stabilizer is too weak or not right for the fabric, the fabric can shift while the machine runs.
Then the stitches lose balance. For example, soft knit fabric without proper backing may stretch, leading to thread buildup under the design.
Lack of Machine Maintenance
A dirty machine can also cause bird nesting. Lint, dust, and small thread pieces often collect around the bobbin area and needle plate.
Over time, this blocks smooth thread movement. For example, lint in the bobbin case can cause the thread to catch and form knots under the fabric.
Bad Digitizing
Bad digitizing is another common cause that many people miss. If the design file has poor stitch settings, the machine may struggle to stitch it cleanly.
For example, very dense stitches, bad underlay, or wrong stitch direction can put too much stress on the thread and fabric. In that case, even a well-set machine may start bird nesting.
Quick Signs to Check
Before you restart a job, check these common trouble spots
- Top thread path
- Tension settings
- Bobbin placement
- Needle condition
- Stabilizer choice
- Machine cleanliness
- Digitized design quality
You can prevent the issue early and achieve cleaner embroidery results by carefully inspecting every area.
Also, good digitizing plays a big part in smooth stitching. Clean, machine-friendly files from Absolute Digitizing can help reduce stitching problems and improve embroidery quality.
How Can You Prevent Bird Nests in Embroidery? (Step-by-Step Guide)
The best way to prevent bird nesting is to review each step of the process carefully. When your machine, thread, needle, fabric, and design all work together, stitching becomes much smoother.
Step 1: Thread the Machine the Right Way
Start by threading the top thread slowly and carefully. Follow every thread guide on your machine. Make sure the thread sits correctly in the tension discs.
Furthermore, raise the presser foot if your machine guide says to do that while threading. This helps the thread settle into the right path.
If the thread skips one guide, the machine may lose control of it. Then the extra thread can collect under the fabric and form a nest.
Helpful checks before you move on:
- Follow the full thread path
- Make sure no guide is missed
- Check that the thread is not twisted
- Rethread the machine if anything looks off
Step 2: Check the Upper Thread Tension
Tension is the pull on the top thread. It helps the top and bobbin threads meet in the middle of the fabric.
If the upper tension is too loose, too much top thread drops underneath. That is one of the most common causes of bird nesting.
So, test the tension before running a full design. Start with your machine’s normal setting. Then make small changes only if needed.
If stitches look loose on top or the underside shows extra thread, the tension may need adjustment. Do not make large changes all at once.
Step 3: Insert the Bobbin Correctly
The bobbin must sit the right way in the case. It also needs to unwind in the correct direction for your machine model.
Use the right bobbin type for your machine. A bobbin that does not fit well can cause rough thread flow and quick tangles.
Also, check how the bobbin is wound. If the thread is uneven, too loose, or messy on the spool, replace it.
If bird nesting starts near the beginning of a design, the bobbin is one of the first things to inspect.
Step 4: Choose the Right Needle
A good needle helps the thread move through the fabric cleanly. A bad needle can make the thread drag, catch, or break.
Change the needle often. Do not keep using a bent or dull one. Pick a size that matches your fabric and thread.
For example, thick thread needs more room than fine thread. Heavy fabric may also need a stronger needle than light fabric.
If you hear popping sounds, see skipped stitches, or notice thread breaks, replace the needle before you continue.
Step 5: Use a Good Thread
Thread quality plays a big role in clean embroidery. Cheap thread may fray, snap, or shed lint too fast.
Old thread can also cause trouble. It may look fine on the spool, but weak thread often twists or breaks while stitching.
So, use smooth, strong embroidery thread from a trusted source. Store the thread in a clean, dry place to protect it from dust and heat.
If the thread keeps breaking for no clear reason, try a fresh spool before changing other settings.
Step 6: Pick the Right Stabilizer
A stabilizer is the backing that supports the fabric during embroidery. It helps keep the fabric steady while the needle moves.
If the stabilizer is too weak, the fabric may shift or stretch. Then the stitches cannot lock in the right place, and the thread may bunch up underneath.
So, choose the right stabilizer based on the fabric type. Soft or stretchy fabric usually needs stronger support than firm woven fabric.
If the fabric moves when you touch it in the hoop, you may need better backing or an extra layer of support.
Step 7: Hoop the Fabric Firmly

Hooping keeps the fabric and stabilizer in place. The fabric should feel firm in the hoop but not stretched too hard.
If the fabric is loose, it may bounce during stitching. If it slips, the stitches can shift, and the thread may tangle below.
So, smooth the fabric before hooping. Make sure the stabilizer sits flat. Then tighten the hoop evenly.
If one side looks tighter than the other, rehoop the fabric before you start the design.
Step 8: Slow the Machine When Needed
High speed can make small problems worse. A machine may stitch well on one fabric at medium speed but struggle on another at full speed.
Delicate fabric, thick materials, and dense designs often stitch better at a slower speed. Slowing down gives the thread more control.
If bird nesting happens again and again, reduce the speed and test the design on scrap fabric. This simple step often helps.
Step 9: Clean the Machine Regularly
Lint and dust build up fast in embroidery machines. They often collect near the bobbin case, hook area, and needle plate.
That buildup can block smooth thread movement. Then the thread may catch and start forming knots.
So, clean your machine often. Remove loose lint with a small brush. Follow your machine manual for safe cleaning and oiling.
If you use lint-heavy thread or stitch every day, clean the bobbin area more often.
Step 10: Test Before Running the Final Design
A quick test can save a full project. Use scrap fabric that matches the real fabric as closely as possible.
Then test the needle, thread, stabilizer, and design together. Watch the first stitches closely.
If you see loose loops, puckering, or thread buildup, stop right away. Fix the issue before you begin the real piece.
Troubleshooting Tips Before You Press Start
Use this quick check to prevent problems early.
- Rethread the top thread if anything feels uncertain
- Replace the bobbin if it looks uneven
- Change the needle if it is old or bent
- Rehoop the fabric if it feels loose
- Slow the speed for tricky materials
- Clean lint from the bobbin area
- Test on scrap fabric before final stitching
Step 11: Use a Clean, Machine-Friendly Design File
Even a well-set machine can struggle with a poor design file. Bad digitizing can create too much stitch density, weak underlay, or rough stitch paths.
That extra stress can pull the fabric, overload the thread, and raise the chance of bird nesting.
So, use well-digitized embroidery files made for your fabric and stitch type. Clean digitizing helps the machine run with less strain and gives you smoother results.
For even smoother results, quality digitizing also makes a real difference. A clean file from Absolute Digitizing can help your machine run better and reduce stitch problems before they begin.

Prevention Guide at a Glance
| Step | What to do | If a problem shows up |
|---|---|---|
| Threading | Follow every guide and seat thread correctly | Rethread the whole path |
| Tension | Keep upper tension balanced | Make small adjustments only |
| Bobbin | Insert the right bobbin the right way | Replace uneven or wrong bobbin |
| Needle | Use a fresh needle that fits the fabric and thread | Replace the uneven or wrong bobbin |
| Thread | Use a slower speed for tricky jobs | Try a fresh spool |
| Stabilizer | Match the backing to the fabric | Add stronger support if the fabric shifts |
| Hooping | Hoop fabric firmly and evenly | Rehoop if the fabric is loose |
| Speed | Use slower speed for tricky jobs | Reduce speed and retest |
| Maintenance | Clean lint and dust often | Brush out the bobbin area and check the manual |
| Test stitch | Run a sample before the final piece | Stop early and fix the issue |
| Design file | Use quality digitizing | Switch to a cleaner file |
You can also watch this short and helpful video to learn the correct threading method and how to prevent bird nesting issues.
Final Thought
Bird nesting in embroidery can look frustrating, but it does not have to ruin your project. In this blog, we explained what bird nesting means, what causes it, and how to prevent it with better threading, tension, bobbin setup, stabilizer support, and machine care.
A thread nest may slow you down, but it does not have to ruin your embroidery. With the right steps, you can get back to clean stitching. Contact Absolute Digitizing for reliable digitizing solutions that support better embroidery every time.
FAQs
Birdnesting in embroidery is when thread gathers under the fabric in a tangled knot. It usually happens when the thread does not move through the machine the right way.
Birdnesting often occurs due to loose upper tension, incorrect threading, bobbin problems, a damaged needle, a poor stabilizer, or lint inside the machine.
Check the threading, upper tension, bobbin placement, needle condition, and stabilizer. Also, clean the bobbin area and test the design before starting the full job.
Yes, bad digitizing can cause birdnesting. A design with too much stitch density or poor stitch settings can put extra stress on the thread and fabric.
No, not always. In many cases, birdnesting can be fixed if you stop the machine early, remove the tangled thread carefully, and correct the setup problem.