
| Quick Summary |
|---|
Needle breakage usually points to a setup, material, design, or machine problem.
|
Your embroidery machine starts stitching normally, but suddenly the needle snaps. You replace it, restart the design, and another needle breaks. Repeated breakage can waste thread, damage fabric, and slow down your work.
However, the needle itself is not always the problem. A bent or incorrect needle, poor threading, tight tension, thread snags, weak stabilization, loose hooping, dense embroidery files, bird-nesting, or the wrong needle for the fabric can all cause trouble. Machine alignment, the presser foot, needle plate, or damaged machine parts can also cause breaks.
Needle breaks linked to the design often point to poor stitch planning. A well-prepared stitch file can make a real difference, and an expert embroidery digitizer helps create cleaner paths with fewer problem areas.

- Why Does an Embroidery Needle Keep Breaking?
- What Are the Most Common Causes of Embroidery Needle Breakage?
- Is the Needle Bent, Dull, Damaged, or Installed Incorrectly?
- Are You Using the Right Needle for the Fabric and Thread?
- Can Thread Tension or Incorrect Threading Break an Embroidery Needle?
- Why Does My Needle Keep Breaking at the Same Spot in the Design?
- Can Poor Hooping or Stabilization Cause Needle Breaks?
- Why Is My Embroidery Needle Hitting the Presser Foot or Needle Plate?
- Why Do Bird Nesting and Thread Bunching Cause Broken Needles?
Why Does an Embroidery Needle Keep Breaking?
An embroidery needle often breaks because the needle, thread, fabric, design, or machine setup creates too much stress during stitching.
Common causes include:
- A bent, dull, or incorrect needle
- Improper needle installation
- Tight or snagged upper thread
- Poor stabilization or fabric movement
- Dense or overlapping stitches
- Bird-nesting under the fabric
- Needle strikes on the foot or plate
However, repeated breaks after these checks may point to a machine alignment problem.
What Are the Most Common Causes of Embroidery Needle Breakage?
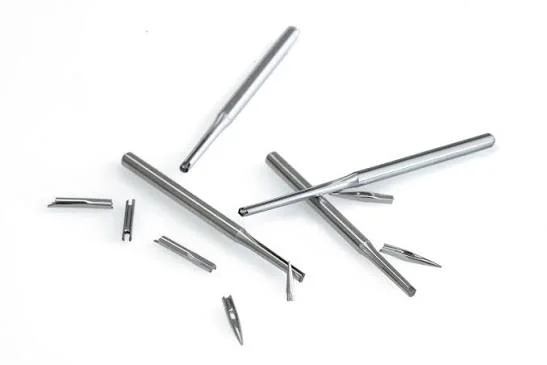
Repeated needle breaks often give clues about the real problem. Instead of replacing the needle again, check what happens right before it breaks.
| What You Notice | Possible Cause | First Thing to Check |
|---|---|---|
| Needle breaks soon after starting | Incorrect needle installation | Needle position and clamp |
| Needle bends before breaking | Needle deflection or fabric movement | Needle size, stabilizer, and hooping |
| Breaks at the same design area | Dense or overlapping stitches | Embroidery file |
| Thread and needle both break | Thread snag or excess tension | Upper threading and spool |
| Thread nests underneath | Threading or bobbin problem | Rethread and inspect bobbin area |
| Needle hits metal | Foot, plate, hoop, or alignment issue | Stop the machine and inspect |
| Breaks on thick areas | Wrong needle or too many stitch layers | Needle size and design |
| Random repeated breaks | Damaged parts or machine timing | Machine inspection |
What Does the Breakage Pattern Tell You?
Where and when the needle breaks can narrow down the cause. For example, repeated failure at one point in a design can suggest excessive density, overlapping stitches, or too many layers in that area.
Meanwhile, a needle that bends before snapping may point to fabric movement, weak stabilization, the wrong needle size, or needle deflection.
Can More Than One Problem Cause Needle Breakage?
Yes. Several issues can happen at the same time. Tight thread tension, poor hooping, and a dense embroidery design may all increase stress on the needle.
Therefore, avoid changing several settings at once. Check one likely cause, test the machine, and then move to the next issue if the problem continues.
Is the Needle Bent, Dull, Damaged, or Installed Incorrectly?

A damaged or poorly installed needle can break even when the rest of the setup looks correct. Even a slight bend can affect how the needle enters the fabric.
Check the Needle Condition
Replace the needle if you notice:
- A visible bend
- A blunt or worn point
- Damage near the eye or shaft
- Marks from hitting the hoop, foot, or needle plate
Also, a needle can look straight but still have a small bend. If it has already struck something, replace it instead of using it again.
Check How the Needle Is Installed
Make sure the needle:
- Sits fully inside the needle clamp
- Faces the direction required by the machine
- Stays secure after tightening the clamp screw
However, needle orientation can vary by needle system. Many home machines use one position, while some commercial systems differ. For this reason, always follow your machine manual instead of assuming the flat side should face the same direction on every machine.
Are You Using the Right Needle for the Fabric and Thread?
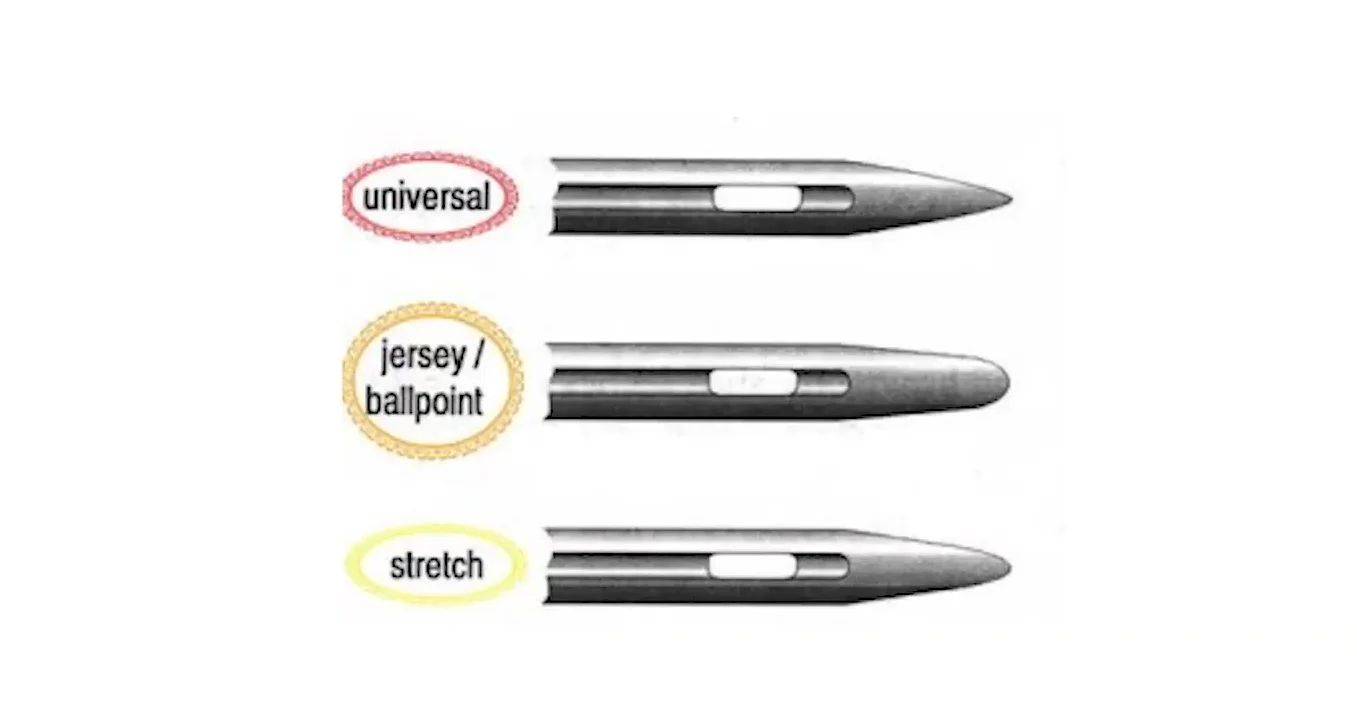
The wrong needle can flex or stress the thread. Matching it to the embroidery fabric and thread helps reduce breakage and supports cleaner stitching.
Needle Size
A needle that is too fine may bend or deflect in heavy or layered material. However, an oversized needle can damage lighter fabrics.
Needle Point
Choose a point that suits the material:
- Woven fabrics need a point that enters the fabric cleanly.
- Knits and stretch fabrics often need a rounded or ballpoint-style needle.
- Dense or specialty materials may need a stronger needle.
Thread-to-Needle Match
The thread must move freely through the needle eye. If the needle eye is too small, extra friction can cause thread breaks during embroidery or make the thread fray.
Therefore, match needle size, point, and eye to both the fabric and thread before stitching.
Can Thread Tension or Incorrect Threading Break an Embroidery Needle?
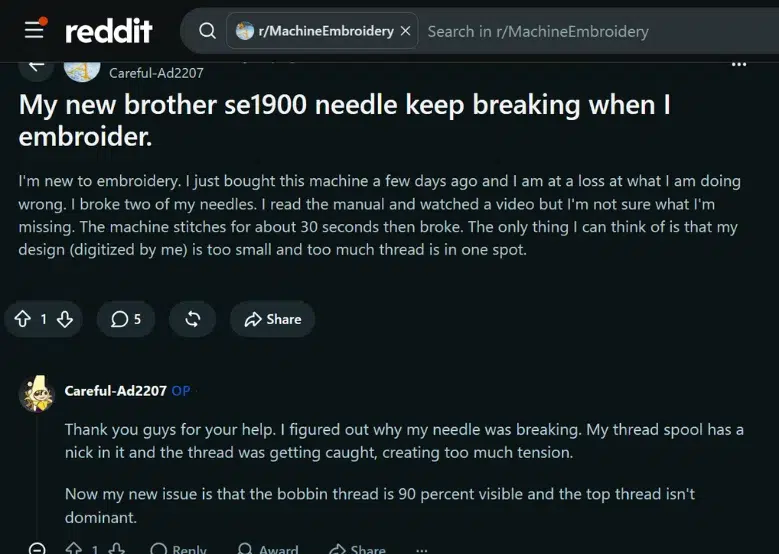
Yes. Embroidery threads that cannot move freely can pull hard on the needle and increase the risk of bending or breaking. One embroiderer on Reddit traced repeated needle breaks to a nick in the thread spool that caught the thread and suddenly increased tension. Tight upper tension and incorrect threading are common causes.
Check the Upper Thread Path
Before stitching again, look for:
- Upper tension set too tight
- A missed thread guide
- Knots or tangled thread
- Thread wrapped around the spool pin
- A spool that cannot unwind smoothly
- Thread caught anywhere along the path
Even a small snag matters.
Check the Bobbin
Also, make sure the bobbin sits correctly in its case and the thread follows the proper path. If either upper or bobbin threading looks wrong, rethread the machine before testing again.
Why Does My Needle Keep Breaking at the Same Spot in the Design?
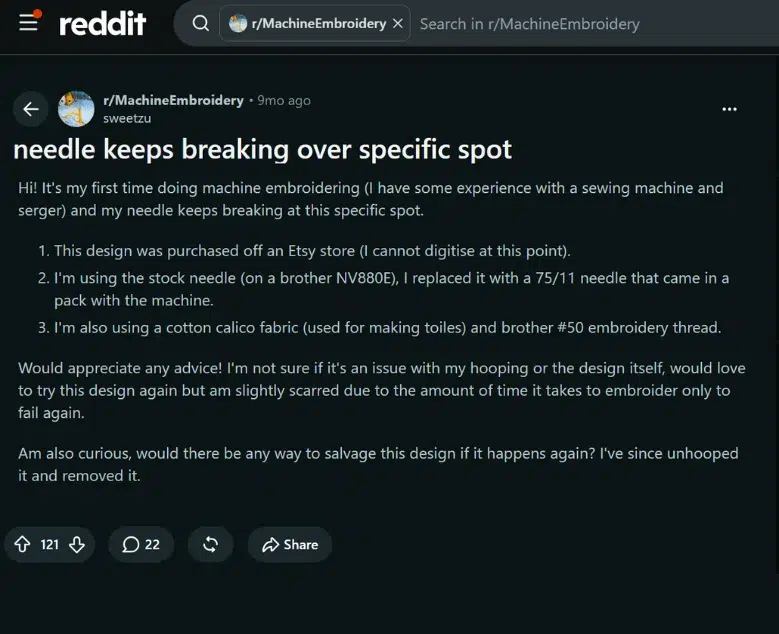
Many embroiderers report the same clue in real projects. One Reddit user had repeated breaks at one exact spot, and other users pointed to dense embroidery stitches in that area.
When a needle breaks at the same point again and again, the embroidery file deserves a closer look. This is especially true if other designs stitch normally on the same fabric and machine.
Check the Problem Area
Watch for a pattern such as:
- Too many stitches packed into a small space
- Overlapping fill sections
- Excessive underlay
- Several stitched layers crossing each other
- Very short stitches
- Unnecessary repeated needle penetrations
These conditions can make one area too dense for smooth needle movement.
If the file needs correction, send it to Absolute Digitizing for a cleaner stitch plan with balanced density, layering, and stitch flow.
Can Poor Hooping or Stabilization Cause Needle Breaks?
Yes. Poor hooping and weak stabilization can let the fabric move too much during stitching. This movement can cause needle deflection and increase the chance of a break.
Watch for Fabric Movement
A common problem is flagging. This happens when the fabric lifts with the needle instead of staying flat. As a result, the needle can bend slightly and miss its normal entry point on the next stitch.
Check for:
- Fabric shifting inside the hoop
- Weak or incorrect stabilizer
- Stretchy fabric bouncing during stitching
- Thick seams or bulky garment areas
- Fabric that lacks proper support
However, avoid stretching every fabric as tight as possible. Some materials can distort. Keep the fabric secure, flat, and properly stabilized so the needle can enter cleanly and consistently.
Why Is My Embroidery Needle Hitting the Presser Foot or Needle Plate?
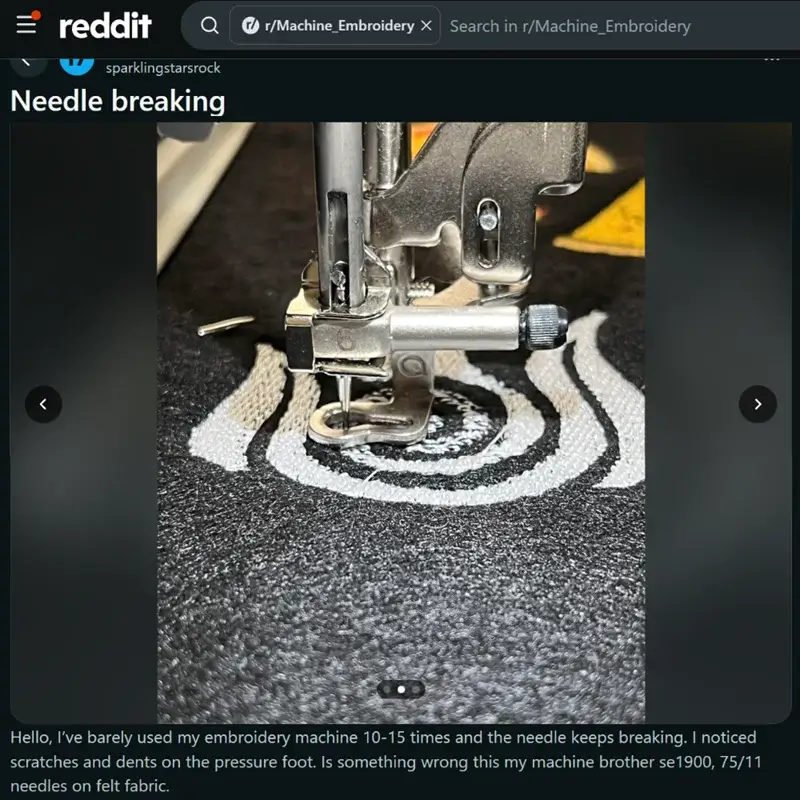
An embroiderer on Reddit reported repeated needle breaks and visible marks on the embroidery foot. After adjusting the foot position, the problem stopped. This is a useful clue because repeated metal strikes are not normal needle wear.
Check the Needle Area
If the needle hits metal, stop the machine and inspect:
- Needle installation and position
- Embroidery foot attachment
- Burrs around the foot opening
- Scratches near the needle plate
- Hoop or frame clearance
- Bobbin-case installation
Damage around the foot, plate, or bobbin area can push the needle off its normal path. Machine misalignment can also cause repeated strikes.
Therefore, do not keep stitching if the needle continues hitting metal. If proper setup does not solve the problem, have the machine inspected before running another design.
Why Do Bird Nesting and Thread Bunching Cause Broken Needles?
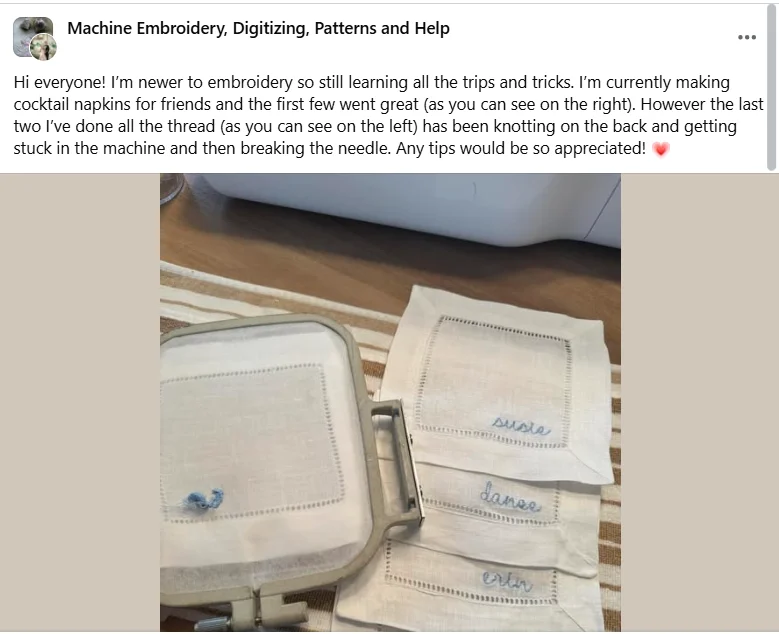
Bird nesting happens when loose thread collects underneath the fabric, often because of incorrect threading or tension. As the thread mass grows near the bobbin area, the fabric may stop moving smoothly.
The needle can then enter the tangled thread instead of passing cleanly through the fabric. This extra resistance can bend the needle or cause it to snap.
What Should You Do?
If the thread starts bunching underneath:
- Stop the machine immediately
- Remove the tangled thread carefully
- Inspect and clean the bobbin area
- Check that the bobbin sits correctly
- Rethread the upper thread completely
- Install a fresh needle before restarting
Also, avoid pulling the fabric or forcing the machine forward. Fix the threading or tension problem before continuing the design.
Can Embroidery Speed Cause a Needle to Break?
Yes, but speed usually makes an existing problem worse rather than causing breakage by itself. High stitching speeds increase needle stress, friction, heat, and vibration.
When Should You Slow Down?
Reduce speed when stitching:
- Dense design areas
- Thick seams
- Several fabric layers
- Bulky or specialty materials
These areas place more resistance on the needle and can increase deflection or wear.
However, slowing the machine should not hide the real problem. Poor digitizing, the wrong needle, unstable hooping, or machine misalignment still need correction.
Use a slower speed for difficult sections, then fix the underlying cause if breakage continues.
What Should You Do Immediately After an Embroidery Needle Breaks?
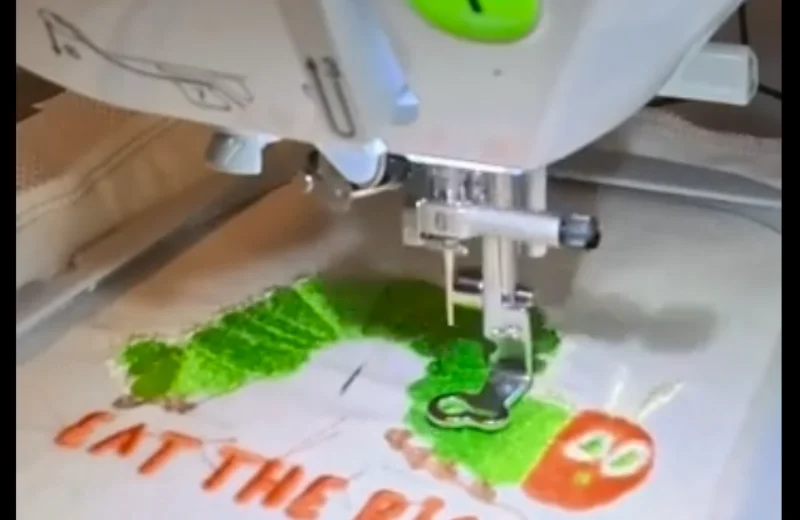
Do not press Start again right away. A broken needle can leave sharp fragments behind, and the original problem may still be present.
Follow These Steps
- Stop the machine.
- Turn it off before reaching near moving parts.
- Remove all visible needle pieces.
- Inspect the presser foot and needle plate.
- Check the bobbin area for fragments or tangled thread.
- Install a fresh, correct needle.
- Rethread the machine completely.
- Move back a few stitches if your machine allows it.
- Test slowly before continuing.
Meanwhile, check why the needle broke. Replacing it without fixing the cause can lead to another break.
When Does Repeated Needle Breakage Mean the Machine Needs Service?
If basic setup checks do not stop the problem, the machine itself may need inspection. Repeated breaks across different designs, fabrics, and fresh needles can point to a mechanical issue.
Signs You May Need Service
Watch for:
- Needle strikes metal with correct setup
- Several new needles break
- Needle sits visibly off-center
- Repeated hook-area contact
- Grinding or knocking sounds
- A damaged needle plate or hook
- Breakage across different designs
- Possible timing or alignment problems
However, avoid adjusting machine timing, hook position, or other internal parts unless your manual gives a safe user procedure.
If these signs continue, professional service is the safer choice and can prevent further machine damage.
How Can You Prevent Embroidery Needles From Breaking?
Good setup and regular checks can prevent many needle problems before they interrupt a stitch-out.
Prevention Checklist
- Start with a fresh, correct needle
- Install it fully and tighten it securely
- Match the needle to the fabric and thread
- Rethread if anything looks unusual
- Check the spool for snags or rough edges
- Stabilize and hoop the fabric correctly
- Keep the bobbin area clean
- Test unfamiliar designs before production
- Watch dense or layered stitch areas
- Slow difficult sections when needed
- Stop immediately after any needle strike
However, if the needle fails at the same design point while other files stitch normally, inspect the embroidery file instead of repeatedly replacing the needle.
Final Thoughts
Repeated needle breakage can come from a damaged needle, poor threading, tight tension, weak stabilization, fabric movement, dense stitching, or machine alignment issues. The pattern often gives the best clue, especially when breaks happen at the same point in a design.
Therefore, check the needle, thread path, hooping, bobbin area, and stitch file before restarting.
If the embroidery file is the problem, contact Absolute Digitizing for professional embroidery digitizing and get a free quote for a cleaner, production-ready design.
FAQs
If the needle breaks at the same point while other designs stitch normally, inspect the embroidery file. Too much stitch density, overlapping fills, excessive underlay, or several stitched layers in one area can put extra stress on the needle.
Yes. Upper tension that is too tight can pull heavily on the needle. Thread that catches on the spool, misses a guide, or tangles along the thread path can also create sudden tension and lead to breakage.
Thick fabric, seams, and multiple layers create more resistance. A needle that is too fine may flex or deflect under this pressure. Match the needle to the fabric, stabilize the material correctly, and slow difficult areas when needed.
Yes. Bird-nesting creates a mass of tangled thread under the fabric. The buildup can stop smooth fabric movement and push the needle off its normal path. Stop the machine, clear the tangled thread, check the bobbin area, and rethread before continuing.
If several fresh needles break, check more than the needle itself. Incorrect installation, thread snags, a damaged presser foot or needle plate, an improperly seated bobbin case, or machine alignment can cause repeated breaks. If the problem continues across different designs and fabrics, have the machine inspected.