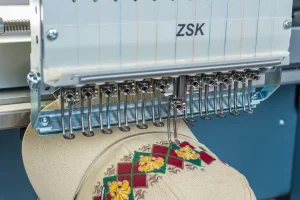
Cap embroidery is everywhere, from baseball teams and sportswear to branded uniforms and promotional caps. It adds a bold and professional touch to headwear and instantly grabs attention. But here is the catch. Digitizing a logo for caps is not the same as digitizing for flat garments like t-shirts or jackets. Why? Because caps have a curved and structured front panel that behaves very differently during stitching. If you do not follow specific rules, your design may shift, pucker, or end up misaligned. That is why this blog exists. Whether you are a beginner or just want to understand the basics better, this is your clear and step by step guide to properly digitize a logo for cap embroidery the right way.
Understanding Cap Embroidery Requirements

Small and Limited Design Area
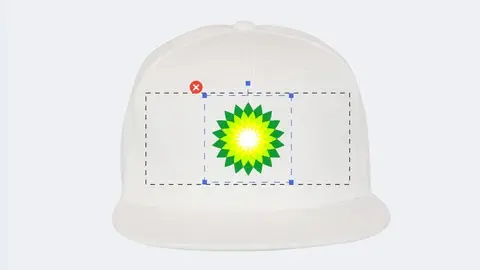
The embroidery area on most caps is quite small, usually around 2 to 2.5 inches in height. This space is typically centered on the front panel of the cap. Because of this limited area, detailed or intricate logos often need to be simplified to ensure they stitch cleanly and remain legible.
Curved and Structured Surface
Unlike flat fabrics such as t shirts or hoodies, caps have a stiff and curved front surface. This structure creates natural tension, which can cause problems during stitching. If not digitized correctly, the design may shift, stretch, or distort as the needle moves across the curved fabric.
Common Stitching Challenges
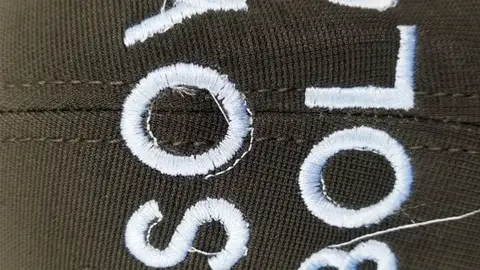
Cap embroidery commonly faces issues like puckering, misalignment, and distortion. These problems are especially noticeable when the design includes small text or dense fills. However, with proper digitizing techniques, these issues can be avoided.
Why Special Rules Apply
Because of the cap’s shape and tension during embroidery, you cannot use the same digitizing method as you would for flat garments. Specific rules, such as stitch direction and design sequencing, are essential for achieving clean and professional results on caps.
Choosing Stitch Types for Each Element

Selecting the right stitch type for each part of your design is key to achieving clean and professional cap embroidery. Each stitch type serves a specific purpose, and using them correctly ensures that your design holds its shape and stitches smoothly on the curved surface of a cap.
Satin Stitch for Letters and Borders
Satin stitch is ideal for text and borders, especially when dealing with small to medium-sized letters. It gives a clean, raised look and works well for most cap logos.
Fill Stitch for Large Areas
When you have large solid shapes or backgrounds, use fill stitches. They cover space efficiently and allow for pattern variation to add texture and reduce bulk.
Run Stitch for Outlines and Details
Run stitches are perfect for outlining shapes or adding fine details. They are thin and light, helping to define edges without adding too much thread buildup.
Underlay Is Essential
Always apply underlay stitches beneath your top layers. Underlay helps stabilize the cap fabric, holds the shape of the design, and prevents shifting during embroidery.
Control Stitch Density
High density can cause thread bunching, especially on stiff cap fabric. Adjust density carefully to balance coverage with smooth stitching.
Adjusting for Push and Pull Compensation
Understand Fabric Movement
Cap fabric shifts more under needle pressure than flat fabrics like t shirts. The curved and stiff structure of a cap creates added tension, which affects how the stitches land. Without proper compensation, the design may come out distorted or off balance.
Add Width to Narrow Areas
Pull compensation helps maintain the correct shape of narrow columns and small letters. Slightly increasing their width during digitizing ensures that they do not shrink or collapse during stitching. This is especially important for satin stitches.
Use Software Settings and Test Runs
Most digitizing software includes push and pull compensation tools. These settings should be fine tuned based on the fabric type and design complexity. Always run a test sew on a sample cap or similar fabric, and use the results to adjust your compensation settings. This step helps catch potential issues before full production.
Adding Proper Underlay and Lock Stitches
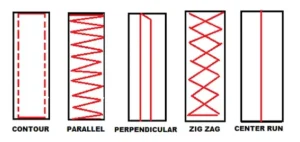
Underlay stitches provide a stable base, which is crucial for cap embroidery. Use a zigzag or edge walk underlay for large areas to add strength and smooth the surface. For satin columns, a center run underlay works best to keep them stable during stitching.
Also, add lock stitches at the start and end of each section. These prevent threads from unraveling due to machine movement or wear. Proper underlay and lock stitches help ensure clean, durable, and professional embroidery results on caps.
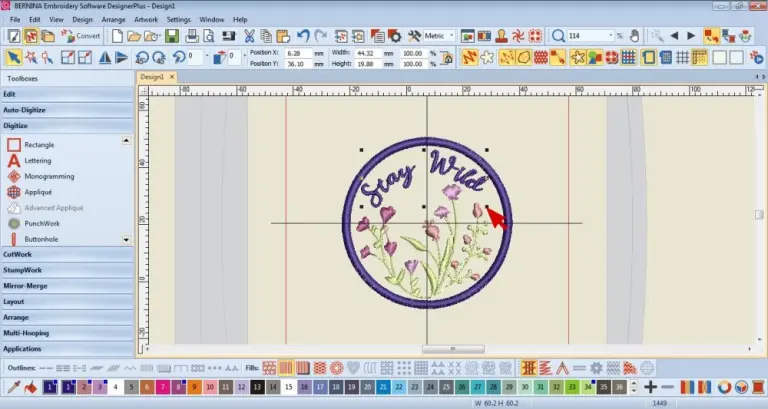
Previewing and Exporting the Design
Before sending your design to the machine, always preview and simulate it in your digitizing software. Zoom in, rotate the view, and check that the stitching sequence follows the center out and bottom up rule. Look closely for unnecessary jumps, trims, or overlaps that could affect stitch quality.
Once everything looks correct, export the file in the right embroidery machine format such as DST or your machine’s specific type. Make sure the design is properly centered in the hoop and that you have selected a cap-specific frame. Finally, transfer the file to your embroidery machine using a USB drive, cable, or memory card. This final check and export step ensures smooth stitching and accurate results on the cap.
Test Sew and Final Adjustments
Do a quick test sew on a real cap or similar fabric. Look for distortion, spacing issues, or tight stitches.
If needed, adjust pull compensation, density, or stitch path. Run one final test to confirm the design is ready for production.