Whether you’re running a small business, launching a clothing brand, or personalizing uniforms, one thing is clear—logos need to look perfect on embroidery. And that means converting your logo into a special file format that embroidery machines can understand. Unlike printing, you can’t just upload a JPG or PNG and hit “start.” The artwork has to be digitized—turned into stitch commands that tell the machine how to sew every detail.

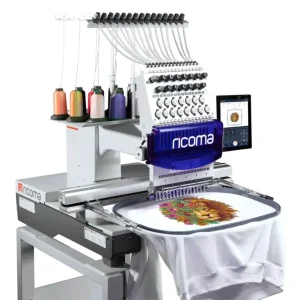
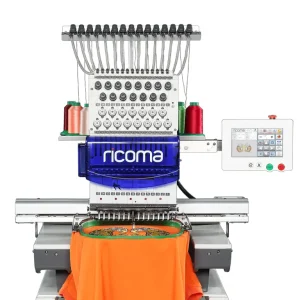
Ricoma Embroidery Machine

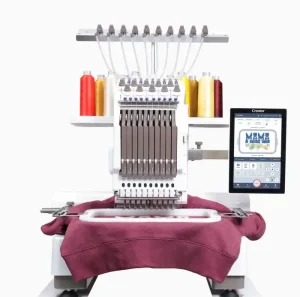
One of the most popular choices for embroidery today is the Ricoma embroidery machine. Known for its ease of use, reliability, and compatibility with both beginners and professional embroiderers, Ricoma machines are widely used around the world. But if you want flawless results, you need to feed it the right kind of file, typically in DST or DSB format.

In this blog, we’ll walk you through the complete process of converting a logo into a Ricoma-compatible embroidery file. From preparing the artwork and using digitizing software to exporting the correct format and testing it on your machine, we’ll cover everything you need to know—whether you’re doing it yourself or getting help from a professional digitizing service.

Let’s get started!

Understanding Ricoma Embroidery Machines

Ricoma Machine

Why Ricoma Is a Popular Choice

Ricoma embroidery machines are widely trusted by both beginners and professionals. They’re known for being user-friendly, cost-effective, and versatile, handling everything from flat garments to hats, bags, and thicker fabrics. Whether you’re running a small business or scaling up production, Ricoma offers models that suit different embroidery needs.

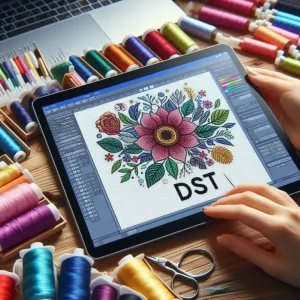
Supported File Formats: DST and DSB

DST & DSB

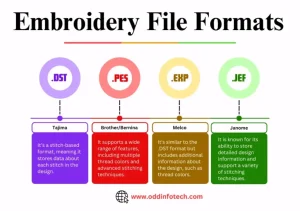
To function properly, Ricoma machines rely on specific embroidery file formats. The most common are DST (used across many brands) and DSB, which is particularly compatible with Chroma—Ricoma’s official digitizing software. Chroma Inspire, Plus, and Luxe support both formats, but DST is more universal and often preferred for sharing files between different machines.

Why File Format Matters

Embroidery File Format

Using the correct file format ensures your machine runs smoothly. If the file is not digitized properly or saved in an incompatible format, it can lead to issues like misaligned stitches, thread breaks, or even damage to your fabric. Choosing the right format, typically DST or DSB, is the foundation for high-quality embroidery on Ricoma machines.

Step 1: Prepare the Logo Artwork

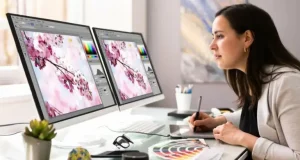
Before you begin the digitizing process, it’s important to have a clean, high-quality logo file. The better your artwork, the better your final embroidery will look.

Use a High-Resolution Image

Twitter Artwork


Start with a high-resolution logo in formats like PNG, JPG, or SVG. Avoid blurry or pixelated images, as they make it difficult to trace clean lines and shapes during digitizing. If available, a vector file (SVG, AI, or EPS) is ideal because it maintains sharpness no matter how much you zoom in.

Simplify the Design

Simplify the Design

Embroidery machines have limits, so overly detailed logos don’t always stitch well. Remove gradients, 3D effects, tiny text, and very thin lines. These may look great on screens but won’t translate cleanly into stitches, especially on smaller designs like chest logos or caps.

Separate the Colors

If your logo uses multiple colors, make sure they’re clearly separated in the design. This helps the digitizing software assign the correct thread color to each section and prevents color bleeding during stitching.

Convert Text to Outlines

Any text in your logo should be converted to outlines or curves (especially if you’re using design software like Adobe Illustrator or CorelDRAW). This ensures the text doesn’t get replaced or distorted due to missing fonts during the digitizing process.

A clean, simplified, and well-prepared logo makes digitizing faster and more accurate—laying the foundation for flawless embroidery.

Step 2: Use Digitizing Software

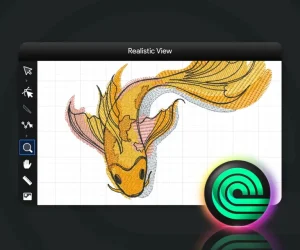
Hatch by Wilcom

Once your logo artwork is ready, the next step is to convert it into an embroidery file using digitizing software. Ricoma provides its own software suite called Chroma, available in three versions: Inspire, Plus, and Luxe. These programs are designed specifically for Ricoma machines and support both DST and DSB formats.

Chroma vs Other Software

Chroma vs Other Software


Chroma is a solid choice for beginners thanks to its user-friendly interface and built-in tutorials. Compared to industry giants like Wilcom and Hatch, Chroma is more affordable and easier to learn. However, Wilcom offers more advanced customization options for professionals working on highly detailed projects.

Manual vs Auto-Digitizing

Manual Digitizing

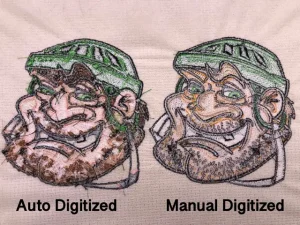
Chroma allows both manual and auto-digitizing. Auto-digitizing is quicker and ideal for simple designs, but it may not handle complex elements well. Manual digitizing takes more time but gives you complete control over stitch direction, type, and density—ensuring higher quality output.

How to Digitize in Chroma

  1. Import the logo artwork (PNG, JPG, SVG, etc.).

  2. Assign stitch types like satin for borders, fill for larger areas, and run stitch for fine details.

  3. Adjust stitch density, underlay, and pull compensation to avoid puckering or distortion.

  4. Set the correct hoop size and design dimensions to match your garment and machine.

Digitizing is where the real magic happens. Done right, it turns a static logo into a dynamic, stitch-ready masterpiece.

Step 3: Exporting to Ricoma-Compatible Format

After digitizing your logo, the next step is to export the design in a format Ricoma machines can read. Most Ricoma models accept files in DST (Tajima format) or DSB (Barudan format), depending on the machine and software version you’re using.

Choose the Right Format

If you’re using Chroma software, you can export in both DST and DSB formats. DST is more widely used and compatible with almost all Ricoma machines, while DSB may offer smoother integration with certain Chroma settings. When in doubt, DST is the safest bet.

Save and Transfer the File

Once exported, you can save the file to a USB drive and plug it directly into your Ricoma machine. Some newer models also support network transfer, allowing you to send files directly from your computer to the machine.

Check Export Settings

Before exporting, double-check your settings:

  • Make sure the design size matches your hoop

  • Verify color stops and thread changes are correctly set

  • Use a meaningful file name (avoid spaces or special characters)

A correctly exported file ensures smooth operation and perfect stitching right from the start.

Step 4: Test the Design on Your Ricoma Machine

ricoma

Once your logo is exported in the correct format, it’s time to test it on your Ricoma embroidery machine. This step helps you catch any problems before running the design on final garments or customer orders.

Load the File

Insert the USB drive into your Ricoma machine or transfer the file via network if your model supports it. Select the design from the machine’s interface and double-check the hoop size, color sequence, and placement before starting.

Run a Trial Stitch

Always do a test run on scrap fabric similar to your final material. This allows you to see how the design behaves in real conditions—without risking your actual product.

Watch for Common Issues

Keep an eye out for:

  • Thread breaks

  • Misaligned stitches

  • Puckering or distortion

  • Incorrect color changes

These problems usually point to issues in the digitizing process, such as wrong stitch type, poor density, or missing underlay.

Make Adjustments if Needed

If you notice flaws, go back to your digitizing software, make the necessary edits, and export the file again. Testing helps ensure your final result looks clean, professional, and ready for production.

Mistakes to Avoid When Converting Logos

Mistakes to Avoid When Converting Logos

Even experienced users can run into problems when converting logos for embroidery. Here are some common mistakes to avoid to ensure a smooth process and high-quality results.

Relying on Auto-Digitizing Without Review

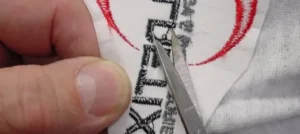
Auto-digitizing can save time, but it often misses important details. Always review and adjust the stitch types, direction, and density to avoid messy or uneven embroidery.

Adding Too Much Detail in Small Areas

Embroidery has physical limitations. Small text, thin lines, or intricate shading won’t show up well—especially on small logos like chest or cap designs. Simplify complex elements before digitizing.

Choosing the Wrong File Format

Uploading a logo in JPG or PNG format directly to the machine won’t work. Embroidery machines require digitized files like DST or DSB. Skipping this step can halt production or damage materials.

Ignoring Thread and Backing Requirements

Different fabrics and threads react differently. Not matching thread colors or using improper stabilizers (backing) can cause puckering, thread breaks, or poor alignment.

Avoiding these common errors helps you save time, reduce waste, and produce clean, professional embroidery with your Ricoma machine.

Why Use a Professional Digitizing Service

Professional Digitizing Service

While it’s possible to digitize a logo yourself, using an embroidery digitizing service can save you a lot of time and headaches. Experts know how to choose the right stitch types, densities, underlay, and compensation settings to ensure your design runs smoothly on a Ricoma machine without thread breaks or distortion.

Companies like Absolute Digitizing offer high-quality digitized files starting at just $10, making it an affordable option even for small businesses or individuals. They also provide same-day delivery, unlimited free edits until you’re satisfied, and 24/7 live chat support—so you’re never stuck waiting if something needs fixing.

If you’re new to embroidery or need consistent, professional results, outsourcing the digitizing is often the smartest and most efficient choice.

Conclusion

Conclusion

Converting a logo to a Ricoma-compatible embroidery file isn’t just about uploading an image—it’s about digitizing it correctly using the right tools, formats, and settings. Whether you’re using Chroma software or another digitizer, proper conversion ensures smooth stitching, accurate colors, and professional-quality results every time.

If you enjoy learning and want to explore the process, give it a try yourself. But if you’re short on time or need flawless results, using a professional digitizing service is the way to go.

Need your logo converted fast? Get a perfectly digitized DST file starting at just $10 at Absolute Digitizing . We offer free unlimited edits, 2-hour delivery, and 24/7 expert support to make the process easy and stress-free. Get your instant free quote now and bring your design to life!