Logos are the face of any brand. Whether stitched on uniforms, promotional caps, tote bags, or corporate giveaways, embroidered logos create a polished and professional impression that printed designs often can’t match. For businesses, embroidery strengthens brand identity, while for individuals, it adds a personal, lasting touch to clothing and accessories.
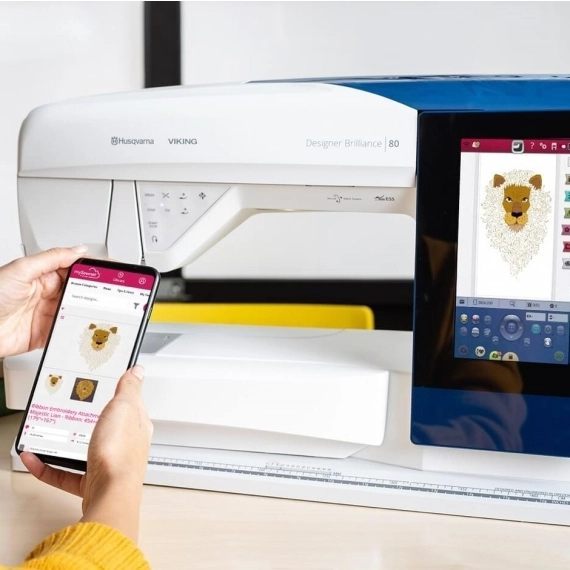
Among embroidery enthusiasts and professionals, Husqvarna Viking machines are a trusted choice thanks to their precision, advanced features, and wide availability of design formats. These machines have a long-standing reputation for delivering high-quality embroidery results, making them a favorite in both homes and embroidery shops.
But here’s the catch: most logos are originally created in image or vector formats like JPG, PNG, AI, or PDF. While these work perfectly for websites or printing, they can’t be read by embroidery machines. Husqvarna Viking machines require specialized embroidery file formats such as VP3, HUS, or VIP and other common formats like DST and PES.
This blog will walk you through exactly how to take a standard logo and turn it into a Husqvarna Viking, ready embroidery file. From understanding the file types to step-by-step digitizing methods and outsourcing options, you’ll learn everything needed to bring your logo to life in stitches.
Understanding Husqvarna Viking File Formats

The File Types Husqvarna Viking Uses
Husqvarna Viking machines work with specialized embroidery file formats such as VP3, HUS, and VIP. These files are not like standard images; they contain detailed stitch data that directs the machine on how to sew the design. Every stitch’s placement, angle, density, and sequence is encoded into these formats, making them essential for proper embroidery.
Image Files vs. Embroidery Files
Most logos you receive or design are in formats like JPG, PNG, AI, or PDF. These are great for printing, websites, or social media, but they lack the critical information an embroidery machine needs. Image files only describe visuals, shapes, colors, and outlines, while embroidery files provide actual needle paths and stitch commands. If you try uploading a standard image directly to a Husqvarna Viking machine, it simply won’t work.
Why Conversion Is Necessary
Since image files can’t communicate with the machine, they must be translated into a format the machine understands. This process is called embroidery digitizing. Using digitizing software, a logo is re-created in stitches, with the program specifying the stitch types, direction, underlay, and density. Once saved as a VP3, HUS, or VIP file, the design is fully compatible with Husqvarna Viking embroidery machines and ready to be stitched.
What is Embroidery Digitizing?
Definition of Embroidery Digitizing
Embroidery digitizing is the process of turning regular artwork, like a logo, illustration, or text—into a stitch-ready file that an embroidery machine can read. Instead of being made of pixels or vectors, a digitized file contains detailed stitch commands that guide the needle to create the design on fabric.
Role of Digitizing Software
This transformation is done using digitizing software, which acts as a bridge between the artwork and the embroidery machine. The software allows the digitizer to trace shapes, assign stitch types, and define exactly how the design should be sewn. Without this step, an embroidery machine like the Husqvarna Viking cannot interpret a simple image file.
Stitch Directions, Density, and Types
Logos don’t just need to “look right” visually; they must also sew well. Decisions such as the direction of stitches, the density of fill areas, and the choice of stitch type, whether satin for text, fill for larger shapes, or running stitch for outlines, affect both the appearance and durability of the final design.
Software Options for Husqvarna Viking Logo Conversion
Husqvarna’s Own Software
Husqvarna Viking provides its own solutions such as Premier+ 2 and mySewnet. These programs are designed specifically for Husqvarna machines, making them a reliable choice for creating compatible files like VP3 or HUS. They offer built-in editing tools, stitch simulations, and direct machine connectivity, which makes the process smooth for hobbyists and professionals alike.
Professional Digitizing Software
For advanced control, many embroiderers prefer industry-standard software like Wilcom Embroidery Studio, Hatch, or Pulse. These tools offer precision features such as custom stitch effects, density adjustments, and advanced lettering. They are widely used by professional digitizers because they allow for highly detailed and polished results. However, their higher cost and learning curve make them better suited for businesses or experienced users.
Free and Low-Cost Alternatives
If you’re just starting out, free or budget-friendly options like Ink/Stitch (an open-source extension for Inkscape) or SewArt can be appealing. They provide basic digitizing capabilities and are great for experimentation. The drawback is limited control, fewer stitch options, and less reliability for complex designs. This makes them useful for simple projects but not ideal for professional-quality logos.
Auto-Digitizing vs. Manual Digitizing
Most of these programs include auto-digitizing, where the software automatically converts artwork into stitches. While quick, it often produces inconsistent results, especially with text or detailed logos. Manual digitizing, on the other hand, gives the digitizer full control over stitch direction, density, and type. It takes more time and skill, but it’s the only way to ensure a logo looks sharp and sews flawlessly.
Step-by-Step: Turning a Logo into a Husqvarna Viking File

Step 1: Import the Logo
Begin by opening your digitizing software and importing the logo file. Most programs accept image formats like JPG, PNG, or vector files. A clean, high-resolution logo will make tracing easier and ensure better accuracy in the final embroidery file.
Step 2: Trace Outlines and Define Stitch Paths
Once the logo is in the workspace, use the software tools to trace each shape or letter. This process converts outlines into paths the machine can follow. Proper pathing is critical, as it determines the flow of stitches and helps avoid unnecessary jumps or trims during sewing.
Step 3: Choose Appropriate Stitch Types
Different parts of the logo require different stitch types. Satin stitches are ideal for letters and borders, fill stitches work best for larger shapes, and running stitches are used for fine details or outlines. Choosing the correct stitch type for each element ensures the logo looks professional and balanced.
Step 4: Adjust Density, Underlay, and Pull Compensation
Fine-tuning settings is what separates a good design from a great one. Density controls how tightly stitches are placed, underlay stitches provide a stable foundation, and pull compensation corrects for fabric stretch or distortion. These adjustments ensure the final logo maintains its shape and clarity when stitched.
Step 5: Save in Husqvarna Viking Format
After finishing the digitizing work, save or export the file in VP3 or HUS format, which are compatible with Husqvarna Viking embroidery machines.
Step 6: Test with On-Screen Simulation
Before stitching, run a preview in your software’s simulation mode. This allows you to catch errors, verify stitch order, and ensure smooth machine operation before using actual fabric and thread.
Common Mistakes to Avoid

When preparing a logo for Husqvarna Viking embroidery machines, avoiding common mistakes can save both time and frustration.
Low-Quality Logos
Starting with a blurry or pixelated logo leads to poor results. Always provide a clean, high-resolution file so the digitizer can trace details accurately.
Over-Reliance on Auto-Digitizing
While auto-digitizing tools seem convenient, they rarely produce polished results. Logos often require manual adjustments to stitch direction, density, and underlay to ensure professional quality.
Ignoring Fabric Type
Different fabrics react differently to embroidery. Stretchy materials need more underlay and compensation, while sturdy fabrics can handle denser stitching. Overlooking this factor often results in puckering or distortion.
Skipping Test Runs
Running a quick test stitch-out on scrap fabric helps identify issues before final production. Skipping this step can lead to wasted thread, fabric, and time if errors go unnoticed until the last minute.
Outsourcing Digitizing: When & Why to Choose Professionals

Why Professional Services Matter
While digitizing software allows you to create embroidery files on your own, achieving consistent, high-quality results takes time, skill, and practice. Professional embroidery digitizing services specialize in converting logos into clean stitch files, ensuring accuracy in stitch direction, density, and compensation. Instead of spending weeks learning complicated software, you can focus on marketing, sales, or production while experts handle the technical side.
Affordable and Reliable Solutions
Companies such as Absolute Digitizing offer affordable, professional-grade services. They handle everything from small left-chest logos to large back designs, delivering files in formats like VP3 or HUS, ready for embroidery. Their services are trusted by both small businesses and large-scale production shops.
Fast Turnaround with Extra Benefits
Turnaround times are another advantage, most orders are completed within 4–12 hours, with rush jobs delivered in as little as 2 hours. Additional benefits include 24/7 live chat support, free unlimited edits until you’re satisfied, and even a money-back guarantee if the result doesn’t meet expectations.
Testing & Perfecting Your Husqvarna Viking Logo File
Before final production, always run a test stitch-out on scrap fabric similar to the final garment. This helps identify issues like poor alignment, thread breaks, or overly dense stitching. If problems appear, return to your digitizing software and adjust settings such as stitch density, underlay, or pull compensation. Even well-digitized logos may need fine-tuning depending on fabric type. Once the test run produces smooth, clean results, the file is ready for use. Testing saves time, prevents wasted materials, and ensures your Husqvarna Viking machine delivers sharp, professional embroidery every time.
Conclusion
Turning a logo into a Husqvarna Viking embroidery file involves preparing clean artwork, digitizing it with the right stitch settings, and testing until it sews perfectly. While hobbyists can try the process themselves, digitizing has a steep learning curve and errors often waste time and materials. For faster, more reliable results, many businesses prefer professional services. Whether you need embroidery for uniforms, caps, or promotional merchandise, outsourcing ensures accuracy and consistency.
Get your logo digitized now with Absolute Digitizing starting at just $10 and bring your brand to life in stitches today.