Creating your own embroidery designs offers a special kind of satisfaction. When you have full creative control, every stitch, curve, and texture reflects your vision exactly as you imagined it. This level of precision is why many embroidery enthusiasts and professionals seek tools that go beyond basic editing or auto-digitizing.
Embrilliance StitchArtist is one such tool. It is a leading manual digitizing software designed for those who want to create embroidery designs from scratch with professional-level accuracy. Whether you are a hobbyist experimenting with personal projects or a business owner looking to produce unique, high-quality designs, StitchArtist gives you the flexibility to control every detail.
In this blog, we will explore whether Embrilliance StitchArtist is free to use, review its key features, and walk through a simple step-by-step guide for beginners. We will also look at why, in some cases, outsourcing to professional embroidery digitizing services can be the smarter and more efficient choice for achieving top-quality results.
- Is Embrilliance StitchArtist Free?
- Free Options Available:
- Embrilliance StitchArtist Versions and Pricing
- Key Features of Embrilliance StitchArtist
- How to Get Started with Embrilliance StitchArtist
- Pros and Cons of Using Embrilliance StitchArtist
- Reddit Users’ Experiences with Embrilliance StitchArtist
- Why Hiring Professional Embroidery Digitizing Services is a Smarter and Efficient Choice
- Conclusion
Is Embrilliance StitchArtist Free?

Embrilliance StitchArtist is not free, but there are ways to explore its interface and some functions without paying upfront. These options let you see how the platform works before deciding if it is worth investing in a license.
Free Options Available:
-
Demo Version – This gives you full access to all StitchArtist features, so you can try creating and editing designs exactly as you would with the paid version. However, you cannot save your work in the BE format or export it to embroidery machine file formats.
-
Express Mode – This runs without a serial number and allows you to use .BX fonts and save .BE files, but it does not include the StitchArtist tools for creating or editing embroidery designs from scratch.
To fully create, save, and export custom embroidery designs, you will need to purchase a StitchArtist license at Level 1, Level 2, or Level 3 depending on your needs. The free modes are best for testing the software’s workflow, learning the layout, and getting a feel for the tools before making a purchase. They give you a risk-free way to explore the platform so you can decide with confidence when it is time to invest.
Embrilliance StitchArtist Versions and Pricing

Embrilliance StitchArtist is available in three levels, each designed to match different skill sets and project needs.
Level 1 is ideal for beginners who want to create simple shapes, basic monograms, and appliqué designs. It offers the core tools needed to start manual digitizing without overwhelming new users.
Level 2 builds on these foundations by adding more stitch types, greater control over node placement, and an expanded toolset for more detailed designs. It is well suited for hobbyists and small business owners who want more versatility in their work.
Level 3 is the professional-grade version, offering complete control over stitch pathing, density, underlays, and other advanced settings. This level is aimed at experienced digitizers or businesses that require precision and efficiency in high-volume production.
You can start at a lower level and upgrade as your skills grow, paying only the difference in cost. Pricing varies depending on the level, and upgrade costs are set by Embrilliance, so it is worth checking current rates before purchasing.
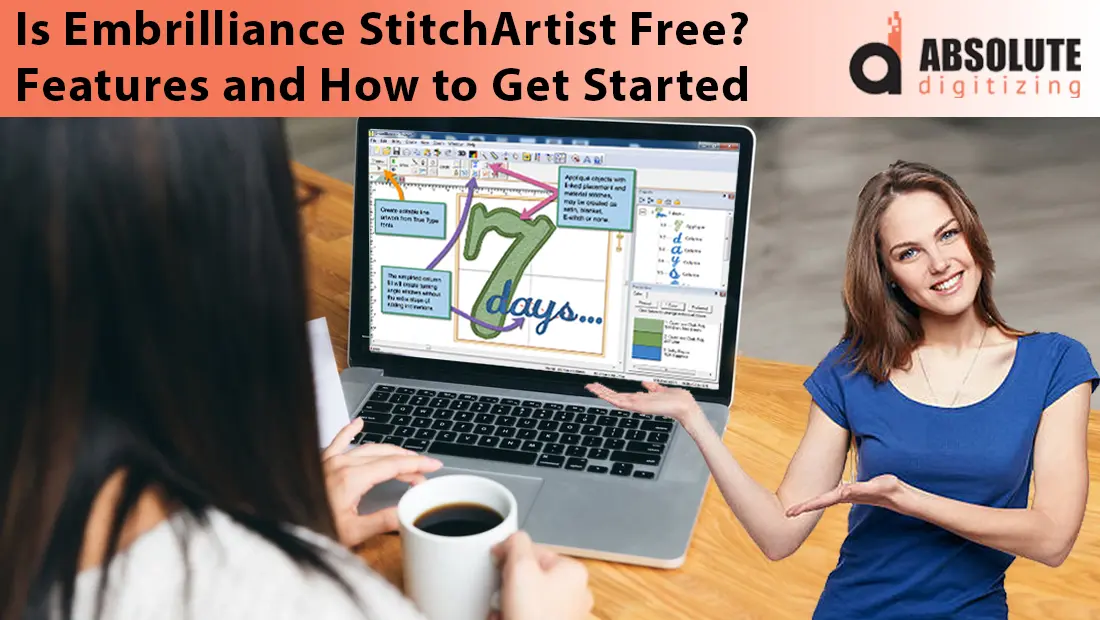
Key Features of Embrilliance StitchArtist

Full Manual Digitizing Control
StitchArtist is designed for precision work. You can place and adjust each node to shape your design exactly as you want it. This includes fine-tuning stitch angles, setting the right stitch density for your fabric, adjusting pull compensation to prevent distortion, and adding the correct underlay for stability. This level of control ensures that your designs stitch out cleanly and professionally.
Variety of Stitch Types
The software supports a wide range of stitch types, including run stitches, satin stitches, fill stitches, motif stitches, and more. Run stitches are great for outlines or fine detail, satin stitches work well for lettering and borders, fill stitches cover larger areas, and motif stitches add decorative patterns. Choosing the right stitch type for each design element improves both the look and durability of your embroidery.
Vector and Raster Import
You can import vector files such as SVG for clean, sharp tracing or raster images like PNG and JPEG for reference. Starting with clean vector art is especially beneficial, as it produces smoother shapes and requires less manual cleanup during digitizing.
Stitch Simulator
The built-in stitch simulator allows you to preview your design’s sew-out sequence before exporting. This helps detect potential issues like overly dense areas, thread breaks, or unnecessary jumps so you can make corrections in advance.
File Format Compatibility
StitchArtist supports saving in multiple popular embroidery machine formats, including PES, DST, JEF, and EXP. This makes it easy to create designs for different brands and models of embroidery machines without additional conversion software.
How to Get Started with Embrilliance StitchArtist

1. Download and Install Embrilliance Platform
Begin by visiting the official Embrilliance website and downloading the Embrilliance Platform. This installer includes StitchArtist along with other modules, and it works on both Mac and Windows.
2. Run in Demo or Express Mode
If you do not have a license yet, you can still explore the software. Use Demo Mode to try all StitchArtist tools without saving or exporting, or Express Mode to use .BX fonts and basic file handling.
3. Import or Create Artwork
Once inside the workspace, you can either import existing artwork or start drawing shapes directly within the program. Using high-quality images, especially vector graphics, will make the digitizing process easier.
4. Assign Stitch Types
Select parts of your design and assign the appropriate stitch type, such as run, satin, fill, or motif, depending on the look and function you want.
5. Adjust Settings
Fine-tune stitch angles, density, and underlay options to suit your chosen fabric and design style. This step ensures better stitch quality and fewer issues during embroidery.
6. Use the Stitch Simulator
Preview the design’s sew-out sequence in the built-in simulator. Look for potential problems like excessive density, gaps, or unnecessary jumps.
7. Export in Your Machine’s Format
Once you have a license, export the design in the file format your embroidery machine uses, such as PES, DST, JEF, or EXP.
8. Test Sew on Sample Fabric
Always run a test on similar fabric before moving to final production. This helps confirm that your design stitches exactly as planned.
Pros and Cons of Using Embrilliance StitchArtist
Pros:
Embrilliance StitchArtist is compatible with both Mac and Windows, making it accessible for most users without requiring different software versions. It does not rely on dongles or external hardware keys, which makes installation and use more convenient. The upgrade system is flexible, allowing you to begin at a lower level and move up as your skills and needs grow, paying only the difference in price. There is also an active online community that provides tutorials, tips, and troubleshooting help.
Cons:
There is a learning curve, particularly for those new to manual digitizing. The software does not have a free full version for creating and exporting designs, so a license is required for complete use. Manual digitizing is more time-consuming than auto-digitizing, which can be a limitation if you need quick results.
| Pros | Cons |
|---|---|
| Works on both Mac and Windows | Learning curve for beginners |
| No dongles or special hardware required | No free full version for exporting designs |
| Flexible upgrade system | Manual digitizing takes more time than auto-digitizing |
| Strong online community support | Requires a license for full functionality |
Reddit Users’ Experiences with Embrilliance StitchArtist

On Reddit Embroidery Digitizing Thread , users frequently discuss their real-world impressions of Embrilliance StitchArtist.
“Embrilliance Stitch Artist works beautifully on a Mac for digitizing! And there are plenty of YouTube videos about how to use it.”
A user who compares multiple platforms highlighted a major advantage:
“I have Hatch & Embrilliance Stitch Artist 3. These days I’ve been using SA3 more because it runs seamlessly on my Mac. I like that SA3 has a tool to draw with bezier handles… Embrilliance maintains my original nodes whereas Hatch tends to add a whole bunch more.”
On the other hand, some users found the interface and quirks frustrating:
“I find Embrilliance Stitch Artist to be extremely frustrating to work with… the weird inconsistent quirks… drive me nuts.”
Why Hiring Professional Embroidery Digitizing Services is a Smarter and Efficient Choice

Time Saving
Manual digitizing in StitchArtist requires practice, trial runs, and multiple edits to achieve professional results. For beginners, the process can be slow and involve a lot of troubleshooting. Professional digitizers, on the other hand, can create ready-to-sew files quickly, often delivering them within a few hours.
Guaranteed Quality
Experienced digitizers understand how to optimize designs for different fabrics, thread types, and machine settings. They know how to minimize thread breaks, adjust stitch density for stability, and create smooth stitch flow. This results in cleaner, more reliable stitch-outs with fewer production issues.
Cost Efficiency
If you only need digitizing occasionally, buying software like StitchArtist and investing the time to learn it may not be cost-effective. For example, a complex logo can be digitized professionally for as little as $10, compared to the cost of software plus the hours required to master it.
Access to Expertise
Professional services can handle challenging designs such as tiny lettering, 3D puff embroidery, gradient effects, and metallic threads. These advanced techniques require a deep understanding of stitch mechanics and are difficult to achieve consistently without experience.
Scalability for Business
For shops or brands with growing orders, outsourcing digitizing allows you to focus on production and customer service without being slowed down by the design process.
At Absolute Digitizing, we deliver flawless embroidery-ready files starting at just $10, with free unlimited edits and turnaround as fast as 4–12 hours.
Conclusion
Embrilliance StitchArtist is a powerful tool for creating custom embroidery designs, but it is not free. The Demo and Express Modes allow you to explore its features and interface before deciding to purchase. For those who plan to digitize regularly, investing in StitchArtist can be a smart choice, offering complete control over every detail of your designs.
However, if you only need occasional digitizing or run a busy embroidery business, outsourcing to a professional service can save time, ensure consistent quality, and often be more cost-effective than doing it yourself.
Ultimately, the decision comes down to your needs and workflow. Whether you choose to create designs with StitchArtist or work with experts like Absolute Digitizing, the goal is the same, beautiful, precise embroidery that meets your vision.