
Machine embroidery can turn a plain hat into custom headwear for a team, business, event, or personal gift. You can stitch a logo, name, monogram, or simple design on baseball caps, beanies, sun hats, and other styles. However, hats have curved surfaces and firm seams, so they need careful setup and proper design placement.
First, you need the right hoop, stabilizer, needle, thread, and machine settings. You also need a clean embroidery file made for the shape and fabric of the hat. A poorly prepared design may cause puckering, broken threads, uneven stitches, or misalignment.
In addition, this guide explains each step, from choosing a hat and preparing the artwork to hooping, stitching, and finishing. For clean and machine-ready files, Absolute Digitizing provides the best services for embroidery digitizing, with careful setup for caps, beanies, and headwear for your project.
| Quick Summary |
|---|
Clean hat embroidery depends on the right cap, secure hooping, proper stabilizer, and a cap-ready stitch file.
|

- Can You Embroider a Hat with a Regular Embroidery Machine?
- How to Choose a Hat for Machine Embroidery
- What Do You Need Before Embroidering a Hat?
- How to Prepare and Digitize the Hat Design
- How to Hoop and Stabilize a Hat
- How to Set Up the Embroidery Machine
- How to Machine Embroider a Hat Step by Step
- What Are the Most Common Hat Embroidery Problems?
- What Are the Best Tips for Clean Hat Embroidery?
Can You Embroider a Hat with a Regular Embroidery Machine?

Yes, many regular embroidery machines can stitch hats, but the result depends on the machine, hoop, and hat style. Single-needle flatbed machines work best when a soft hat can lie flat or stay secure in a compatible frame.
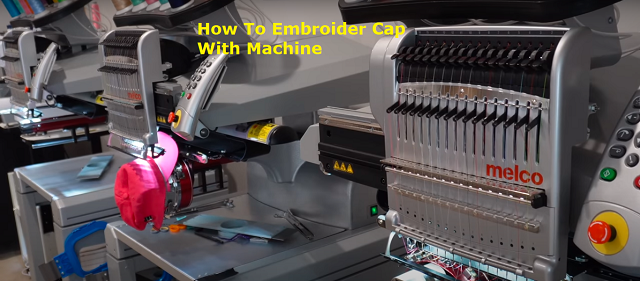
Multi-needle embroidery machines use a smaller free arm and cap frames that hold curved hats more evenly. Commercial cap machines add wider cap drivers and suit structured caps and larger orders. Some single-needle and multi-needle models also support optional cap frames. Structured caps often need this extra support.
Hats That Work Best at Home
- Unstructured baseball caps
- Bucket hats
- Beanies
- Visors
- Soft-panel caps
Hats That Are Harder to Embroider
- Structured or high-profile caps
- Thick center-seam hats
- Stiff front panels
- Caps with little space above the bill
However, always check your machine’s hoop size, cap compatibility, and safe stitching area before starting.
How to Choose a Hat for Machine Embroidery
Choose a hat with a smooth, firm area that can hold stitches without shifting. Hat structure affects hooping, placement, and stitch quality. Measure the front-panel height before sizing the design.
Also, avoid hats with heavy seams, buttons, pockets, patches, or decorations near the sewing area. These features can block the frame or move the design. Use an inexpensive practice cap for the first test.
Structured vs. Unstructured Hats

Structured caps have stiff front panels and hold their shape. They often need a compatible cap frame for support.
However, unstructured hats feel softer and flatten more easily. Therefore, they may work better on home embroidery machines.
Check the Center Seam and Fabric
A thick center seam can shift small letters or create uneven stitches. In addition, stretchy, mesh, thick, or waterproof fabrics may need different needles, stabilizers, tension, and stitch settings.
What Do You Need Before Embroidering a Hat?

Good preparation prevents crooked designs, puckering, thread breaks, and wasted hats. Choose the right hat, gather tools, and set up a safe workspace.
Choose a Suitable Hat
Select a hat with an embroidery area that fits your machine and frame. Beginners can practice on an inexpensive, unstructured cap before working on structured or foam-front styles.
Gather the Essential Supplies
Keep these items ready:
- Embroidery machine that supports your hoop or cap frame
- Standard hoop or compatible cap frame
- Tear-away stabilizer for firm caps
- Cut-away stabilizer for soft or stretchy hats
- Water-soluble topping for beanies and textured fabric
- Quality polyester embroidery thread
- Lightweight bobbin thread
- Fresh needle suited to the hat material
- Embroidery scissors
- Temporary embroidery adhesive, clips, or tape
- Fabric marker and measuring tape
- Machine-ready embroidery file in a supported format
Your bobbin thread does not need to match the top thread. Also, check the machine manual before choosing a needle, frame, or file type.
Prepare the Design and Placement
Measure the front panel before resizing the artwork. Keep the design away from the bill, side seams, and narrow edges.
In addition, mark the horizontal and vertical center lines. This helps you place the design evenly.
Organize the Workspace
Place the machine on a clean, stable surface with room for frame movement. Keep tools nearby, remove loose objects, and confirm that the needle path is clear before stitching.
How to Prepare and Digitize the Hat Design
A hat design starts with artwork that fits the sewing area. Choose a logo, name, monogram, or graphic. Small details, thin lines, and tiny letters may need careful adjustment before stitching on a curved cap. However, a skilled embroidery digitizer can simplify shapes, adjust spacing, and select suitable stitches to preserve as much detail as the fabric and design size allow.
Check the Hat and Design Area
Measure the front panel before opening your digitizing program. Also, check the sewing field for your hoop or cap frame. Keep the design away from the bill, side seams, eyelets, and panel edges.
Use these checks before digitizing:
- Confirm the width and height
- Mark the center of the front panel
- Note the center seam
- Simplify details that are too small
Create or Import the Artwork
Open clean artwork. Import a clear PNG or JPEG. However, importing an image does not create a production-ready stitch file.
Trace the main shapes, remove rough edges, and build each object in the sewing order. Avoid enlarging a poor image because blurred edges can create uneven shapes.
Digitize for the Curved Surface
Cap designs need controlled movement. In many cases, sew from the center toward the sides to reduce shifting. Designs near the bill often sew from the lower area toward the crown, but the artwork and machine setup should guide the sequence.
Set each part carefully:
- Use underlay to support the top stitches
- Adjust density for the fabric and thread
- Add pull compensation where needed
- Select run, satin, or fill stitches by shape
- Limit long jumps and extra trims
- Plan lettering to cross thick seams cleanly
Do not rely only on automatic conversion. Review stitch angles, overlaps, starts, stops, and color changes.
Resize and Position the Design
Resize objects in the editable design file rather than scaling a finished machine file too far. Then center the design within the frame template and confirm its direction.
Export and Test the File
Save the editable source file before exporting. Choose a machine format such as DST, PES, EXP, JEF, VP3, or HUS based on your machine manual.
Finally, run a test stitch on a hat. Check placement, tension, density, registration, and lettering before using the cap.
How to Hoop and Stabilize a Hat

Proper hooping keeps the hat steady and the design aligned. Use a cap frame made for your machine when working with structured hats.
Prepare the Hat
Open the back strap and fold the sweatband down. Remove loose labels that may block the embroidery area.
Then, smooth the front panel and move the bill and extra fabric away from the needle.
Add the Stabilizer
Cut the stabilizer larger than the embroidery area. Place it behind the front panel and keep it free from wrinkles.
Also, use temporary embroidery adhesive when extra grip is needed. Keep the backing flat and secure to reduce shifting and puckering.
Attach the Hat to the Cap Frame
Align the hat’s center mark with the frame center. Pull the cap firmly into place without stretching the front panel.
Afterward, fasten the frame strap and add clips where allowed. Check that the hat cannot slide and that the bill faces the correct direction.
How to Float a Soft Hat in a Standard Hoop
Hoop only the stabilizer and mark its center. Apply temporary adhesive, place the soft hat over it, and match the placement marks.
Finally, secure loose fabric with tape or clips. Keep pins and clips outside the stitch area. Trace the design before stitching to confirm a needle path.
How to Set Up the Embroidery Machine
Set up the machine after the hat, stabilizer, and embroidery file are ready. A secure frame and clear needle path prevent shifting, poor placement, and needle damage.
Attach the Hoop or Cap Frame
Use a hoop or cap frame that fits your machine. Slide it into the holder and lock it.
Then, move the frame to confirm that it sits level and travels without hitting the needle plate or machine body.
Position the Hat
Center the hat by matching its placement mark with the frame center. Keep the front panel smooth and firm, but do not stretch it.
Also, move the bill, sweatband, straps, and loose fabric away from the stitching area. Check that the hat cannot shift.
Check the Stabilizer
Use backing that extends beyond the design area. Keep it flat behind the front panel so it supports every stitch.
However, replace wrinkled, torn, or loose stabilizer before sewing. Weak support may cause puckering, gaps, or poor registration.
Thread the Machine
Install a fresh needle that suits the hat material. Thread the machine with quality embroidery thread and load the bobbin correctly.
Follow the threading path in your machine manual. Afterward, check upper and bobbin tension on a test sample.
Load and Trace the Design
Load the file and confirm its size, direction, and color order. Use the trace function to check the sewing boundary.
Finally, make sure the needle stays inside the area and clears the bill, clips, frame, and seams.
How to Machine Embroider a Hat Step by Step
After setting up the frame, thread, and file, follow these steps to complete a clean stitch-out. Stay near the machine because curved caps can shift or catch more easily than flat fabric.
Load and Review the Design
Open the embroidery file on the machine. Confirm the size, direction, color order, and selected frame.
Then, center the design on the front panel. Make sure it stays inside the machine’s safe sewing area.
Trace the Stitching Area
Use the trace or outline feature before lowering the needle. Watch the frame move around the design boundary.
Also, check that the bill, clips, seams, and loose fabric remain clear. Reposition the design if any part could touch the needle or machine.
Run a Test Stitch
Test the file on a practice cap or similar fabric with the same stabilizer. Review the placement, thread tension, density, lettering, and color sequence.
However, correct any shifting, looping, gaps, or puckering before using the final hat.
Start and Monitor the Stitch-Out
Begin at a slower speed when your machine allows it. Watch the opening stitches to confirm that the hat stays secure.
Pause the machine if you notice:
- Thread or needle breaks
- Fabric movement
- Tangled thread
- Loose stitches
- Frame contact
Finish the Hat
When sewing ends, remove the frame carefully. Trim jump stitches and loose thread without cutting the design.
Finally, remove extra stabilizer, reshape the hat, and inspect the front and back for clean coverage, correct placement, and secure stitches.
You can also watch this short and helpful, start-to-finish hat embroidery tutorial to see the setup, hooping, stitching, and finishing process in action.
What Are the Most Common Hat Embroidery Problems?
Most problems come from poor hooping, weak support, settings, or a file not prepared for a curved cap. Use this table before restarting.
| Problem | Possible Cause | Solution |
|---|---|---|
| The design looks crooked | Poor hooping, wrong center mark, cap movement, or uneven panel | Recenter the cap, secure the frame, and trace the design |
| Fabric puckers | Weak stabilizer, high density, loose hooping, or incorrect tension | Add backing, reduce density, and test tension |
| The thread keeps breaking | Damaged needle, poor-quality thread, high speed, tight tension, or dense stitching | Replace the needle, rethread, slow the machine, and check density |
| Small letters look unclear | Tiny letters, high density, wrong stitch type, or poor digitizing | Enlarge or redigitize the text with suitable stitches |
| Design shifts at the center seam | Thick seam, wrong stitch order, weak underlay, or flat-design settings | Use cap-ready digitizing and sew from the center outward |
| The hat hits the machine | Loose fabric, wrong bill direction, incorrect frame, or oversized design | Stop, secure the hat, and trace the safe area |
A Real-World Hat Embroidery Problem

Embroiderers often face weak thread coverage, unclear small letters, and shifted designs on structured caps. In this example, the white thread looks uneven on the black hat, while the bottom text appears thin and hard to read. Lowering the presser foot or adding several backing layers may not solve the issue.
Problem
The file may not use cap-specific stitch order, underlay, density, pull compensation, or lettering settings. Poor hooping and excess pressure can also affect registration.
Solution
Redigitize the design for the cap. Use center-out and bottom-up stitching where suitable, improve the small lettering, and adjust coverage without making the design too dense. Also, secure the cap correctly, use suitable backing, set the presser foot as recommended, and test the file on a spare hat.
What Are the Best Tips for Clean Hat Embroidery?
Clean results come from proper setup, support, and testing. These tips reduce puckering, thread breaks, crooked placement, and uneven stitches.
Use the Right Supplies
- Match the needle to the hat fabric.
- Choose tear-away, cut-away, or water-soluble stabilizer as needed.
- Use embroidery thread and lightweight bobbin thread.
- Replace bent or dull needles before stitching.
Test the Settings
Practice on a spare cap. Check tension, stitch density, placement, and machine speed before using the hat.
Also, make small tension changes. Follow the machine manual when adjusting bobbin tension.
Keep the Stitch-Out Clean
Secure loose fabric and keep clips outside the needle path. Trim jump stitches and clean the machine.
Finally, test thread colors against the hat so the design stays clear and easy to read.
Final Thoughts
Clean hat embroidery starts with the right cap, proper stabilizer, secure hooping, and a well-prepared stitch file. You should also check the design size, center seam, needle path, thread tension, and machine speed before starting. In addition, a test stitch can help you catch placement, density, or registration problems before working on the final hat.
Good digitizing helps create clear lettering, smooth coverage, and accurate stitching on curved surfaces. For reliable, machine-ready files made for caps, beanies, and other headwear, contact Absolute Digitizing for professional embroidery digitizing services. Send your artwork today and get a free quote.
FAQs
Yes, some home machines can stitch hats. Soft, unstructured caps work best. Structured caps may need a compatible cap frame or a multi-needle machine.
Not always. Soft hats can sometimes be floated over a hooped stabilizer. However, structured caps usually need a cap frame for better support and alignment.
Use tear-away stabilizer for firm caps and cut-away backing for soft or stretchy hats. Water-soluble topping helps on beanies, fleece, and textured fabrics.
Choose the needle based on fabric thickness and cap structure. Use a fresh embroidery needle, and select a stronger size for thick seams or firm materials.
Crooked designs often come from poor hooping, wrong placement, fabric movement, or a stitch file not prepared for a curved cap.
Yes, but the file needs proper underlay, stitch direction, and sewing order. A test stitch helps prevent shifting and uneven lettering.
The correct format depends on your machine. Common options include PES, JEF, DST, EXP, VP3, and HUS. Always check the machine manual.
Measure the selected area and keep the design inside the safe sewing field. Check the bill, seams, eyelets, and frame limits before sizing.