| Summary |
|---|
Clean patch artwork helps your design turn into a sharp, readable, and production-ready patch.
|
Clean artwork gives your custom patches a strong start. It helps your design stitch cleanly, look sharp, and stay readable at the final patch size.
However, poor files can slow the whole process. A blurry logo, tiny text, wrong colors, or stretched image can lead to rough edges and extra revisions. It may also make the final patch look different from the design you had in mind.
That is why artwork preparation matters before production begins. The right file format, clear details, proper size, and simple color notes help your patch team create better results.
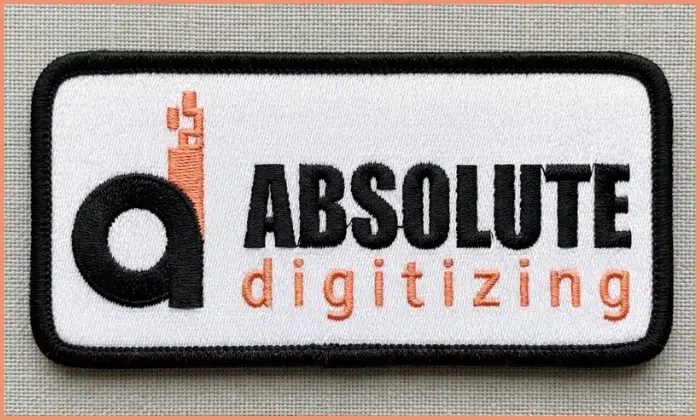
At Absolute Digitizing, we make this process easier with expert embroidery digitizing and high-quality custom embroidered patch services. Send us your artwork, or ask our team to help prepare it for production.

- What Are Custom Patch Artwork Requirements?
- Which File Format Works Best for Custom Patch Artwork?
- What Size and Resolution Should Your Artwork Have?
- How Small Can Text Be on a Custom Patch?
- What Details Should You Simplify Before Production?
- What Border and Shape Details Should You Plan?
- How Should Colors Be Prepared for Patch Artwork?
- Why Hiring a Professional Embroidered Patches Service Is the Best Choice?
- Conclusion
What Are Custom Patch Artwork Requirements?
These are the basic rules your design must follow before it becomes a real patch. They guide file type, size, color, text, shape, and detail level.
Clear and complete artwork
Your artwork should show the full design, clean edges, and final layout. It should also include the border style and color notes.
Useful file tips:
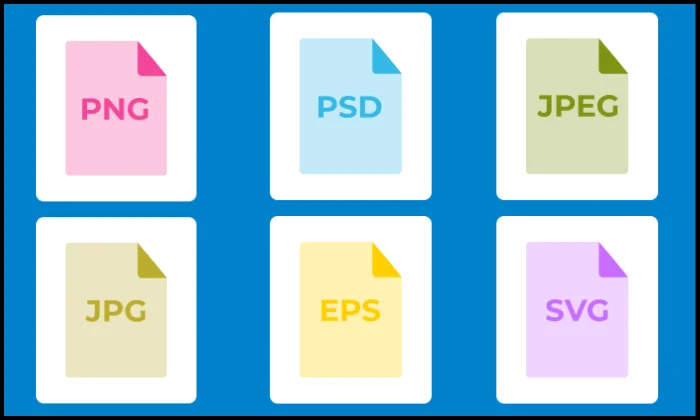
- Send vector files when possible, such as AI, EPS, SVG, or PDF.
- Use PNG or JPG only if the image is clear and high resolution.
- Keep text bold and easy to read.
- Avoid tiny details, shadows, and soft gradients.
- Check that the design still looks clear at the final patch size.
Which File Format Works Best for Custom Patch Artwork?
The right file format helps your patch team turn your design into clean stitches. It also reduces guesswork during digitizing.
Best file formats for clean results
Vector files work best for most patch designs. They keep lines sharp when the design gets resized or digitized.
Best options include:
- AI for editable design files
- EPS for print and production use
- SVG for clean shape-based artwork
- PDF for easy sharing and review
These formats help digitizers see clear shapes, text, borders, and color areas.
Can you use PNG or JPG files?
Yes, PNG, JPG, and TIFF files can work. However, they must be clear and high resolution.
For better results:
- Save the file at the final patch size
- Use 300 DPI (Dots Per Inch) when possible
- Avoid blurry web images
- Do not stretch small artwork
What if you only have a blurry screenshot?
A blurry screenshot may need cleanup before production. In many cases, the team must redraw the design or convert it into clean vector artwork first.
What Size and Resolution Should Your Artwork Have?
The artwork size doesn’t matter, but it must be clean and sharp so the digitizer can see the clear details. An expert digitizer sizes the artwork for the final file. You must provide the digitizer with the correct patch size you want.
Simple size checks
Before you submit your file, check these points:
- Share the final width and height
- Use 300 DPI for PNG, JPG, or TIFF files
- Avoid stretching small images
- Keep key details easy to see
- Ask about the maximum patch size for large designs
However, low resolution can cause blurry edges, rough text, and missing details.
How Small Can Text Be on a Custom Patch?
Small text should stay large enough to stitch cleanly. A safe rule is about 1/4 inch tall for embroidered lettering. Some makers accept 4 to 5 mm, but bigger text gives clearer results.
Why is small text hard to read
The thread has thickness. When letters get too small, open spaces can close up. Thin lines may also blur or disappear.
Best font choices for patches
Use simple fonts that are easy to stitch.
Good text choices:
- Bold block letters
- Clean spacing
- Short words
- Strong color contrast
Avoid these:
- Tiny script fonts
- Thin serif letters
- Small taglines
- Crowded curved text
When to change the patch type
If your design needs tiny text or fine detail, woven or printed patches may work better than embroidery.
What Details Should You Simplify Before Production?
Very small details can look clear on a screen but get lost in the thread. Embroidery needs space because stitches have thickness. Fine lines, gradients, and tiny elements often work better in printed patches than embroidered ones.
Details to simplify
Review your design at the real patch size before sending it.
Simplify these parts:
- Thin outlines
- Tiny icons
- Drop shadows
- Texture effects
- Photo details
- Very close spacing
- Small background shapes
Instead, use bold lines, simple shapes, and clear color blocks. Also, remove details that do not support the main design.
A simple rule helps: if a detail looks hard to see at actual size, simplify it before production.
What Border and Shape Details Should You Plan?
Plan the border before production because it affects the patch shape, edge strength, and final look.
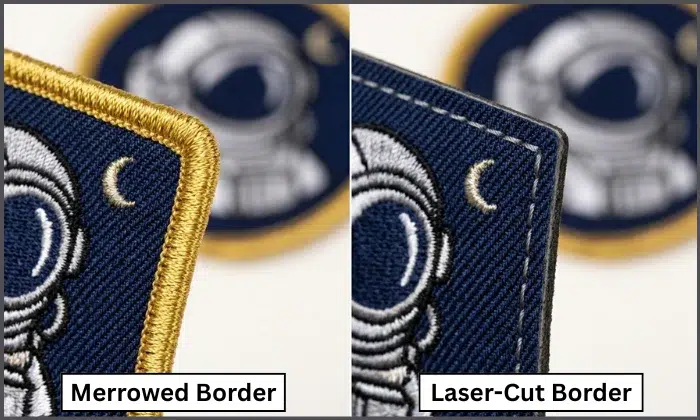
Merrowed border
A merrowed border gives a thick, classic edge. It works best on simple shapes like circles, squares, ovals, rectangles, and shields. It also helps protect the patch edge from fraying.
Laser-cut or heat-cut border
A laser cut or heat cut border works better for custom shapes, sharp angles, and detailed outlines. It gives the patch a thinner edge and more shape flexibility.
Safe edge spacing
Keep key artwork away from the patch edge.
Edge tips:
- Leave space for the border
- Avoid tiny text near edges
- Keep logos inside the safe area
- Review the proof before approval
As a safe rule, keep important details slightly inside the edge so the border does not cover them.
You can also watch this short and helpful video to see the difference between a merrowed border and a hot cut border before choosing the right edge style for your patch.
How Should Colors Be Prepared for Patch Artwork?
Use clean, solid colors in your patch artwork. Solid colors help the digitizer choose thread shades and build cleaner stitch areas.
However, avoid gradients, shadows, and soft fades for small patches when possible. Embroidery uses thread, so it cannot blend colors the same way a screen or printer can. If you want a gradient in small patches, then printed patches may work better for photo-style designs or smooth gradients.
Best color prep tips
Before you submit your file, follow these steps:
- Use clear color blocks
- Avoid too many close shades
- Send Pantone codes for brand colors
- Share thread color numbers if you have them
- Check colors on a proof before production
Also, expect small color changes. Thread colors may look different from screen colors, and some Pantone shades may only have a close thread match.
If your design needs a smooth color-blended look, our team at Absolute Digitizing can help digitize the artwork for embroidery. We can suggest the best stitch direction, thread shades, and patch style to keep the final result clean and professional.
Why Hiring a Professional Embroidered Patches Service Is the Best Choice?
Clear artwork is important, but it is only the starting point. A professional team must turn that artwork into a production-ready stitch file.
Artwork needs expert conversion
Embroidery machines do not read regular images the same way we see them. A digitizer must set stitch types, stitch direction, density, underlay, borders, and thread colors.
This step helps the final patch look clean and balanced.
A professional service reduces mistakes
A skilled patch team can spot issues before production starts.
They can help with:
- Small text cleanup
- Color matching
- Border planning
- Detail simplification
- File format setup
- Proof review
As a result, your patch is more likely to look sharp, durable, and close to your original design.
For a smoother process, Absolute Digitizing can help prepare your artwork and turn it into high-quality embroidered patches.
Conclusion
Clean artwork helps your custom patches look sharp, readable, and production-ready. The right file format, clear size, proper resolution, simple colors, readable text, and safe border spacing all make a big difference. Still, artwork needs expert digitizing before it becomes a stitch-ready patch.
For cleaner results and fewer revisions, contact Absolute Digitizing today and get a free quote for all types of custom patches.
FAQs
Vector files work best for custom patches because they keep lines, shapes, and text clean. AI, EPS, SVG, and PDF files are great options. High-resolution PNG, JPG, or TIFF files can also work if they are clear.
Yes, you can use a JPG or PNG if the file has high resolution. A 300 DPI file works better for clean results. Blurry screenshots or small web images may need cleanup before production.
Small text can close up because the embroidery thread has thickness. Thin fonts, tight spacing, and tiny letters may become hard to read. Use bold, simple fonts for better patch quality.
Solid colors work best for embroidered patches. Gradients, shadows, and photo effects can be hard to stitch. If your design needs smooth color blending, your patch team can suggest better thread and stitch options.
A professional patch service turns your artwork into a stitch-ready file. They set stitch direction, density, borders, and thread colors. This helps your patch look cleaner, stronger, and closer to your original design.