
If you are still new to the embroidery arena, production and digitizing for embroidery patches can be a little daunting. Honestly, embroidering patches is not really different and difficult from your routine embroidery orders. For most embroiderers, the hesitation or reluctance, in the beginning, is only there because they have not done a similar job before. Nevertheless, you have to get started at some point and, if that is the case, why not as early as possible?
Once you get started, embroidered patches, are in fact, one of the most enjoyed orders by digitizers. Due to their unique crisp and boldness, patches will always be one of the most relished pieces for passionate embroiderers and customers alike. We will go through some standard practices of embroidering and digitizing patches. As this post is primarily created for beginners, we will keep it clear and concise, without indulging in intricate industry jargon.
Ordering And Deciding Raw Materials:
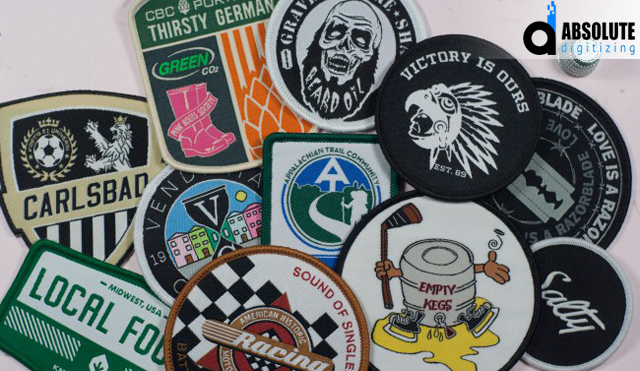
Even before the designing or digitizing for embroidery patch, you have to order plain patches upon which the design will rest. They are readily available in all kinds of shapes and sizes. Round, square, oval or sometimes a custom shape is used. For sizes, there is a whole range of it available. From 1 inch to a full-back, finding patch sizes are a no-brainer.
While finding bare patches is easy, your selection should never be random. The decision should be driven by the choices of your audience and limitations of your embroidery machine. Very big or very small sizes can be a limitation depending on the machine you are using.
After the size and shape considerations, the immediate consideration is the color. You can either choose the color of the fabric and be on the safe side or you can be creative and try out other colors. The back of patch is either plain or heat-sensitive. Once again the choice is yours but here we will recommend buying the plain ones.
Not that heat-sensitive ones are entirely a no-gone zone, they are relatively difficult to stitch. Moreover, applying it requires a heat press to produce adequate heat and pressure. If you are a beginner or worst, a first-timer, going with heat sensitive back means inducing unnecessary complexity to something that is still fairly new to you. Obviously, not a very wise option!
Lastly, you have to pick up a merrow color. Merrow is that thread which runs around the border of the patch. At the borders, there is a bump. This is where the threads are eventually locked once embroidered.
Digitizing For Embroidery Patches:
Start by scanning your patch and get it in a graphical format. Once done, open it in a digitizing software. It will act as a base upon which the design will be centered. Make sure that everything is nicely centered. Make sure that the design is centered on the patch and the patch is also in the center of the outline. It will set everything in place as your design always start and stop at the center.
While digitizing for embroidery patches, always do your work at some distance from the border. It is important because otherwise, the presser foot on the machine will press against it. This will cause distortion issues during the production stage. Moreover, always adhere to standard practices of digitizing embroidery designs.
Once done with digitizing the embroidery design, it is time for applying it. Before applying it, add a running stitch at the outside. This outline will also start and stop at the center. The purpose of this outline is to make it clear that where the patch is supposed to be. You can also overlap your outline with the design to simplify things.
While embroidering, stitch the running stitch outline first. While digitizing, add a stop function here. It will stop the machine when the outline is embroidered. Use the outline it to center your blank patch before the design is added to it.
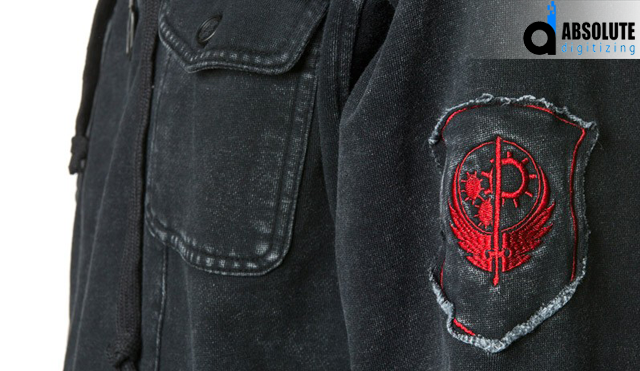
As you can see, embroidery patches are not really difficult. They are just a little different. The only challenge that can arise during the process is sticking the patch to the fabric. The good news is that there are different ways to do it which just opens up the options, and makes it easier.
Sticking The Embroidery Patches:
First one is pretty easy. You can simply use a sticky backing or stabilizer. If you are somewhat familiar with the embroidery production, stabilizers are an absolute must.
The only difference here is that these are the sticky ones.
One possible problem that can raise its head is the sticking of the stabilizer with the needle. This will only happen if you are embroidering more than one patch in a single hoop. It can cause frequent thread break which is definitely something you don’t want to occur. The fix to this is cleaning the needle with a drop of machine oil with cotton.
The second option is to use a spray adhesive. Ensure that the spray adhesive you use is specifically manufactured for machine embroidery. Apply the adhesive to the back of the patch and let it dry. Now, put it on the garment to see if adheres. If the adhesive effect is not enough, spray another coat to ensure the firm grip.
Caution here is to avoid spray adhesive getting into the parts of the machine. It can really cause issues with the normal functioning of the machine. As you can now see, that embroidery and digitizing embroidery patches is not really difficult. All it needs is need a little attention and practice to the size, shape, and nature of the patch.
For receiving professional results with digitizing for embroidery designs at the lowest rates, reach out to us. We are a professional custom digitizing service that delivers you high quality digitized designs, in less than a day. You know what is even better? It only costs $1/ 1000 stitches. Get a quote now!