
| Summary |
|---|
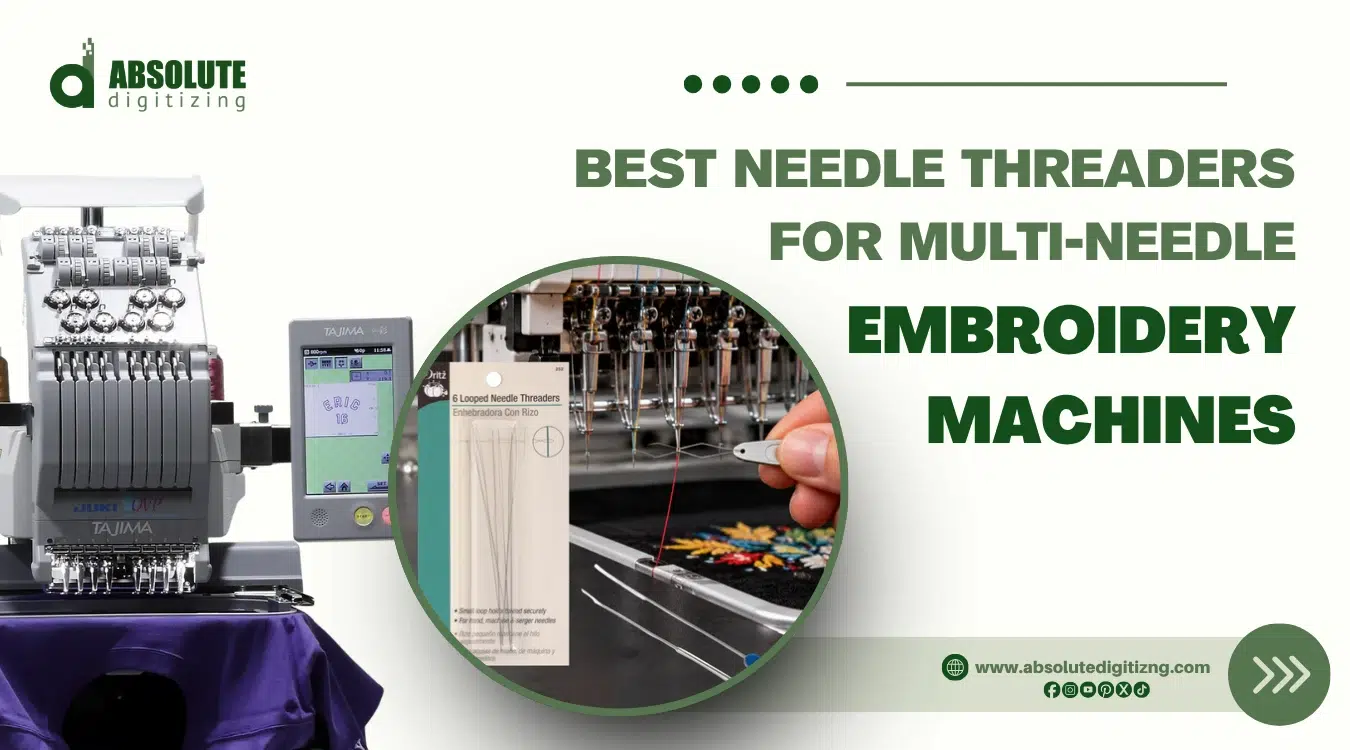
The right needle threader saves time and makes multi-needle embroidery setup easier.
|
Threading 6, 10, or 15 needles can slow down a busy embroidery shop. Tiny needle eyes make the job harder, especially when a thread breaks halfway through an order.
The right needle threader can save time, but the choice depends on your machine. Some models have built-in threaders, while others need a manual tool. Needle size also affects compatibility.
However, smooth production goes beyond threading. Pairing the right tools with quality embroidery digitizing help keep your workflow on track.
This guide compares practical needle threaders, explains their limitations, and helps you choose an option that fits your machine.
- Quick Answer: Which Needle Threader Is Best?
- Why Is Threading a Multi-Needle Embroidery Machine Difficult?
- Types of Needle Threaders for Embroidery Machines
- Top Needle Threaders for Multi-Needle Machines
- Needle Threader Compatibility by Machine Brand
- How to Thread a Multi-Needle Embroidery Machine
- Common Needle Threading Problems and Fixes
- Simple Tips for Faster Needle Threading
- Final Verdict
Quick Answer: Which Needle Threader Is Best?
The Dritz 252 is a practical choice for manual threading because its small wire loop works with machine needles. However, no threader fits every multi-needle embroidery machine. Needle size, space around the needle, and machine design all matter.
Best Options by Need
- General use: Dritz 252 holds thread securely while passing through the needle eye.
- Small needle eyes: Klaer UltraFine works with machine needle sizes 60/8 to 80/12.
- Easier handling: Guided tools like Bohin 91358 may help operators who struggle with wire loops.
Before buying, check your machine manual and needle size. Also, make sure the tool fits comfortably without forcing it through the needle eye.
Why Is Threading a Multi-Needle Embroidery Machine Difficult?
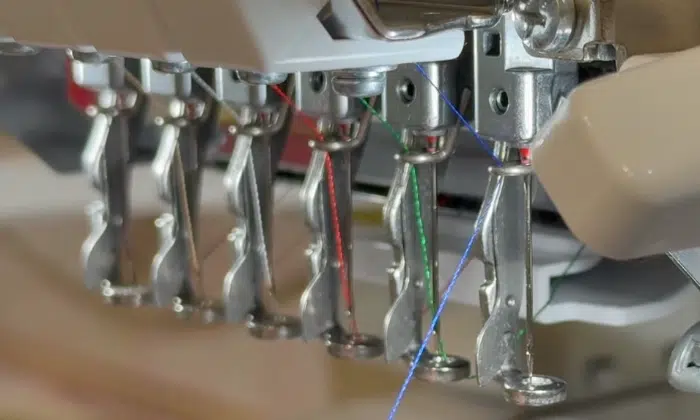
Threading several needles takes patience. Tiny parts and limited room around the needle bar can slow the job.
1. Small Needle Eyes and Tight Spaces
Multi-needle machines place several needles close together. This leaves little space for your fingers or a handheld threader. Poor lighting makes it harder to see the eye.
2. Fine Thread and Different Needle Sizes
Embroidery thread can split or fray when its end catches on the needle. Also, smaller needles usually have smaller eyes, so some threaders will not fit. Different machines use different needle systems, which can change how you thread them.
3. Automatic Color Changes Are Not Automatic Threading
A machine may switch between thread colors, but that does not mean it can thread the needles. Some models include built-in threaders; others need manual help. Always check your machine’s threading features before choosing a tool.
Types of Needle Threaders for Embroidery Machines
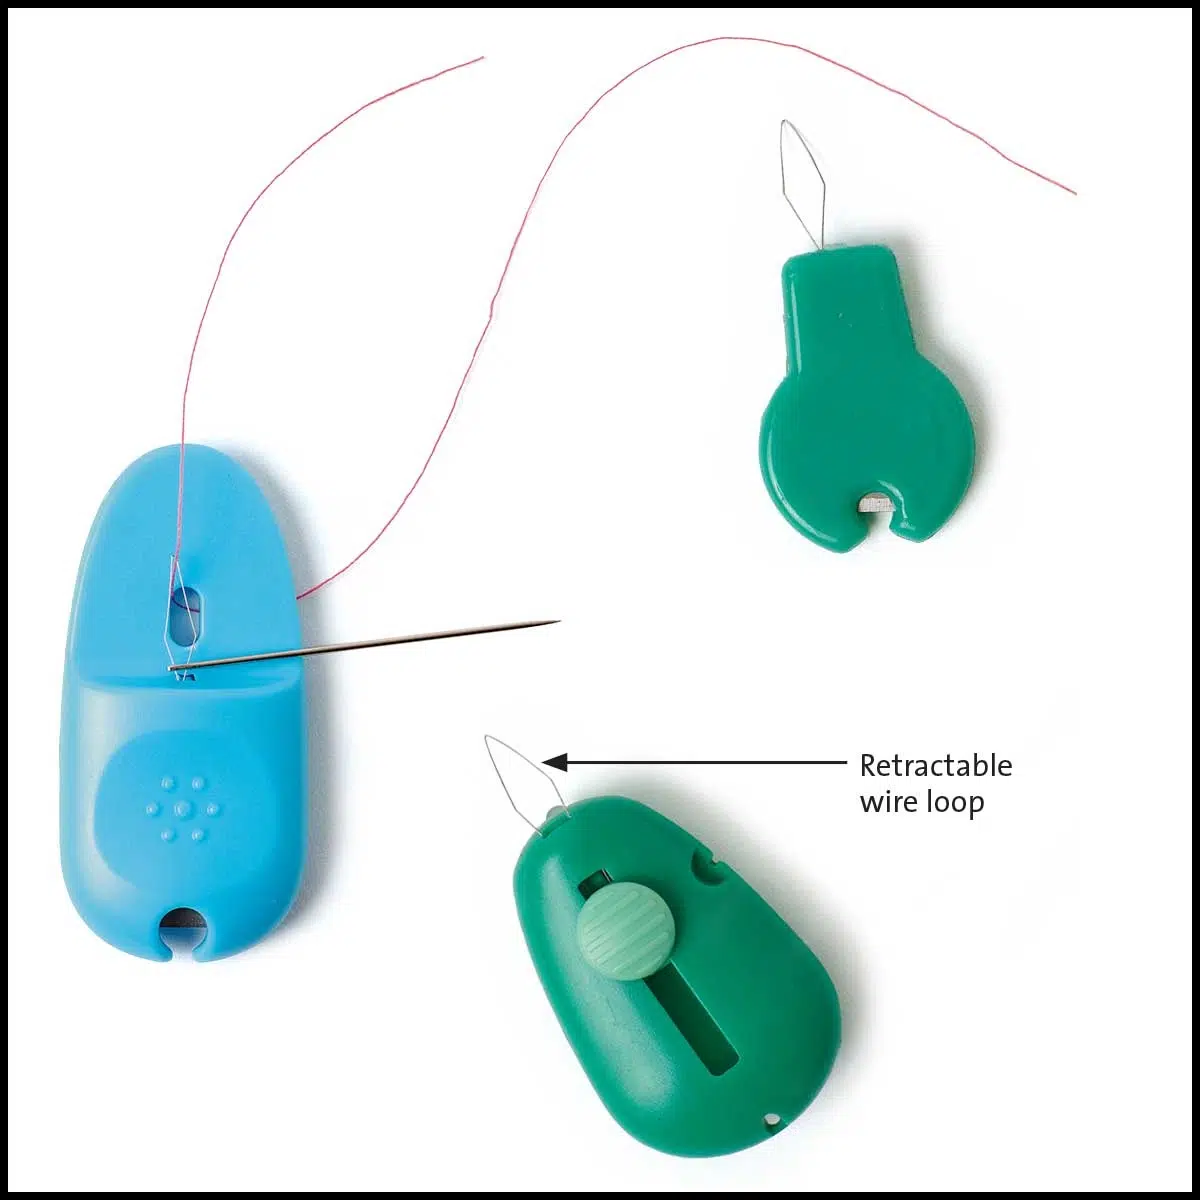
Needle threaders work in different ways. Each type has benefits, but not every tool fits every machine.
1. Wire-Loop Needle Threaders
These tools use a thin, flexible loop. Pass the loop through the needle eye, catch the thread, and pull back gently. They cost little, but the wire can bend if forced.
2. Hook-Style and Guided Threaders
These tools use a small hook or guide to move thread through the needle eye. They may feel easier to hold. However, they need enough space and careful alignment.
3. Built-In Automatic Needle Threaders
Some machines, including the Brother PR680W, have built-in threaders. A small hook passes through the needle eye. The needle must sit correctly, and some needles or threads may not work.
Threader Comparison
| Type | Advantage | Limit | Best Use |
|---|---|---|---|
| Wire loop | Low cost | Fragile wire | Manual threading |
| Guided | Easier grip | Needs space | Careful handling |
| Built-in | Quick setup | Machine limits | Supported models |
Before choosing, check your machine manual, needle size, and available space around the needle.
Top Needle Threaders for Multi-Needle Machines
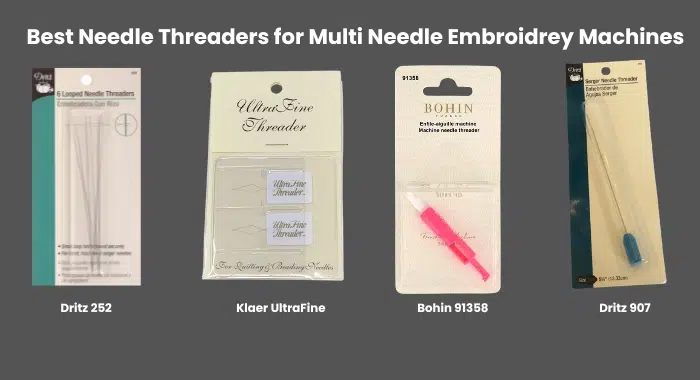
Choosing a threader gets easier when you match the tool to your needle and working space. These four options cover common needs.
1. Dritz 252 Looped Needle Threader—Best All-Around Option
The Dritz 252 uses a small wire loop to hold thread as it passes through a needle eye. Place the thread in its large loop, pull it into the smaller loop, then guide the pointed end through the needle. Each pack contains six threaders.
This is a good starting point for shops that want low-cost spare tools near their machines. You can also keep extras on a magnet, so they are easy to find.
However, the wire must pass through the needle eye without force. Dritz lists machine needles, but not specific commercial embroidery models.
2. Klaer UltraFine Needle Threader—Best for Small Needle Eyes
The Klaer UltraFine uses a thin, pointed stainless steel loop. It helps pull fine thread through a small needle eye.
The UltraFine model works with embroidery machine needle sizes 60/8 through 80/12. That includes the common 75/11 embroidery size.
Still, the delicate wire can bend. Keep it straight and check that you can reach the eye safely on your machine.
3. Bohin 91358 Machine Needle Threader—Best Guided Option
The Bohin 91358 uses a plastic guide and a small metal mechanism. Place the thread in the slot, slide the tool along the needle, and press gently. When it reaches the eye, the tool pushes the thread through.
It may suit operators who find loose wire loops hard to hold. Its seven-centimeter body also gives you a larger grip.
However, confirm there is room around your needle bar. Bohin does not list every DBxK5 commercial machine as a tested fit.
4. Dritz 907 Serger Needle Threader—Best Long-Reach Alternative
The Dritz 907 is 5.25 inches long and has a wire loop at one end. Its extra length can help you reach needle areas where your fingers cannot fit. A clear sleeve protects the wire when stored.
This option may help with awkward access, but it was designed for sergers. Do not assume it fits every multi-needle embroidery machine. Check clearance and needle-eye size first.
Needle Threader Compatibility by Machine Brand
Not every needle threader fits every embroidery machine. Embroidery needle type, built-in features, and space around the needle bar all matter. For example, Brother PR models and many commercial machines use different needle systems.
Recommended Threaders by Machine Brand
| Machine Brand | Recommended Threader to Try | What You Need to Know |
|---|---|---|
| Brother PR Series | Built-in automatic threader or Dritz 252 as backup | Models like PR680W have automatic threading. Check needle restrictions before using it. |
| Ricoma MT and EM | Dritz 252 or Klaer UltraFine | Check the needle system and make sure the wire fits the eye. |
| Tajima | Dritz 252 or Klaer UltraFine | Many models use DBxK5 needles. Check needle size and available space. |
| Barudan | Dritz 252 or Dritz 907 | The longer Dritz 907 may help with tight spaces, but it is designed for sergers. |
| Melco | Klaer UltraFine or Dritz 252 | Many models use DBxK5 needles. Check the needle eye and tool clearance. |
These are possible manual threading options, not confirmed fits for every model. Never force a threader through the needle eye.
Does Needle Size Affect Threader Compatibility?
Yes. Smaller needles usually have smaller eyes, which can make threading harder.
- 65/9: Fine needle for delicate fabrics and small details.
- 75/11: Common size for everyday embroidery.
- 80/12: Often used for thicker fabrics and caps.
- 90/14: Larger needle for heavier threads or materials.
Some Brother models require manual threading with 65/9 needles. Using their automatic threader may damage the mechanism. However, this rule does not apply to every Brother machine.
How to Thread a Multi-Needle Embroidery Machine
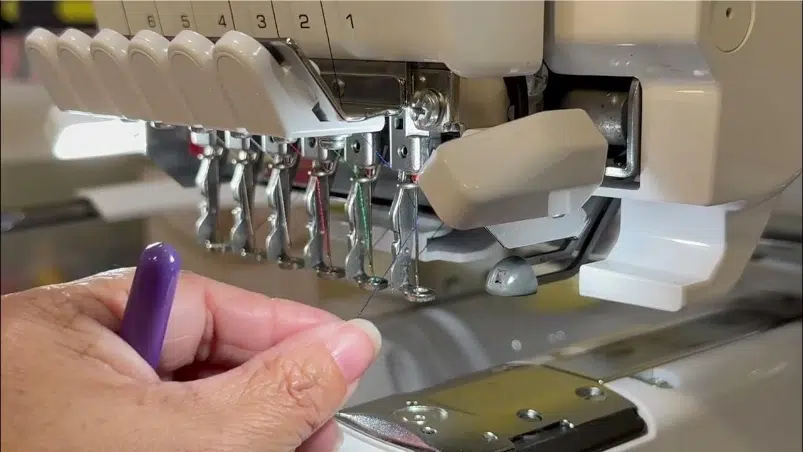
Threading gets easier when you follow the same steps each time. Use this method for manual threaders, but always check your machine’s instructions.
Manual Threading: Step by Step
- Stop the machine. Follow your manual to prevent unexpected needle movement.
- Select the needle you need. Move it into the correct threading position, then disable movement as directed.
- Check the thread path. Make sure the thread passes through the guides and tension parts. Inspect the needle eye for damage.
- Trim the thread end with sharp scissors. Remove loose fibers to make threading easier.
- Position the threader. Hold its loop or hook near the needle eye, following the tool’s instructions.
- Guide the thread through. Some wire loops enter from the back, while other tools use a loaded loop from the front. Never force the tool.
- Pull the thread through gently. Remove the threader and check for snags or split fibers.
Need a closer look at needle threading? Watch this quick and helpful video for a visual guide, and remember to follow your machine’s instructions for the correct threading method.
What About Built-In Automatic Threaders?
Automatic systems follow a different process. For example, Brother PR machines require the selected needle to reach the correct position before automatic threading.
Follow your machine’s instructions and keep your fingers clear of moving parts.
Common Needle Threading Problems and Fixes
A threader should pass through the needle eye without force. If it catches, bends, or misses the eye, stop and check the cause. Pushing harder can damage the tool or needle.
Quick Troubleshooting Guide
| Problem | What to Check and Do |
|---|---|
| Threader won’t fit | Check the needle eye and tool thickness. Try a finer loop. |
| Wire or hook bends | Check alignment. Replace bent tools instead of forcing them. |
| Thread keeps fraying | Look for a rough needle eye. Trim the thread end. |
| Automatic threader misses the eye | Check needle position, installation, and the threading hook. |
| Thread won’t pull through | Make sure the thread is not too thick for the needle. |
Also, check that the needle sits in its holder. A loose needle can cause automatic threading problems.
If the issue returns, replace a worn tool or follow the machine manual for service. Never adjust the automatic threading system while the machine can move.
Simple Tips for Faster Needle Threading
Small changes can make threading easier, especially during a busy embroidery run. Keep these tools beside your machine.
Make the Needle Easier to See
- Use an LED task light to brighten the needle area.
- Hold a white card behind the needle for better contrast.
- Wear magnifying glasses to see small needle eyes.
- Cut frayed ends with sharp thread snips.
- Keep spare threaders nearby in case one bends.
- Clear lint around the needle before threading.
Save Time When Changing Spools
When changing spools, tie the new thread to the old thread. Gently pull it through the upper threading path if your machine manual allows. Remove the knot before the needle and thread the eye again.
Final Verdict
The right needle threader can save time and make daily embroidery work easier. However, no single tool works with every machine.
For general use, the Dritz 252 is a practical starting choice. Klaer UltraFine works well with smaller needle eyes, while guided threaders may help operators who struggle with thin wire loops.
Before buying, check your machine model, needle size, and available space around the needle. Never force a threader that does not fit.
Ready for your next embroidery project? Send your artwork to Absolute Digitizing for custom embroidery digitizing and get a free quote. Keep your machines running smoothly and your designs looking their best.
Less time fixing problems, more time creating. Happy embroidering!
Frequently Asked Questions
Yes, some manual threaders work with commercial embroidery needles. However, check the needle eye size and available space. Not every sewing machine threader fits industrial needles.
The Klaer UltraFine is a good option for 75/11 needles. It supports machine needle sizes 60/8 through 80/12. Always check that the tool fits your machine.
The needle may sit in the wrong position, or the threading hook may be bent. Check the needle installation and threading position. Contact an authorized technician if the hook is damaged.
Yes. You can thread the needle by hand or use a compatible manual threader. Follow your machine’s safety instructions and make sure the needle cannot move while threading.
Yes, a damaged hook or bent wire can snag and fray the thread. Replace damaged threaders and check the needle eye for rough edges before stitching.