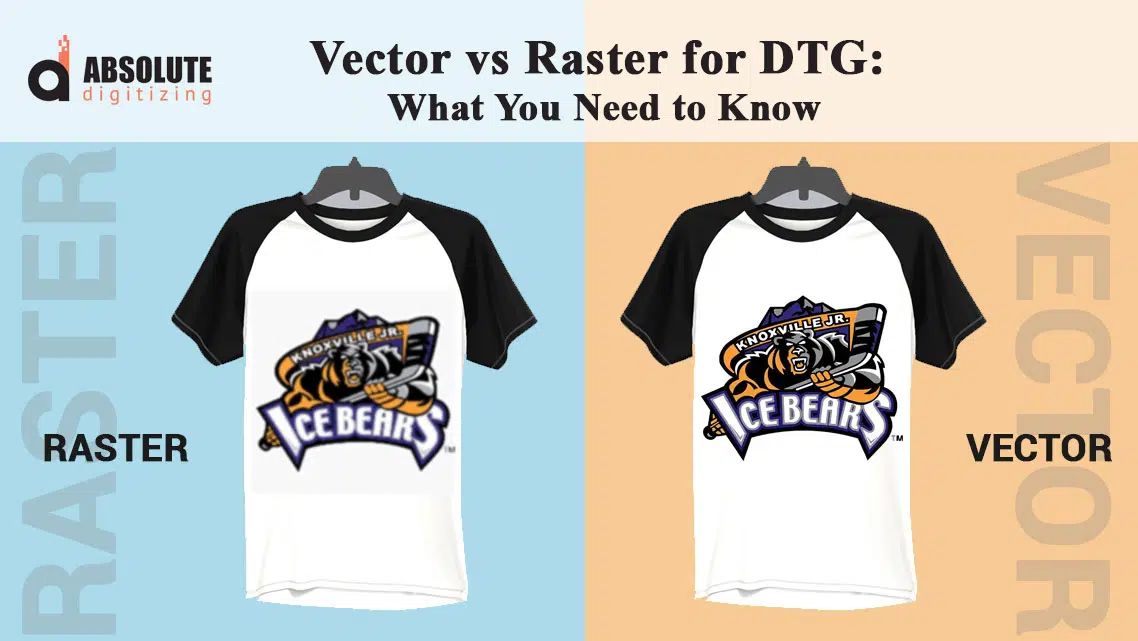
Print the same design on the same DTG machine, and you can still end up with two totally different shirts. One looks crisp and premium. The other looks soft, blurry, or slightly “cheap,” even though the artwork looked fine on your screen. In most cases, the printer is not the problem. The file you send is.
DTG (direct-to-garment) printing does not repair weak artwork. It prints exactly what you provide, including jagged pixels, compression marks, and low resolution. If you send the wrong file type or the wrong size, your print quality drops fast.
In this guide, you will learn when to use vector files, when raster files work better, and the simple steps that keep DTG prints sharp. And if your logo only exists as a small JPG, WhatsApp image, or screenshot, a professional vector conversion gives you a clean master file you can reuse for every future print, without rework.
- DTG Printing in Simple Words
- What Is a Raster File?
- What Is a Vector File?
- The Biggest Difference: Scaling and Edge Quality
- Best File Types for DTG: What Shops Usually Ask For
- When Raster Is the Right Choice
- When Vector Is the Best Choice
- Common DTG File Mistakes That Ruin Prints
- When Getting Professional Artwork Help Becomes the Smart Move
DTG Printing in Simple Words
What DTG Printing Actually Does
DTG (direct-to-garment) printing works like a high-end inkjet printer for T-shirts. The machine sprays water-based ink directly onto the fabric, then heat-cures it so the design bonds properly and lasts. Because it prints straight onto the shirt, DTG can capture smooth gradients, tiny details, and photo-style artwork when the file is prepared correctly.
Why Artwork Quality Matters So Much
DTG does not “clean up” your design. It prints exactly what you provide, including fuzzy edges, pixel noise, and compression marks. Fabric texture also makes weak edges look worse, so a file that looks okay on a phone can still print soft or rough on a shirt.
The Most Common Problem: The Wrong Kind of File
Many customers send a small JPG from Google, a screenshot, or a WhatsApp-forwarded logo and expect it to print sharply at 10–12 inches wide. DTG cannot invent missing detail, so the result comes out blurry or uneven. That is why choosing the right file type matters before you print.
What Is a Raster File?
Raster Files Are Made of Pixels
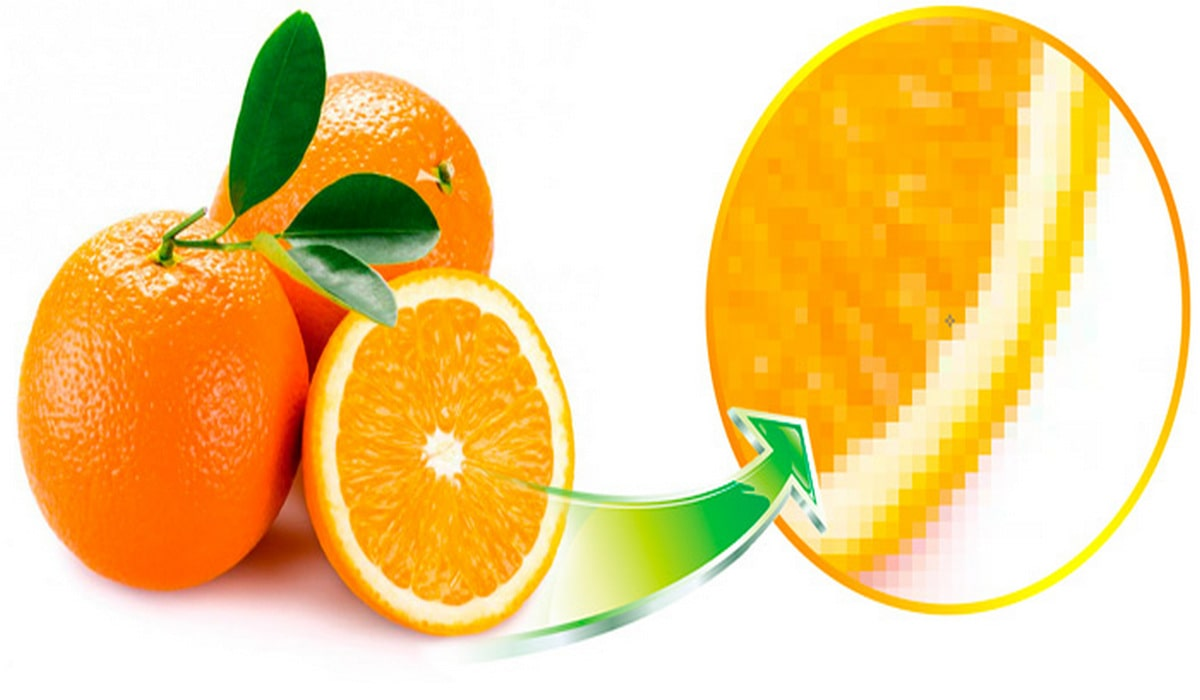
A raster file is an image built from tiny squares called pixels. Each pixel holds a color value, and together these pixels form the picture you see. When you zoom in on a raster image, you eventually start seeing those little blocks, especially around edges and text. This pixel-based structure is why raster quality depends heavily on resolution and final print size.
Common Raster Formats You’ll See in DTG
Most customers send raster files without realizing it. The most common raster formats include JPG/JPEG, PNG, TIFF, and PSD (Photoshop files). These formats are everywhere because phones, cameras, and most design apps export raster images by default.
When Raster Works Best
Raster files shine when you print photos, realistic artwork, smooth shading, and gradients. If you want a portrait on a shirt or a detailed illustration with lots of color blending, raster can work beautifully, as long as the file is large enough and clean.
The Big Problem: Enlarging Makes It Look Worse
The weakness of raster is simple: if you enlarge a small image, you stretch the pixels. That creates softness, jagged edges, and sometimes a grainy or “dirty” look. A design can look sharp on a phone screen because the phone displays it small. But when you print it on a shirt at 10–12 inches wide, the missing detail shows up immediately.
Quick Example
A small JPG logo might look perfect in an email signature. Print it on a DTG shirt, and the edges suddenly look fuzzy and uneven, especially on fabric texture.
What Is a Vector File?

Vector Files Use Shapes, Not Pixels
A vector file builds artwork using paths, points, and shapes instead of pixels. Think of it like drawing with perfect mathematical lines and curves. Because the design is based on shapes, the file does not “break into blocks” when you zoom in. It simply redraws the lines smoothly at any size.
Common Vector Formats
You will usually see vector artwork in formats like AI (Adobe Illustrator), EPS, SVG, and vector PDF. (Important: a PDF can be vector or raster depending on how someone created it, so you cannot assume every PDF is a true vector file.)
When Vector Is the Best Choice
Vector files work best for logos, text, badges, icons, and any design that needs clean edges. DTG printing benefits from this because sharp outlines and crisp lettering look more professional on fabric. Vector also makes it easy to change colors, adjust thickness, and create different sizes for left chest, full front, or back prints without quality loss.
Why Vectors Stay Sharp at Any Size
Since vector artwork is math-based, it scales up or down without losing detail. A logo can go from a small sleeve print to a big back print and still look clean and smooth. This saves you from redoing artwork every time you change placement or size.
A Quick Note About Photo-Real Designs
Vectors are not always the best fit for photo-real images or complex shading. You can still prepare those designs well, but they often work better as high-resolution raster files instead of forcing everything into vector shapes.
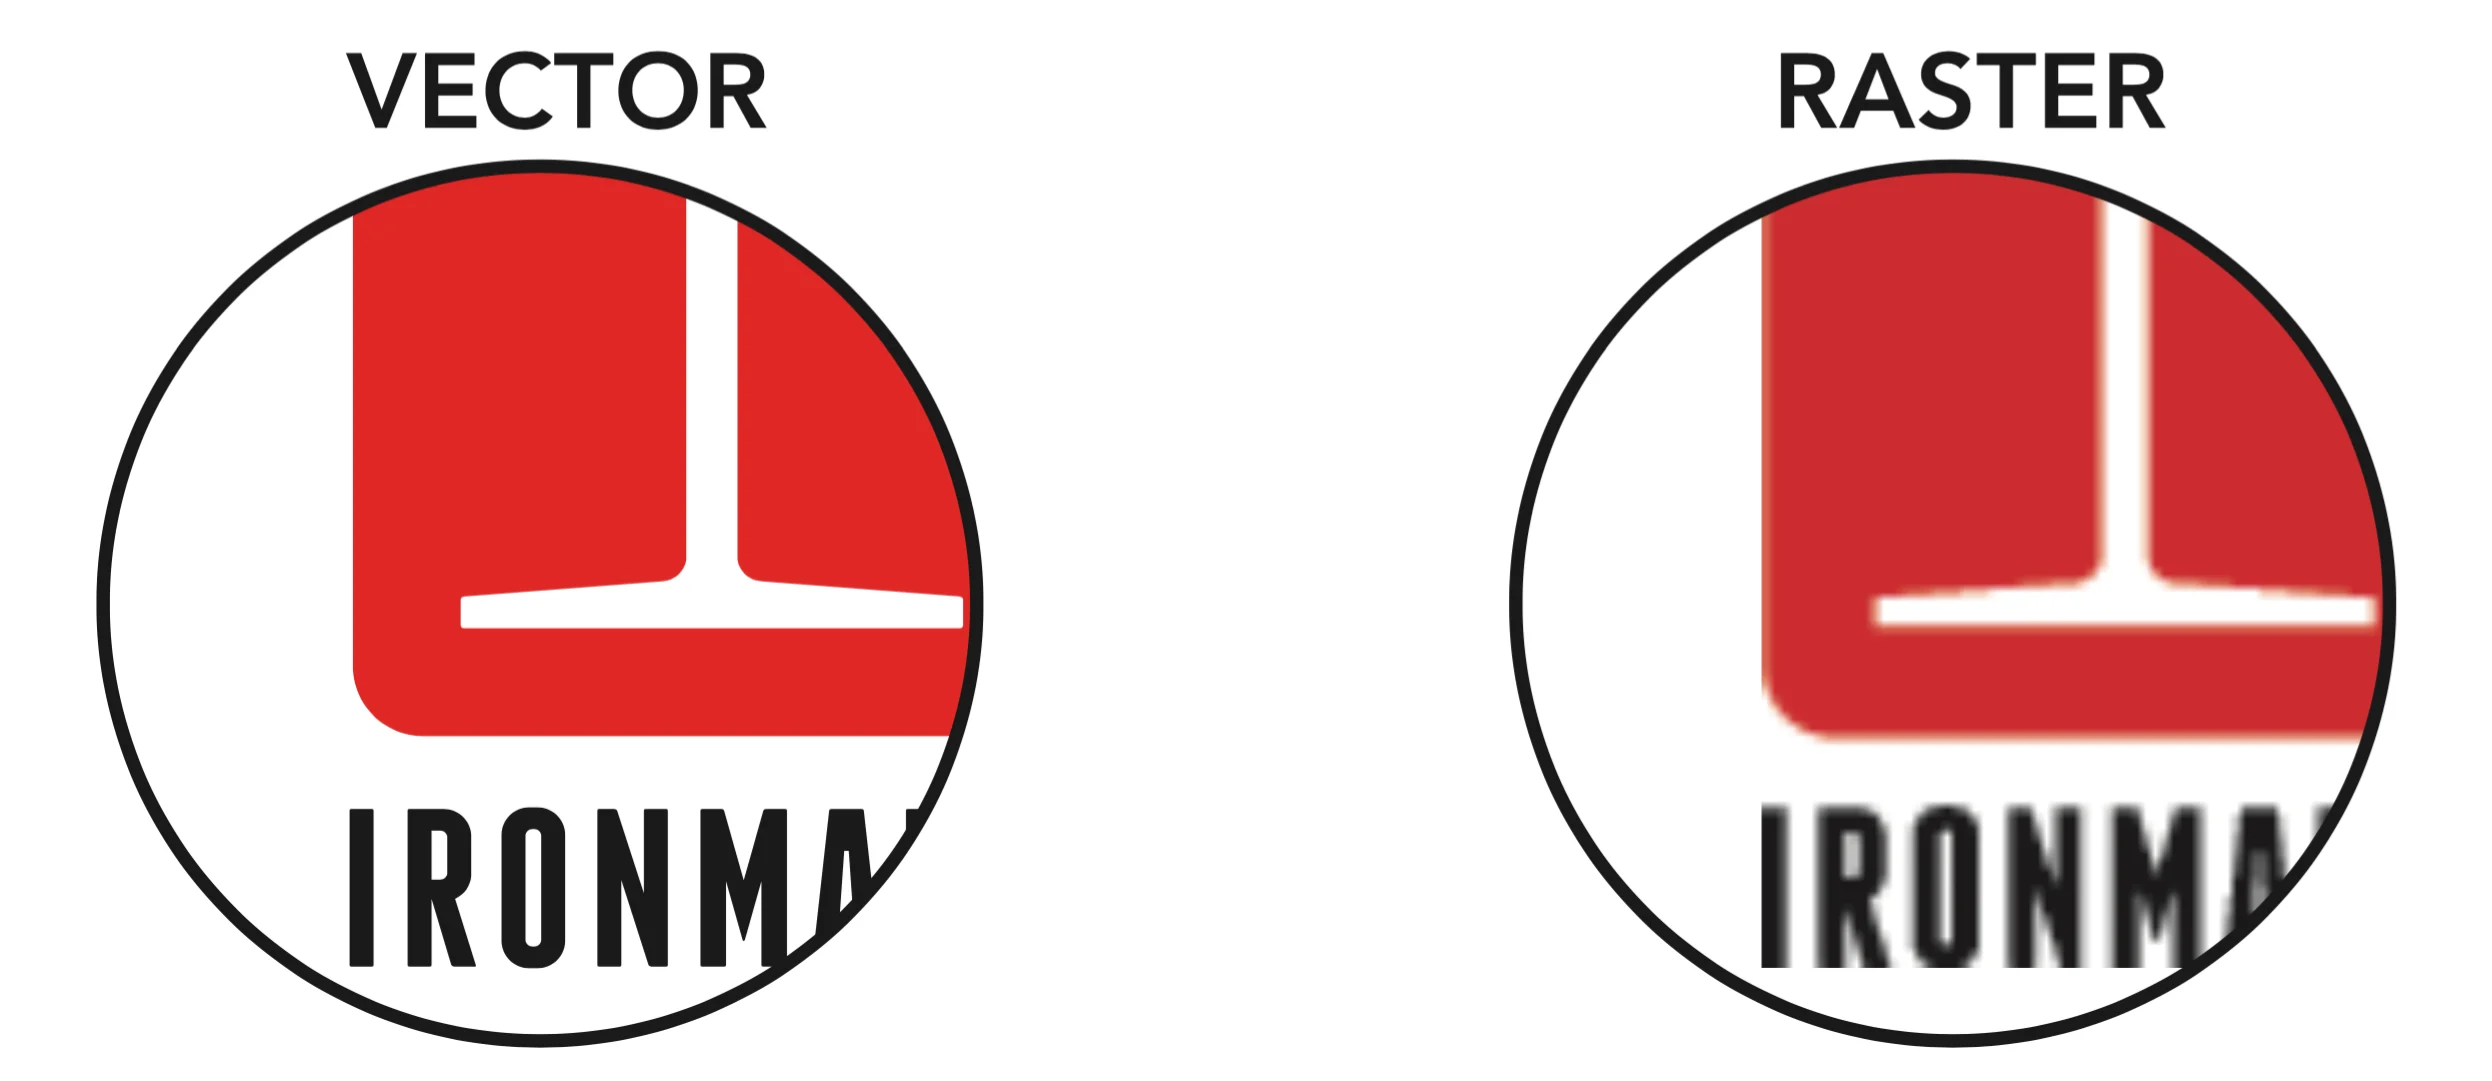
The Biggest Difference: Scaling and Edge Quality
Raster Depends on Resolution and Print Size
Raster files only look sharp when they have enough pixels for the size you want to print. If you stretch a small image bigger, you spread the same pixels over a larger area. That is when edges turn soft, curves look jagged, and fine details start to disappear. DTG makes this worse because fabric texture already softens edges, so low-resolution artwork shows up quickly on a shirt.
Vector Stays Crisp When You Resize
Vector files behave differently. When you resize a vector, the software redraws the shapes cleanly at the new size. That is why logos and text stay sharp whether you print them small on a sleeve or large on the back.
DPI Explained Simply (and Why DTG Cares)
DPI means dots per inch. It tells you how much detail your raster image has for each inch of print. For DTG, a common safe target is 300 DPI at the final print size. That means you should decide the print size first (example: 12 inches wide), then make sure the file has enough pixels to stay at 300 DPI at that size. If you only have a small file, you cannot “add” real detail by increasing DPI.
Simple Rule
If you might resize a design, start with a vector master. Then export a properly sized, high-resolution file for DTG when you are ready to print.


