Are you looking to convert an image into a PXF file? When dealing with embroidery projects, changing file formats can become a common task. PXF files are incredibly useful for creating and adjusting complex embroidery designs. However, it might get tricky when you need to convert image files (like JPG or PNG) to PXF, or when you’re trying to convert a PXF file into a format that’s compatible with embroidery machines (such as PES or DST).
Let’s walk through the process of making these conversions as smoothly as possible.
Succeeding in Custom Embroidery Business Across Seasonal Changes
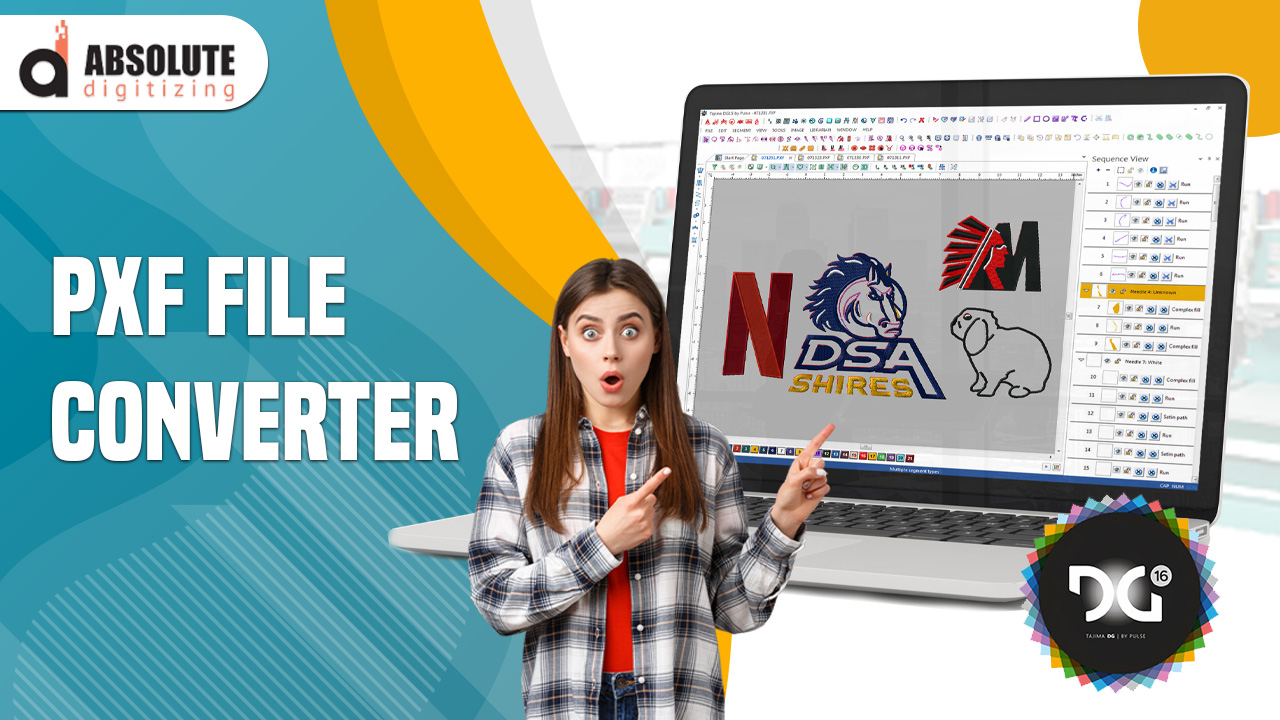
Easy Guide to PXF File Conversion
What’s a PXF File in Embroidery?
Converting Designs to PXF File: Why and How It’s Done
PXF file Converters – Methods and Tools
What Do You Use This Software For?
Method 2: Auto-Digitizing
What This Means for You
Method 3: Free Online PXF File Converters
What Should You Do?
Method 4: Embroidery Digitizing Services
Our Embroidery Digitizing Service
How to convert PXF files to machine embroidery formats? – A Complete Guide
FAQs
Easy Guide to PXF File Conversion
Converting your images to PXF or changing PXF files into formats that embroidery machines can understand doesn’t have to be complex. Whether you’re beginning with a JPG that needs to be turned into a PXF, or if you have a PXF file that you need to convert to a format like PES or DST, there’s a straightforward path to follow. Here’s a step-by-step guide to navigate you through converting your designs, ensuring they’re prepped and ready for embroidery on any machine.
What’s a PXF File in Embroidery?
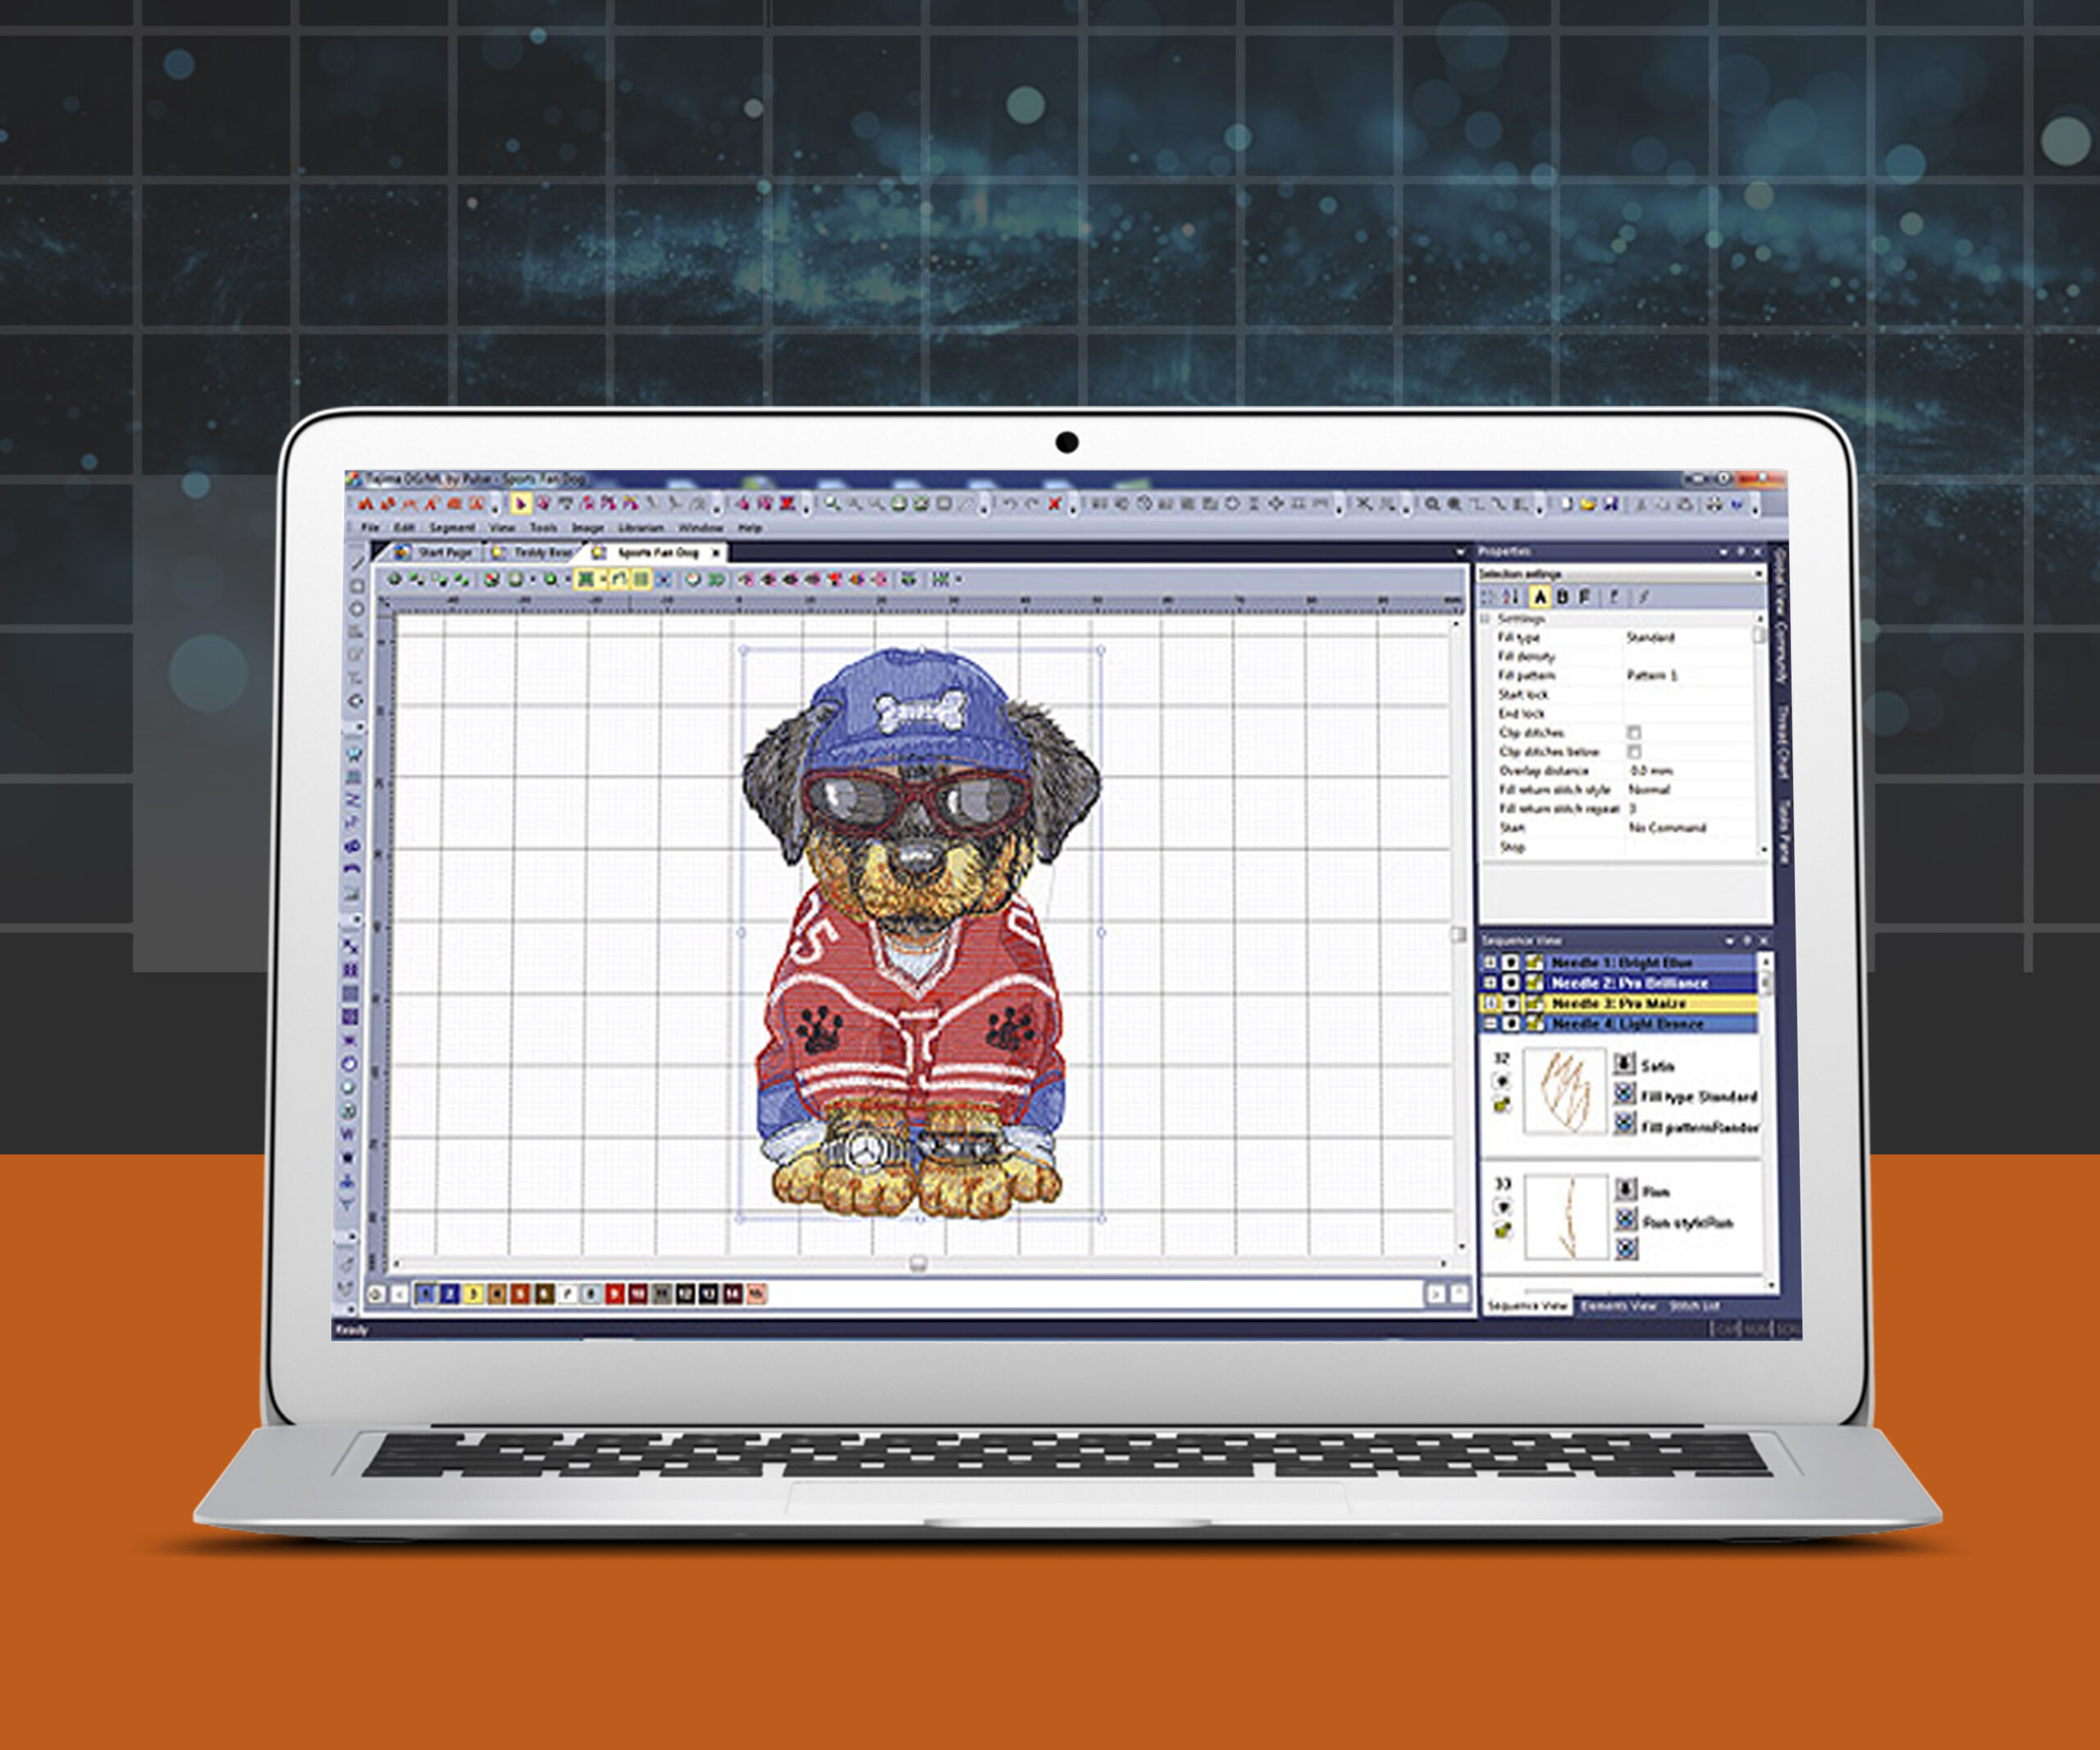
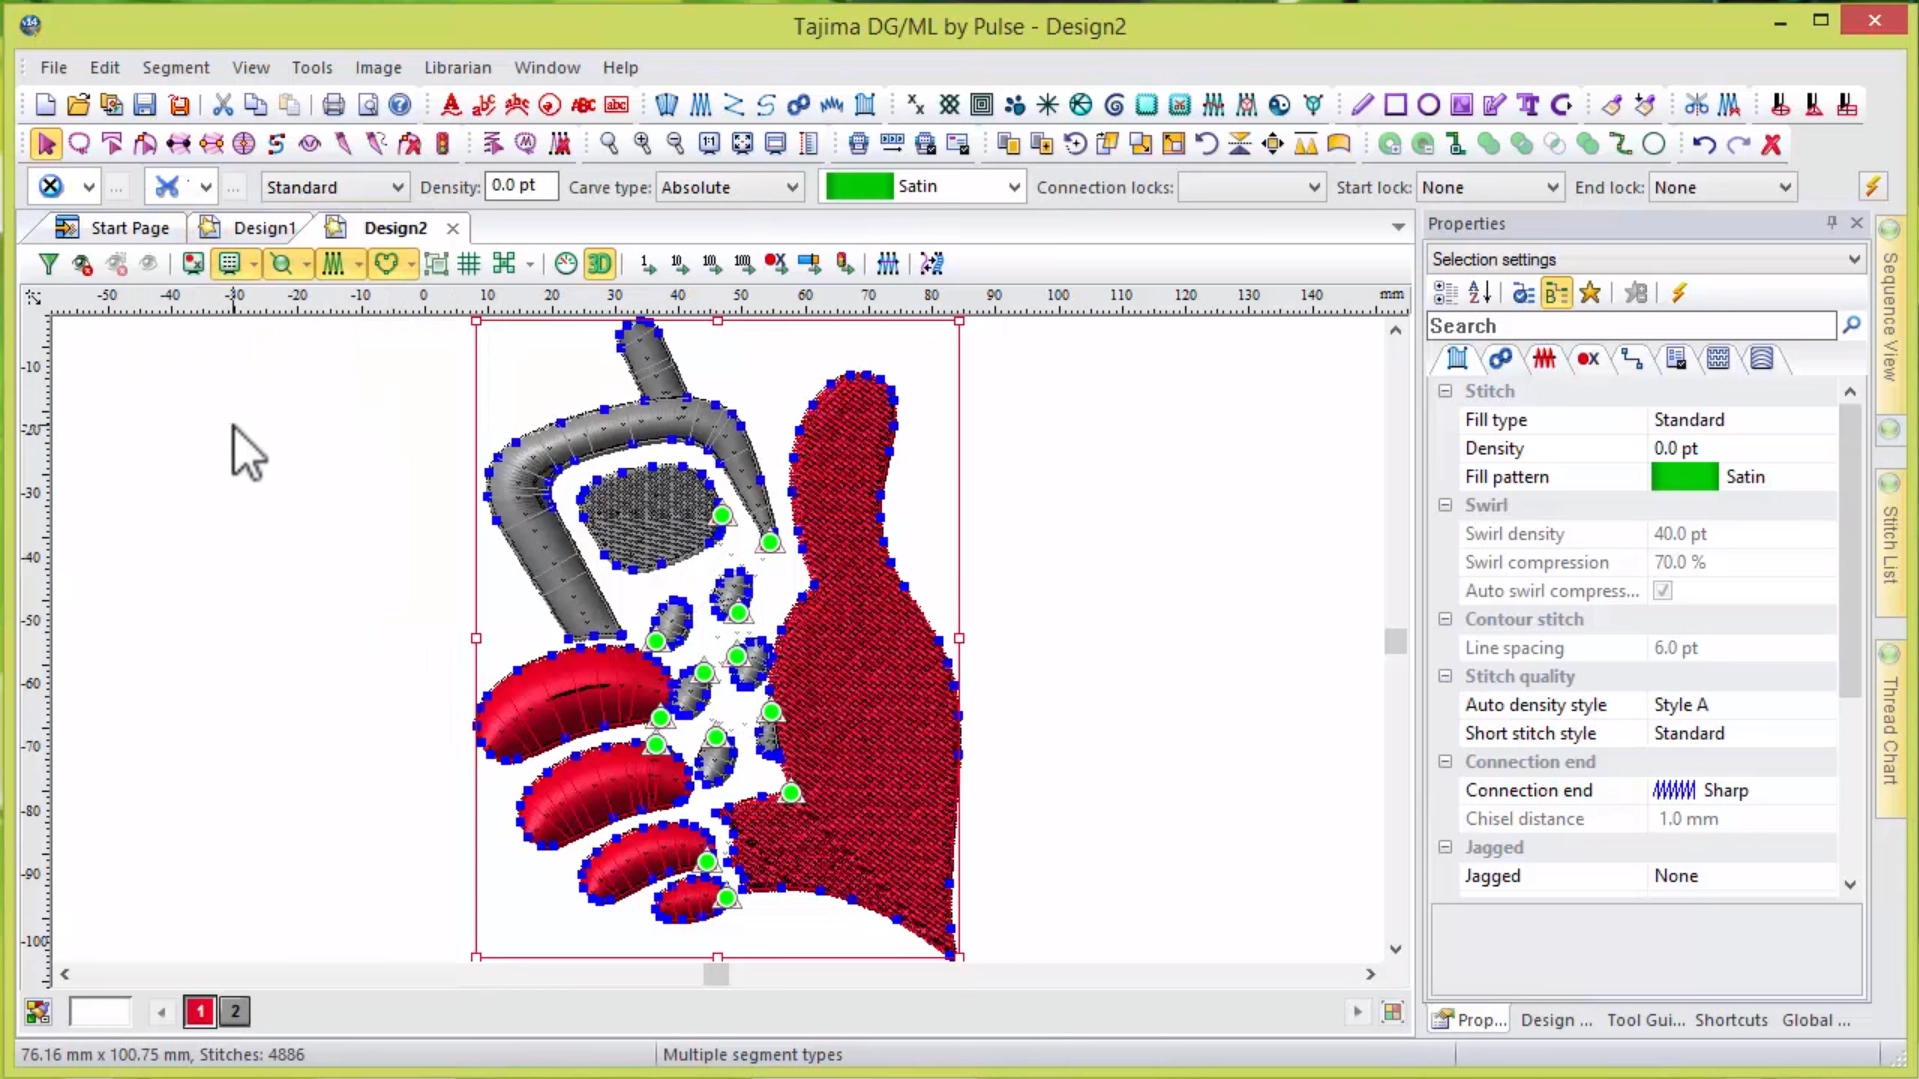
When you’re working with embroidery on a computer, you might come across something called a PXF file. This stands for Pulse XML Format, and it’s a type of file for a specific embroidery software called Tajima DG/ML by Pulse. The company behind this, Pulse Microsystems, is pretty big in the embroidery world. They make all sorts of software to help people create, tweak, and manage their embroidery designs with lots of detail and creativity.
So, what does a PXF file do? Well, it holds all the info about an embroidery design that you’re working on your computer. This includes the kinds of stitches to use, the colors, the order of stitches, and other important details. Think of it like a digital blueprint of your embroidery project that you see and edit on the screen.
PXF files are also super handy for keeping all your embroidery designs organized and in one place.
But here’s the catch: You can’t use PXF files directly on an embroidery machine. They’re not in the right format. Before you can stitch out your design on fabric, you need to change the PXF file into a format that the embroidery machine understands, like PES or DST. These are the types of files that tell the embroidery machine exactly how to stitch your design.
Don’t worry, though, converting PXF files into machine ready formats isn’t too tough. There are several ways to do it, and we are going to look at some of those methods in detail.
Converting Designs to PXF File: Why and How It’s Done
In the world of embroidery digitizing, there’s a special kind of file called a PXF file that’s pretty important. Think of it as a key that unlocks all the cool features of your embroidery software. With a PXF file, you can whip up new designs on your computer or tweak existing ones until they’re just right.
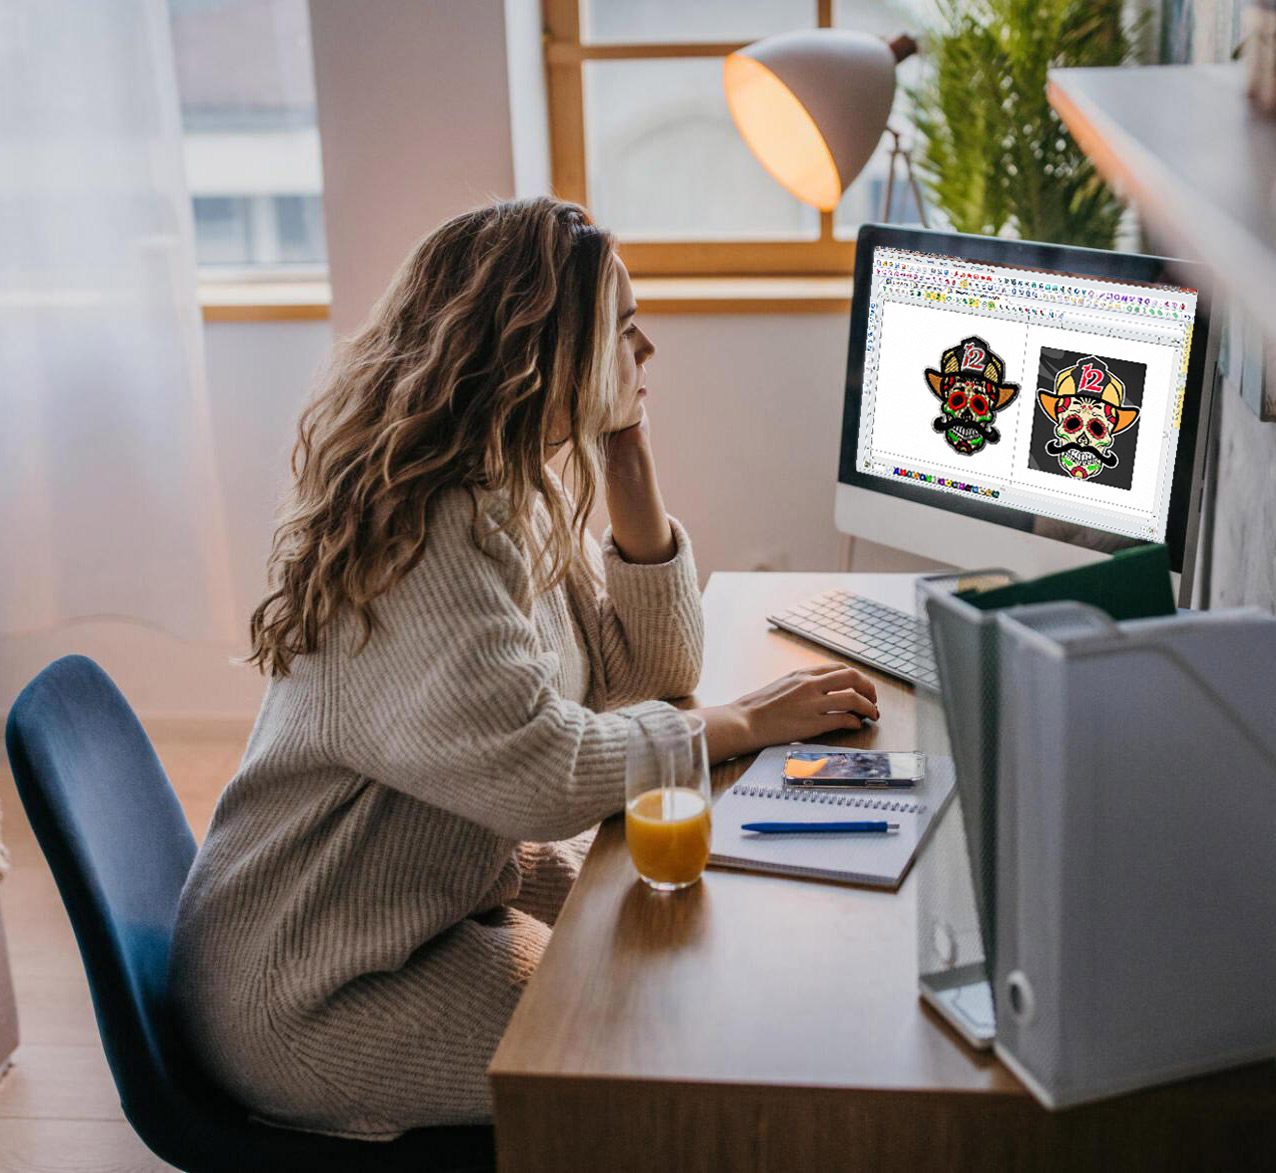
So, why do you need to turn a design into a PXF file? Well, it boils down to flexibility. If you’ve got a picture or design in a simple image file, like a JPG, and you want to embroider it onto fabric, you need to be able to mess around with it first. You might want to change some colors, alter some shapes, or adjust the size. The PXF format lets you do all that.
Here’s the deal:
The kind of file formats that embroidery machines read directly don’t let you make those kinds of edits. They’re more like final instructions for the machine, without room for tweaking. So, if you have a cool image you want to stitch onto something but you also want to customize it, you need to convert that image into a PXF file first. This step lets you get into the software and make your edits.
But there’s a catch. Once you’ve got your design just how you want it in the PXF file, you’re not done yet. Embroidery machines can’t read PXF files directly, so you’ll need to convert it again, this time into a format that the embroidery machine can understand.
This process is crucial because it lets you work with your design in a flexible, editable way before locking it into a machine readable format. Plus, once your design is in a more universal format, it’s easier to share or use across different types of software and machines.
And the good news is, software like Tajima DG/ML by Pulse makes this double conversion process pretty straightforward. It supports a bunch of different embroidery machine brands, so you can convert your PXF files into several popular formats that machines understand, like:
- DST: A common format for many commercial embroidery machines.
- EXP: Another widely used machine format.
- PES: Preferred by Brother embroidery machines.
- JEF: Used by Janome embroidery machines.
- SVG: Great for when you want to edit designs in vector graphics software before embroidering.
This versatility is why converting to and from PXF is such an important step in the embroidery design process.
PXF file Converters – Methods and Tools
There are multiple methods by which you can convert PXF files to your desired embroidery file format. Let’s have a look at some of these methods below:
Method 1: Using Embroidery Digitizing Software
Let’s talk about one way to change PXF embroidery files into a different format using special software.
What’s the Deal with PXF Files?
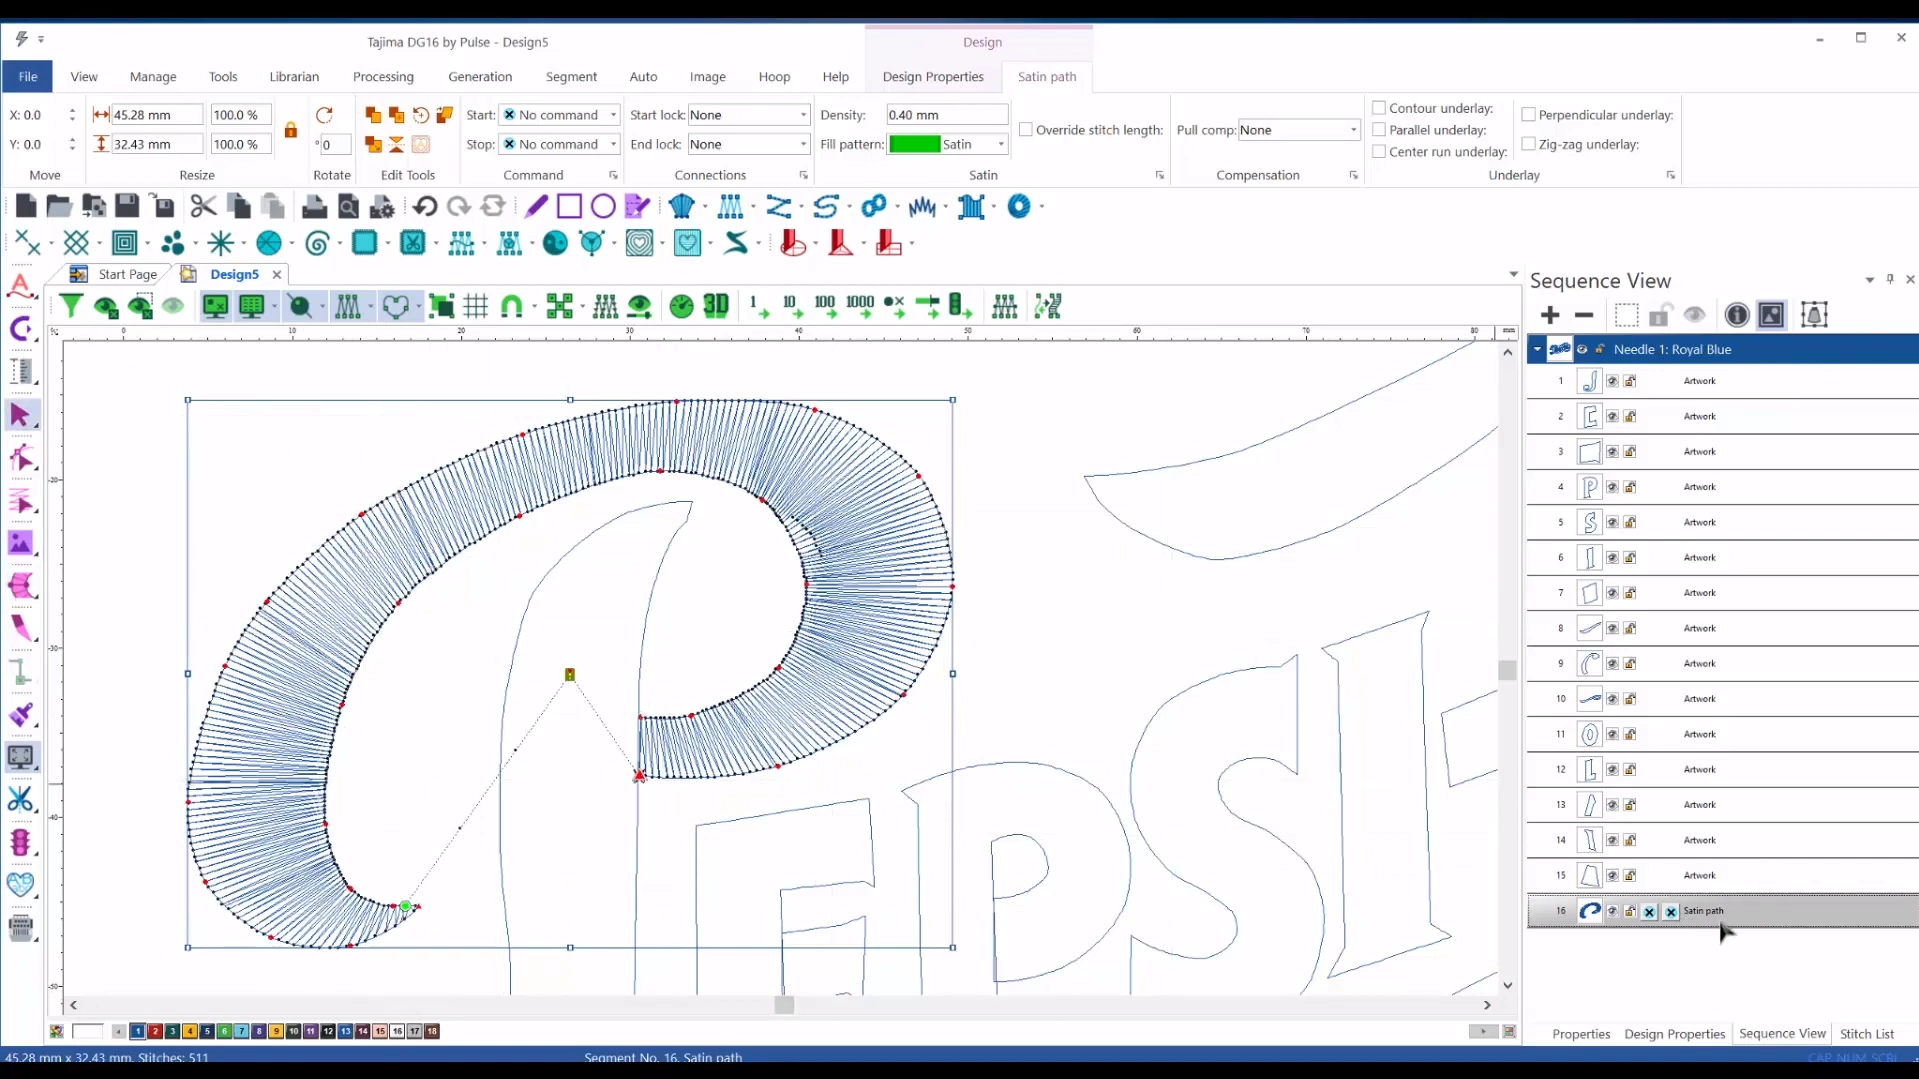
Converting a logo into a PXF file format isn’t something you can do with just any software. There’s a specific software made for this, called Tajima Pulse, which is part of Pulse Microsystems. They’re actually the folks who came up with the PXF file format. They have a few different versions of their software that can handle this job, like Tajima DG/ML by Pulse, and the newest version is called Tajima DG16.
What Do You Use This Software For?
This software is all about creating and editing embroidery designs by hand. A person who knows how to use this software really well is called an embroidery digitizer. They’re professionals at making sure your design looks just right, with no worries about quality or mistakes.
But, Here’s the Thing
This software isn’t cheap. The starting price for Tajima DG16 is about $2,450 for the basic stuff and can go all the way up to $12,200 for all the advanced features. If you are thinking of doing this yourself, be ready to spend quite a bit of money. Plus, you’ll need some time to really get the hang of using this software. It’s made for professionals, so if you’re just starting out, expect to spend at least a year learning this software.
Considering Hiring a Pro?
If you are thinking about hiring someone to do the conversion for you, keep in mind that it’s going to be pretty costly. You’re not just paying for their time and skills, you also need to think about the space they will work in and the equipment they will use.
So, in a nutshell, using this software for PXF file conversion is a top-notch option for getting quality results, but it’s an investment in both time and money, whether you decide to learn it yourself or hire a pro.
Method 2: Auto-Digitizing
Let’s talk about another way you can change an image into a PXF embroidery file, which we call “Auto-Digitizing.”
What is Auto-Digitizing?
Auto-digitizing lets you automatically change images or logos into embroidery files without having to do all the detailed work yourself. Sounds great, right? But there’s a bit more to it.
The Only Tool You Can Use: Tajima Pulse Software
To try auto-digitizing, you’ll need to buy Tajima Pulse Software. It’s made by the same folks who came up with the PXF format.
But, There’s a Catch
While buying this software sounds like a simple solution, it might not give you the results you’re hoping for. Why? Because, at the moment, this software’s auto-digitizing feature isn’t perfect. Even though Tajima is a big name in the embroidery world, their automatic process doesn’t quite hit the mark for professional-looking embroidery.
What This Means for You
If you go down this path, you’ll find it pretty easy to use. However, you should be ready to accept that the embroidery designs it creates would not look as polished or as detailed as you’d like. So, while it’s a straightforward method, the trade-off is that the quality of your final embroidery will be poor.

Method 3: Free Online PXF File Converters
Let’s look at another way people talk about changing images into the PXF format, which is using free online converters.
The Truth About Free Online Converters
There’s a lot of buzz about using free online services to convert images into PXF embroidery files. However, it’s important to know that this buzz isn’t all it’s cracked up to be. In fact, many of these free online converters don’t actually help you at all. While it may appear that they’re providing a useful service, the truth is far from it. These services are unable to genuinely convert any image into a PXF file format, and that’s a fact.
What’s Really Going On?
These online converters often have a hidden agenda. Their main goal isn’t to help you convert your files. Instead, they want to make money by tricking you into clicking on advertisements. When you try to use their services, you might find yourself clicking on ad after ad, without getting any closer to converting your file.
The Risks Involved
Besides just wasting your time, there’s a bigger issue at play with these free online converters. They can be really dangerous for your privacy and security. When you upload your files to these websites, you’re taking a big risk. There’s a chance that your sensitive information and data could fall into the wrong hands. So, it’s not just about not getting the service you expected, it’s also about exposing yourself to potential harm.
What Should You Do?
Given these risks, it’s a good idea to stay away from these free online converters for PXF files. They’re not safe or reliable, and they can’t really change your design into a PXF file. Even though trying out a free service sounds good, it’s not worth the risk in this situation.
Method 4: Embroidery Digitizing Services
Let’s explore another way to change your logos or designs into PXF files, which are the types embroidery machines can read: using an embroidery digitizing service.
What’s This About?
Choosing an embroidery digitizing service is a really practical idea if you need to convert designs to PXF or other embroidery-friendly formats.
The Perks
- Saves Money and Time: Using one of these services can help you save not just money, but also a lot of time and effort. You won’t have to deal with the tricky parts of the process yourself.
- Quality and Accuracy: These services are dedicated to keeping the quality and accuracy of your designs. They won’t let you down here.
- Professional Skills: The services have skilled professionals who use Tajima Pulse Software to make sure your designs are converted into PXF format just right. This means you’ll get exactly what you need for your embroidery project.
- Fast and Affordable: Need something done fast? They can often turn your logos into PXF files quickly, sometimes charging as little as $10 for each logo. That’s pretty affordable!
Our Embroidery Digitizing Service
How to convert PXF files to machine embroidery formats? – A Complete Guide
So, you’ve got a PXF file that you need to change into a format that an embroidery machine can understand, right? Here’s how you can do that, broken down into simple steps.
Switching PXF files into machine-ready embroidery formats can sound technical, but it’s quite doable with a little guidance. Here’s a straightforward way to do it, plus answers to some common questions you might have.
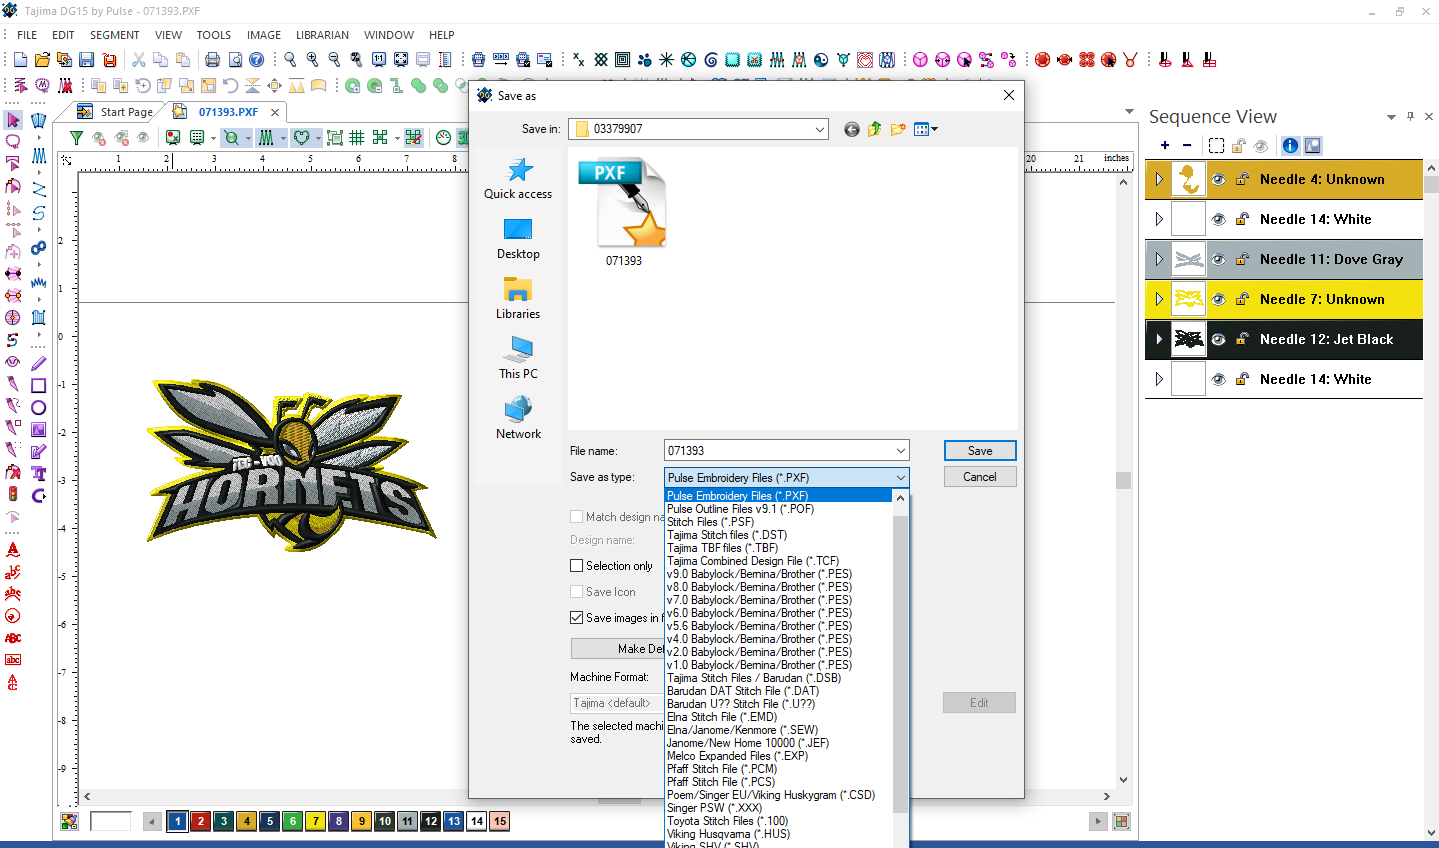
Step 1: Open the Right Software
First off, you need to open the software that’s going to let you do the conversion. The one you’re looking for is called Tajima DG/ML by Pulse. It’s pretty much the go-to software for this. They’ve got a couple of new versions out, like Tajima DG15 and Tajima DG16, so make sure you’re using one of these newer versions.
Step 2: Bring Your PXF File into the Software
If you already have a PXF format file on your computer, you need to bring this file into the software. This is usually as easy as clicking an “Import” button and finding the file you want to work with.
Step 3: Make Any Changes to Your Design
Once your file is in there, you might want to tweak or change the design a bit. This is your chance to adjust things and make sure everything looks just the way you want it to.
Step 4: Save Your Design in the Embroidery Machine Format
After you’ve got the design looking perfect, it’s time to save it back to your computer. But here’s the important part: when you go to save it, the software will ask you what format you want to save it in. This is where you pick the embroidery machine format you need, like DST. Hit the save button after selecting the right format.
Step 5: Review Your File
Before sending it to your machine, check the saved file for any discrepancies or errors.
And that’s it! You’ve now successfully converted your PXF file into an embroidery-friendly format.
FAQs
How can I ensure the quality and accuracy of converted designs?
If you want to ensure the quality of your converted designs, you have to make sure that you are using the right conversion method. Not every method is going to work for you, so it is better to review all the methods first and then choose the one that suits you the best. Moreover, don’t forget to review your converted designs before stitching them out. For instance, check for color accuracy, and stitch density.
Do I need technical expertise to use PXF file converters effectively?
Yes, you do require some technical understanding of embroidery digitizing software and embroidery formats to convert PXF files accurately. As it is a complex phenomenon and requires manual input.
In wrapping things up, if you’re looking to take the hassle out of dealing with PXF files and ensure seamless compatibility across embroidery machines, look no further than our embroidery digitizing service. Our team of experts knows the ins and outs of PXF file conversion like the back of their hand. Let us handle the technical stuff while you focus on bringing your creative vision to life.